How to Use Sandwich Maker Like a Pro: Ultimate Guide
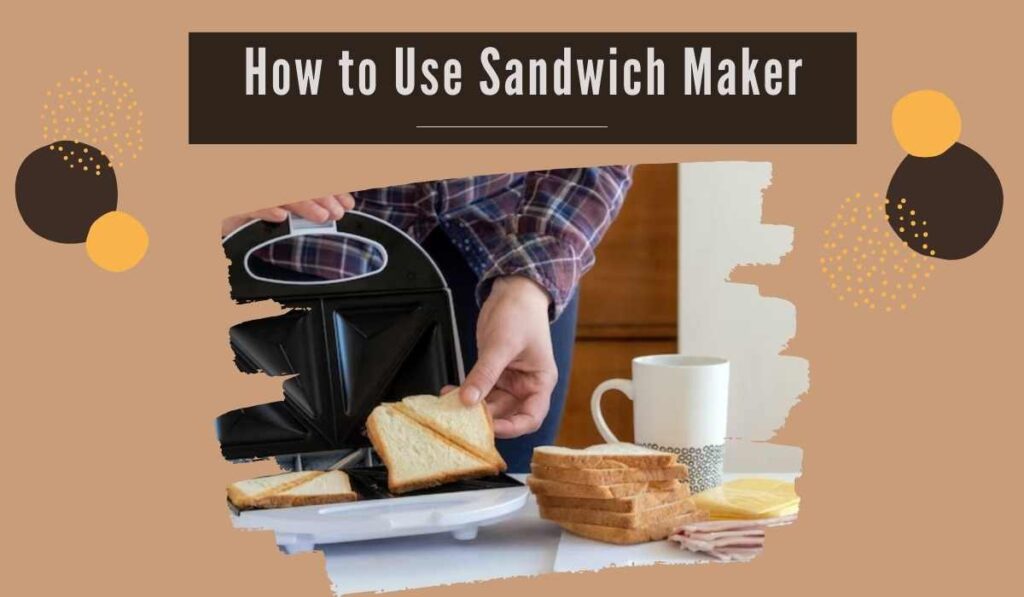
To use a sandwich maker, plug it in, preheat it, place your sandwich inside, and close the lid. Cook the sandwich for a few minutes until it is golden brown and crispy.
Sandwich makers are a convenient kitchen appliance that allows you to quickly and easily prepare delicious sandwiches. Whether you’re craving a classic grilled cheese or a gourmet panini, the sandwich maker can do it all. With its simple operation, you can have a hot and satisfying sandwich in no time.
We will guide you on how to use a sandwich maker effectively to get the best results. From preheating to adding your favorite ingredients, we will cover all the steps you need to follow for a perfect sandwich every time. Let’s get started!
Mastering the Art of Sandwich Making
Briefly introduce the topic of using a sandwich maker
The humble sandwich maker is a kitchen appliance that often goes underestimated. It’s a device designed to streamline the sandwich-making process and take your culinary creations to the next level. Whether you’re a busy professional seeking a quick and satisfying meal or a home cook aiming to impress, the sandwich maker is your secret weapon for crafting delicious and perfectly toasted sandwiches. In this ultimate guide, we’ll delve deep into the world of sandwich makers, exploring how to use them like a seasoned pro. From choosing the right appliance to creating mouthwatering recipes, we’ve got you covered.
Highlight the importance of using it effectively
Using a sandwich maker effectively is not just about convenience; it’s about elevating the quality of your sandwiches. When used properly, a sandwich maker can transform ordinary ingredients into extraordinary meals. It ensures that your sandwiches are evenly cooked, with a crispy exterior and a warm, gooey interior. The importance of using it effectively lies in achieving that perfect balance of flavors and textures. Plus, it’s a time-saving tool that simplifies meal preparation, making it an invaluable addition to any kitchen. By mastering the art of sandwich making with your sandwich maker, you’ll not only save time but also enjoy restaurant-quality sandwiches in the comfort of your own home.
Mention the benefits of making sandwiches with a sandwich maker
Making sandwiches with a sandwich maker offers a plethora of benefits. Firstly, it’s a versatile appliance that can accommodate various ingredients, allowing you to get creative with your sandwich recipes. From classic grilled cheese to gourmet paninis, the possibilities are endless. Secondly, it’s a healthier cooking option compared to frying, as it often requires less oil or butter. Additionally, the controlled cooking environment of the sandwich maker ensures that your sandwiches are cooked to perfection without burning or uneven cooking. It’s also an energy-efficient choice, as it heats up quickly and cooks fast, reducing your electricity consumption. Lastly, making sandwiches at home using a sandwich maker is a budget-friendly alternative to dining out, allowing you to enjoy delicious sandwiches without breaking the bank. So, as we delve deeper into this guide, you’ll discover how to harness these benefits to create scrumptious sandwiches that will leave your taste buds singing.
Choosing the Right Sandwich Maker
Exploring the Different Types of Sandwich Makers
When it comes to choosing the right sandwich maker, it’s essential to understand the various types available in the market. The most common types include the classic stovetop sandwich press, the electric panini press, and the versatile 3-in-1 sandwich maker.
Stovetop Sandwich Press: These traditional sandwich makers are placed directly on a stovetop burner. They often have a cast iron or aluminum construction with ridged plates for grilling. Stovetop models are known for their durability and ability to deliver a classic grilled sandwich experience. They are suitable for those who prefer a hands-on approach and want to control the cooking process.
Electric Panini Press: Electric panini presses come with non-stick plates and a hinged lid. They are designed for ease of use and convenience. Panini presses are ideal for making hot sandwiches like paninis, and they often have adjustable temperature settings to accommodate various recipes. These appliances are a popular choice for home kitchens due to their simplicity and efficiency.
3-in-1 Sandwich Maker: A 3-in-1 sandwich maker is a versatile option that can function as a sandwich press, a waffle maker, and a grill. It offers flexibility in preparing a variety of dishes beyond just sandwiches. These models typically have interchangeable plates, allowing you to customize your cooking experience.
Considering Size, Capacity, and Features
Choosing the right sandwich maker also involves evaluating practical factors such as size, capacity, and features.
Size: Consider the available space in your kitchen and the storage capacity of the sandwich maker. Smaller models are suitable for individuals or small households with limited kitchen space. Larger models are great for families or those who frequently entertain guests.
Capacity: The number of sandwiches you can make at once depends on the size of the cooking plates. Some sandwich makers can accommodate two sandwiches simultaneously, while others can handle more. Think about your typical serving size and whether you want to prepare multiple sandwiches at once.
Features: Pay attention to additional features that can enhance your sandwich-making experience. This includes adjustable temperature controls, indicator lights for preheating, and removable, dishwasher-safe plates for easy cleaning. Some models also have floating hinges that adjust to the thickness of your sandwiches, ensuring even cooking.
Tips for Selecting the Best Sandwich Maker for Your Needs
To select the best sandwich maker for your specific needs, consider your cooking style, preferences, and budget. If you enjoy classic grilled sandwiches and want a hands-on experience, a stovetop sandwich press might be the right choice. For those who prefer convenience and versatility, an electric panini press or a 3-in-1 sandwich maker can offer a wide range of cooking options. Read product reviews, compare prices, and assess warranties to make an informed decision. Additionally, check for any additional accessories or recipe guides that may come with the appliance, as they can add value to your purchase.
The different types of sandwich makers, evaluating size and capacity, and considering essential features, you’ll be well-equipped to choose the perfect sandwich maker to meet your culinary needs and preferences.
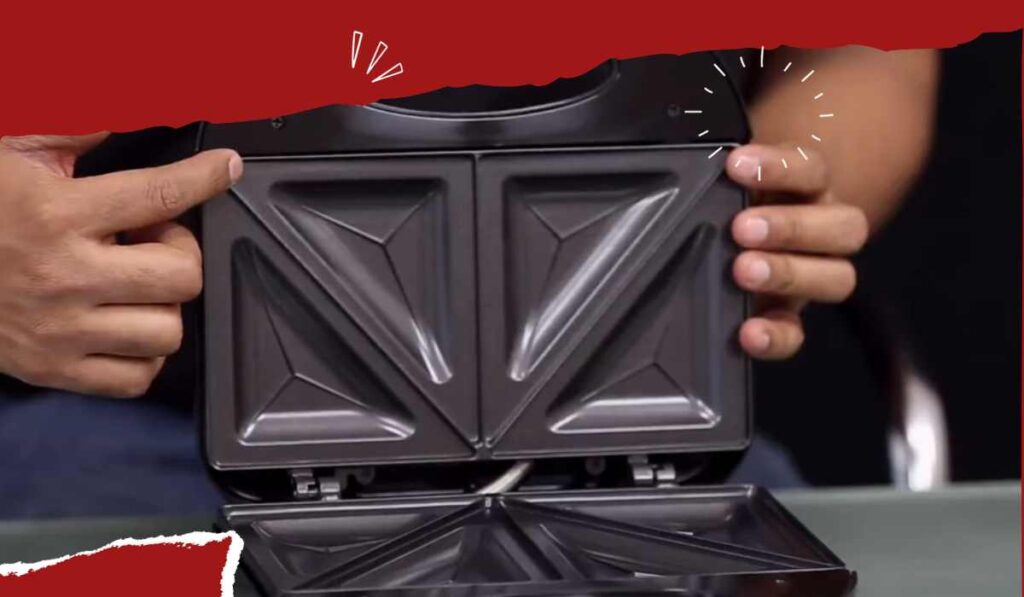
How To Assemble Your Sandwich Maker
Making sandwiches with a sandwich maker can be both fun and delicious. To get started, you’ll need to properly assemble your sandwich maker to ensure that your sandwiches come out perfectly crispy and golden. Follow these steps to assemble your sandwich maker:
Preparing Your Ingredients:
Gather all the ingredients you’ll need for your sandwich, such as bread, cheese, meat or other fillings, and condiments.
Make sure your ingredients are sliced or shredded as desired before assembling your sandwich.
Properly Layering Your Ingredients:
Place one slice of bread on the bottom section of the sandwich maker. This will serve as the base of your sandwich.
Layer your desired ingredients on top of the bread. Start with your protein (like meat or cheese), followed by any vegetables or additional fillings.
Add any desired condiments to your sandwich.
Place the second slice of bread on top to complete the sandwich.
Choosing The Right Bread:
Use bread that is thick enough to hold your fillings without getting soggy. Avoid thin or delicate bread that may not withstand the heat of the sandwich maker.
Opt for bread that is fresh and soft, as it will produce a better final result.
Alternatively, you can experiment with different types of bread, such as whole wheat, sourdough, or even bagels, to add variety to your sandwiches.
Now that you know how to assemble your sandwich maker and layer your ingredients properly, it’s time to explore various combinations and get creative with your sandwich fillings. With the right assembly techniques, you can enjoy perfectly grilled and delectable sandwiches in no time.
Happy sandwich-making!
How To Operate Your Sandwich Maker
To make the most out of your sandwich maker and create delicious sandwiches without any hassle, it’s important to know how to operate the appliance correctly. Here are some simple steps to follow:
Adjusting Temperature And Settings:
Before you begin, make sure to read the instruction manual of your sandwich maker to understand the specific temperature settings it offers.
Most sandwich makers have adjustable temperature controls, allowing you to customize the cooking process according to your preference.
Start by preheating the sandwich maker to the desired temperature, usually indicated by a light or beep.
Adjust the temperature based on the type of sandwich you’re making. Delicate fillings like cheese may require lower heat, while denser items like meat might benefit from higher temperatures.
Remember that experimenting with different temperature settings will help you find the perfect balance and achieve the desired texture and taste.
Timing Your Sandwich:
Each sandwich maker comes with a recommended cooking time, which can vary depending on the type of sandwich and ingredients you’re using.
It’s essential to time your sandwich accurately to ensure it is cooked thoroughly and to prevent burning.
Start by placing the prepared sandwich inside the preheated sandwich maker and close the lid gently.
Set a timer according to the recommended cooking time or keep a close eye on the sandwich until it reaches the desired level of crispiness and color.
Avoid opening the sandwich maker unnecessarily during the cooking process, as this can affect the heat distribution and cooking time.
Once the sandwich is cooked to perfection, carefully remove it using heat-resistant utensils to avoid any burns.
Using The Correct Cooking Spray:
A non-stick cooking spray is a handy tool to prevent your sandwich from sticking to the surfaces of the sandwich maker.
Before preheating the appliance, lightly coat the cooking plates with an even layer of cooking spray.
Ensure that the cooking spray you use is suitable for high temperatures and doesn’t leave any residue or flavor on the sandwich.
Using an appropriate cooking spray helps to maintain the integrity of your sandwich, making it easier to remove and clean the sandwich maker afterward.
By following these simple steps, you will be able to operate your sandwich maker with ease and create delicious sandwiches customized to your liking. So, get ready to experiment with various fillings, bread types, and seasoning combinations to elevate your sandwich-making game!
Flavored Sandwich Ideas For Your Sandwich Maker
Who doesn’t love a perfectly toasted and delicious sandwich? With a sandwich maker, you can take your sandwich game to a whole new level and get creative with exciting flavors and combinations. Whether you’re a fan of classic ham and cheese, prefer vegetarian options, or crave sweet and savory combinations, we’ve got you covered.
Get ready to tantalize your taste buds with these flavorful sandwich ideas for your sandwich maker.
Classic Ham And Cheese:
Thinly sliced ham: Add a layer of flavorful, thinly sliced ham for that classic taste.
Melted cheese: Choose your favorite cheese, like cheddar or Swiss, and let it melt into gooey perfection.
Crispy bacon: For an extra indulgence, add some crispy bacon on top of the ham and cheese.
Fresh veggies: To balance the flavors, layer some fresh lettuce and sliced tomatoes.
Vegetarian Options:
Grilled veggies: Brush some olive oil on sliced bell peppers, zucchini, and eggplant, then grill them until tender and flavorful.
Pesto and mozzarella: Spread a generous amount of pesto sauce on your bread slices, and layer them with mozzarella cheese for a delightful combination.
Spinach and feta: Sauté some spinach with garlic until wilted, then sprinkle crumbled feta cheese on top for a tasty vegetarian option.
Avocado and cucumbers: Mash ripe avocado on one slice of bread, and add sliced cucumbers for a refreshing and creamy sandwich.
Sweet And Savory Combinations:
Peanut butter and banana: Spread a layer of creamy peanut butter on the bread, then top it with thinly sliced bananas for a sweet and satisfying treat.
Ham and pineapple: Combine the flavors of juicy ham and tangy pineapple rings for a tropical twist on your sandwich.
Chicken and cranberry: Shred some cooked chicken breast and mix it with cranberry sauce, then pile it between slices of bread for a savory and tangy delight.
Nutella and strawberries: Slather some Nutella on your bread, and fill it with fresh strawberry slices for a decadent and fruity sandwich.
Get creative with your sandwich maker and explore endless possibilities. These flavored sandwich ideas are just the beginning. Experiment with different bread types, spreads, and fillings to create your own unique combinations. Whether you’re a fan of classic flavors or prefer to explore new taste sensations, the sandwich maker is your culinary playground.
Enjoy the mouthwatering results and elevate your sandwich game to a whole new level.
Basic Steps for Sandwich Making
Step-by-Step Instructions for Assembling a Basic Sandwich
Creating a delicious sandwich with your sandwich maker starts with assembling the ingredients properly. Begin by selecting your choice of bread; it could be classic white, whole wheat, sourdough, or any other type you prefer. Lay out two slices of bread, and then start building your sandwich. Place your desired fillings on one slice of bread. This can include ingredients like cheese, deli meats, vegetables, and spreads such as mayonnaise or mustard.
Once your fillings are in place, put the other slice of bread on top, creating a sandwich. Make sure to press the bread slices together gently to secure the ingredients. It’s important to note that you should avoid overstuffing the sandwich, as it can make it difficult to cook evenly and may result in a messy sandwich. Keep it balanced with an appropriate amount of fillings to ensure even cooking.
Tips on Layering Ingredients for Even Cooking
Layering your sandwich ingredients correctly is crucial for achieving even cooking and a balanced flavor profile. Start by placing cheese or other meltable toppings close to the bread, as this helps in creating a gooey, flavorful core to your sandwich. Next, add your meats or proteins followed by any vegetables or greens. By layering in this manner, you ensure that the ingredients that require more cooking time are closer to the heat source, while the delicate elements like lettuce or tomato stay protected from direct heat.
Additionally, consider spreading condiments like mayonnaise, mustard, or pesto on the inside of the bread slices rather than directly on the fillings. This prevents your sandwich from becoming soggy during cooking and keeps the flavors well-balanced. Experiment with different ingredient combinations and layering techniques to create sandwiches that are not only delicious but also visually appealing.
Cooking Time and Temperature Guidelines
The cooking time and temperature for your sandwich maker may vary depending on the model and the ingredients you use. However, there are some general guidelines to keep in mind. Preheat your sandwich maker according to the manufacturer’s instructions. Most sandwich makers have indicator lights that signal when they’re ready to use.
For basic sandwiches with ingredients like cheese, meats, and vegetables, a medium to medium-high heat setting is typically sufficient. Cooking time usually ranges from 3 to 5 minutes, but it’s essential to monitor the sandwich’s progress. Check for the desired level of crispiness on the bread and ensure that the fillings are heated through and the cheese is melted.
Keep in mind that thicker sandwiches or those with ingredients that release moisture, like tomatoes, may require slightly longer cooking times. Experimentation is key to finding the perfect balance of temperature and time for your specific sandwich creations. By mastering these basics, you’ll be well on your way to crafting delectable sandwiches using your sandwich maker.
Advanced Sandwich Recipes
Creative and Delectable Sandwich Recipes for Every Palate
Elevate your sandwich-making skills with an array of imaginative and mouthwatering recipes that transcend the ordinary. Step into the world of gourmet sandwiches, each a symphony of unique flavors and ingredients designed to delight your taste buds. For instance, savor the taste of the Mediterranean with our grilled chicken creations: tender marinated chicken, roasted red peppers, kalamata olives, and a zesty tzatziki sauce, all nestled within warm pita bread. Alternatively, pamper your palate with a vegetarian masterpiece, featuring roasted vegetables like eggplant, zucchini, and bell peppers, harmonizing beautifully with creamy herbed goat cheese and a drizzle of balsamic glaze.
If you’re seeking a delightful breakfast twist, explore our breakfast sandwiches that unite crispy bacon, fried eggs, and creamy avocado on a toasted English muffin. These recipes are a culinary journey that promises not only to tantalize your senses but also to impress your loved ones with your culinary finesse.
To master these advanced sandwich recipes, let’s embark on a culinary adventure together. Follow our step-by-step instructions to ensure a harmonious blend of flavors and textures. Take, for instance, our Mediterranean chicken sandwich. Begin by marinating boneless chicken breasts in a medley of olive oil, lemon juice, garlic, and Mediterranean spices for at least 30 minutes. Grill the chicken until it’s perfectly cooked with those desirable grill marks.
Now, craft the exquisite tzatziki sauce by marrying Greek yogurt, cucumber, garlic, dill, and a hint of lemon juice. Lightly toast your pita bread, then assemble your sandwich by artfully layering the grilled chicken, roasted red peppers, olives, and a generous dollop of tzatziki sauce. Serve it while it’s still warm for the ultimate enjoyment.
For the roasted vegetable panini, commence by roasting your favorite vegetables with a drizzle of olive oil, a pinch of salt, and a sprinkle of pepper until they reach a tender, slightly caramelized state. Smear herbed goat cheese on the interior of your panini bread, and lovingly nestle in the roasted vegetables. Crown your creation with a delicate balsamic glaze, then press the panini until the cheese luxuriously melts and the bread achieves an enticing crispness.
Embrace Your Culinary Creativity: Variations and Ingredient Substitutions
While our recipes present a delectable ensemble of ingredients, don’t hesitate to infuse your personal touch and adapt these sandwiches to your taste or dietary preferences. For the Mediterranean sandwich, you might consider swapping out chicken for succulent grilled shrimp or delectable falafel if you’re inclined towards seafood or a vegetarian delight. Experiment by incorporating different cheeses or herbs, and tailor the sauces and condiments to harmonize with your unique palate.
Troubleshooting Common Issues
Identifying Common Problems and Challenges
Using a sandwich maker can be a delightful experience, but like any kitchen appliance, it comes with its fair share of challenges. Identifying these common problems is the first step toward becoming a sandwich-making expert. One issue you may encounter is uneven cooking, where certain parts of your sandwich are perfectly toasted while others remain undercooked. This can happen due to an imbalance in ingredient distribution or the sandwich maker not applying consistent pressure to the sandwich.
Another challenge is the issue of sticking, where your sandwich or ingredients adhere to the cooking plates, resulting in a messy cleanup and a ruined sandwich. Furthermore, some sandwich makers may have difficulty accommodating thicker sandwiches, leading to improper sealing and potential ingredient spillage. Recognizing these issues early on will empower you to overcome them and create flawless sandwiches with ease.
Offering Solutions and Troubleshooting Tips
Now, let’s delve into solutions and troubleshooting tips to address these common sandwich maker challenges. For uneven cooking, the key is to ensure even ingredient distribution within your sandwich. Spread your fillings and condiments evenly, paying attention to the edges, to promote uniform cooking. Additionally, try to press down gently on the sandwich maker lid to help the plates make better contact with your creation. If your sandwich maker has adjustable heat settings, experimenting with different temperatures may also help achieve more balanced results.
To combat sticking, use a light coating of non-stick cooking spray on the cooking plates or brush a small amount of oil or butter onto the exterior of your sandwich. This preventive measure reduces the likelihood of ingredients adhering to the plates, making cleanup a breeze. If you’re dealing with a thicker sandwich that doesn’t close properly, consider using less filling or selecting thinner slices of bread. This will help ensure that the sandwich maker can seal your creation correctly.
Lastly, always follow the manufacturer’s instructions for preheating and cooking times. Preheating sufficiently before adding your sandwich can help prevent many of these issues. By implementing these troubleshooting tips, you’ll navigate common sandwich maker challenges effortlessly and continue to enjoy perfectly crafted sandwiches every time.
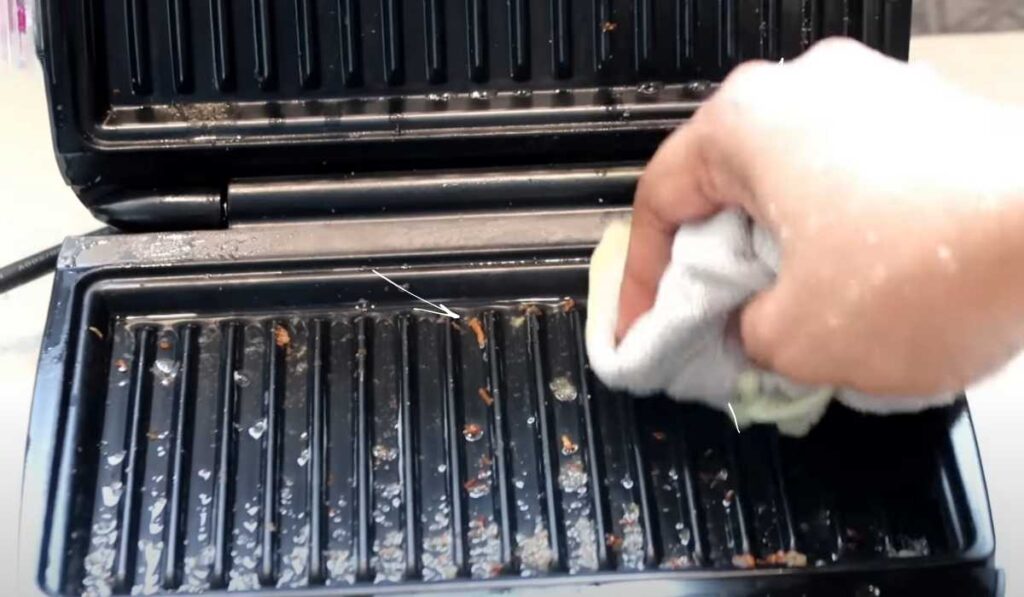
Cleaning And Maintenance Tips For Your Sandwich Maker
Maintaining the cleanliness of your sandwich maker is essential to keep it in good working condition and ensure the longevity of its use. You can enjoy tasty sandwiches without any hassle by following a few simple cleaning and maintenance tips.
Here are some guidelines to help you keep your sandwich maker clean:
Removing Crumbs And Grease:
After each use, unplug the sandwich maker and allow it to cool down before cleaning.
Open the lid and gently shake the sandwich maker over a sink or garbage bin to remove any loose crumbs.
For stubborn crumbs or grease, use a soft brush or cloth to wipe them away gently.
Be careful not to scratch the non-stick surface while removing the crumbs or grease.
Using Non-Abrasive Cleaners:
To clean the surfaces of your sandwich maker, use a mild detergent or dish soap mixed with warm water.
Dampen a cloth or sponge with the soapy solution and wipe the plates and exterior of the sandwich maker.
Do not immerse the appliance in water or submerge the detachable plates.
If there are areas that require extra attention, use a soft toothbrush or cotton swab to reach into crevices and corners.
Storing Your Sandwich Maker Properly:
Once you have cleaned and dried your sandwich maker, store it in a cool and dry place.
Avoid stacking heavy items on top of the appliance, as this could damage the plates or internal components.
If possible, store the sandwich maker vertically to save counter space and prevent any accidental damage.
If your sandwich maker has detachable plates, make sure to store them separately to maintain their condition.
By following these cleaning and maintenance tips, you can keep your sandwich maker in excellent shape and ensure that it continues to serve you delicious sandwiches for years to come. Keep in mind that regular cleaning and proper storage play a significant role in extending the lifespan of your sandwich maker.
So take care of your appliance, and it will reward you with many tasty meals!
Frequently Asked Questions Of How To Use Sandwich Maker?
How Do You Clean A Sandwich Maker?
To clean a sandwich maker, unplug it and let it cool down. Wipe the plates with a damp cloth or sponge. For stubborn stains, use a mild detergent or baking soda paste. Never immerse the sandwich maker in water or use abrasive cleaners.
Can I Use Butter In A Sandwich Maker?
Yes, you can use butter in a sandwich maker. However, it is recommended to spread a thin layer of butter on the outside of the bread before placing it in the sandwich maker. This will help prevent the bread from sticking to the plates and ensure a crispy finish.
How Long Does It Take To Cook A Sandwich In A Sandwich Maker?
The cooking time for a sandwich in a sandwich maker can vary depending on the type of sandwich and the desired level of crispiness. On average, it takes about 3-5 minutes to cook a sandwich until it is golden brown and heated through.
Keep an eye on the sandwich to avoid overcooking.
Conclusion
To wrap up, mastering the art of using a sandwich maker can greatly enhance your culinary skills and bring versatility to your meal options. By following a few simple steps, you can create delicious and customizable sandwiches in no time.
Remember to always preheat your sandwich maker, layer the ingredients evenly, and avoid overfilling to ensure even cooking. Experiment with different fillings, bread types, and seasonings to create unique and satisfying sandwiches that cater to your taste preferences. Utilize the indicator lights and adjustable settings to achieve the perfect level of toasting and doneness.
Cleaning your sandwich maker properly after each use will prolong its lifespan and maintain optimal performance. With these tips in mind, you can confidently use your sandwich maker to create mouthwatering sandwiches that will impress your family and guests. Happy sandwich-making!