Making goo is surprisingly simple and can be a fantastic, sensory activity for all ages! This guide will walk you through a “shockingly best” recipe that’s easy to follow, uses common household ingredients, and results in a wonderfully stretchy and fun goo.
Making your own goo at home can be a truly delightful experience, bringing a bit of science and a lot of fun right into your kitchen. Many people think creating the perfect, stretchy, and satisfying goo is complicated, but we’re here to show you just how easy it can be! Forget messy store-bought options or confusing recipes. We’ve got a simple, reliable method that guarantees a “shockingly best” result every time. Get ready to unlock a world of tactile fun with our step-by-step guide.
The Ultimate Goo Recipe: Simple, Satisfying, and Shockingly Fun!
Welcome to The Honey Pot Bakery’s Kitchen Guide! We love making our kitchens functional and fun, and that includes bringing in activities that spark joy and creativity. Today, we’re diving into the wonderfully squishy world of homemade goo. This isn’t just any goo; it’s designed to be the best – perfectly pliable, delightfully stretchy, and incredibly easy to make. Whether you’re looking for a rainy-day activity, a fun science experiment, or just a way to de-stress, this recipe is your ticket to gooey success.
Why This Goo Recipe is a “Shocking Best”
We know there are many ways to make goo out there, but this particular recipe stands out for several key reasons:
Simplicity: Uses readily available household ingredients.
Reliability: Consistently produces excellent results.
Texture: Achieves that perfect balance of stretchy, squishy, and not-too-sticky.
Customization: Easy to adapt with colors and glitter for added fun.
Beginner-Friendly: Perfect for first-time goo makers.
Let’s get started on making some of the best goo you’ve ever experienced!
What You’ll Need: Your Goo-Making Toolkit
Before we begin, gather these simple ingredients and tools. Having everything ready makes the process smooth and enjoyable.
Essential Ingredients:
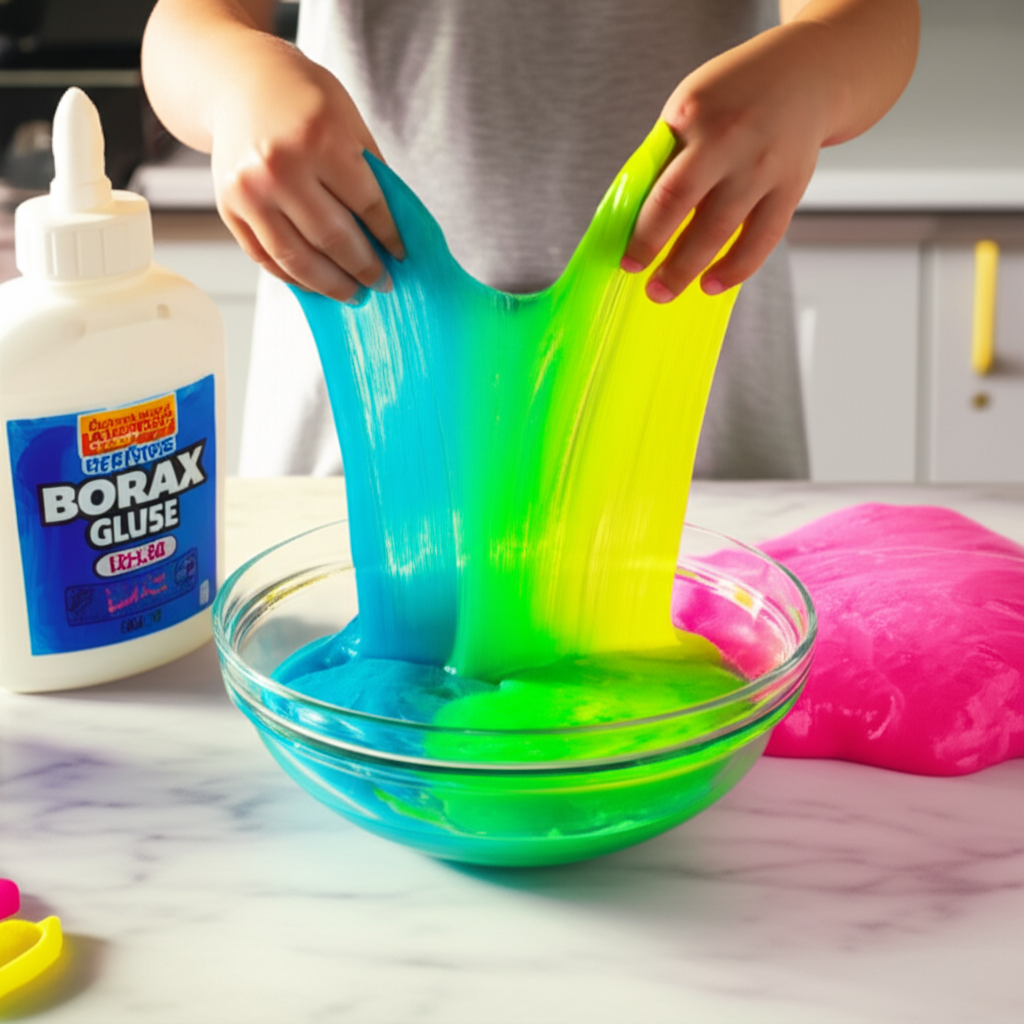
White School Glue: (PVA glue) – About 1/2 cup (120 ml). Make sure it’s PVA-based, as other types won’t work. Elmer’s white glue is a popular and reliable choice.
Baking Soda: 1/2 teaspoon (2.5 ml). This helps to firm up the goo and give it structure.
Contact Lens Solution: About 1 tablespoon (15 ml). Crucially, it must contain boric acid and sodium borate. Saline solution alone won’t activate the goo. Brands like Renu or Biotrue often work well.
Water: 1 tablespoon (15 ml) (optional, for a slightly stretchier goo).
Food Coloring: A few drops for vibrant color.
Glitter, Sequins, or Small Toys: For decoration and added fun (optional).
Necessary Tools:
Mixing Bowl: A medium-sized bowl to mix your ingredients.
Measuring Cups and Spoons: For accurate ingredient measurements.
Spoon or Spatula: For stirring.
Airtight Container: For storing your finished goo.
Step-by-Step Guide: Crafting Your “Shocking Best” Goo
Follow these simple steps to create your amazing goo. We’ve broken it down so anyone can achieve fantastic results.
Step 1: Pour the Glue
Begin by pouring your 1/2 cup (120 ml) of white school glue into the mixing bowl. This forms the base of your goo.
Step 2: Add Baking Soda and Water (Optional)
Add the 1/2 teaspoon (2.5 ml) of baking soda to the glue. If you want a slightly stretchier goo, add the 1 tablespoon (15 ml) of water now as well. Stir thoroughly until the baking soda is completely dissolved. This step is important for texture.
Step 3: Introduce Color and Sparkle (Optional)
If you’re adding color, now is the time! Add a few drops of your chosen food coloring to the mixture. Stir until the color is evenly distributed. If you want to add glitter or other decorative elements, mix them in now as well.
Step 4: Activate the Goo!
This is the magic step! Slowly add the contact lens solution, starting with about half a tablespoon (7.5 ml). Stir the mixture continuously. You’ll notice it start to thicken and pull away from the sides of the bowl.
Step 5: Mix and Knead
As the goo begins to form, keep stirring. Once it becomes too thick to stir easily with the spoon, it’s time to use your hands! Take the goo out of the bowl and begin kneading it. It might feel sticky at first, but keep kneading. If it’s still too sticky, add another teaspoon of contact lens solution and continue kneading.
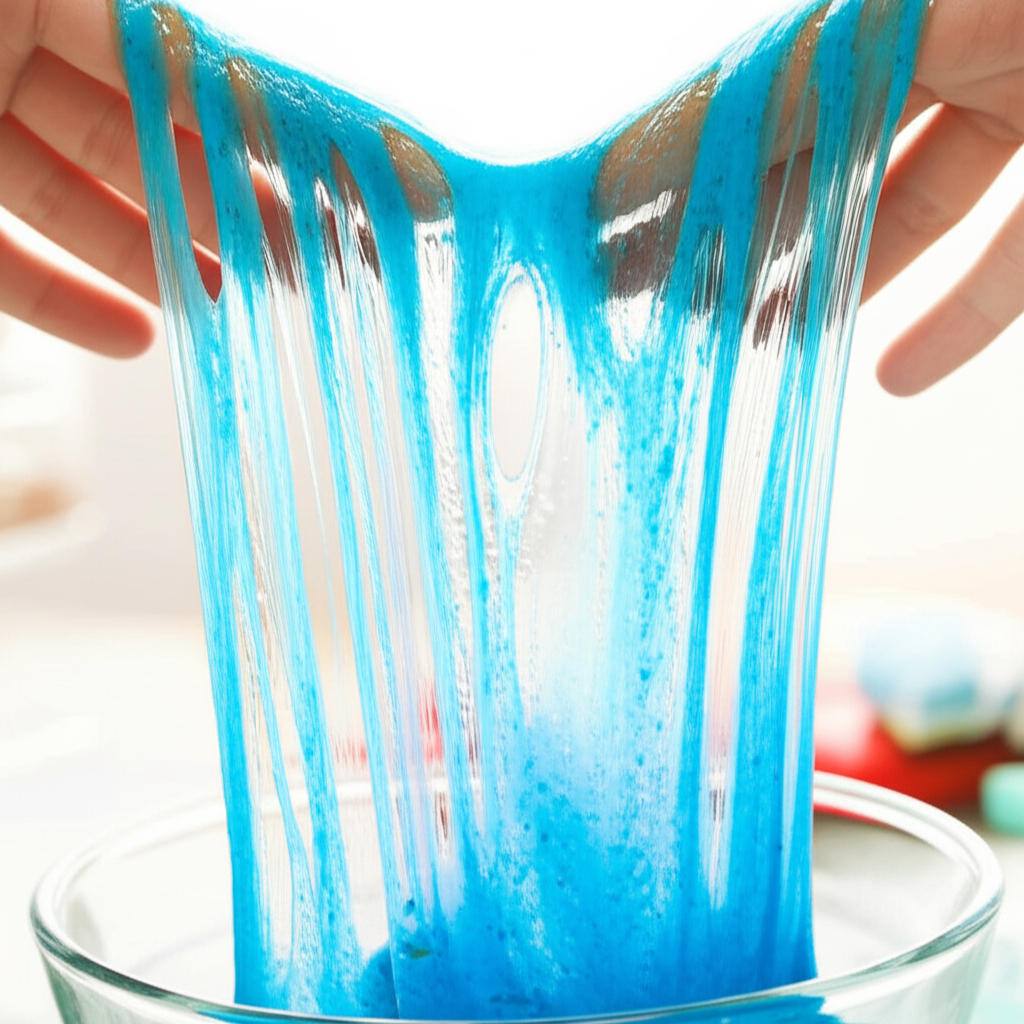
Step 6: Achieve the Perfect Consistency
Continue kneading until the goo is no longer sticky and has a smooth, stretchy texture. You’ve achieved the “shockingly best” goo! The exact amount of contact lens solution needed can vary slightly depending on the glue and the specific brand of solution, so add it gradually until you get the desired consistency.
Troubleshooting Common Goo-Making Issues
Even with the best recipes, sometimes things don’t go exactly as planned. Don’t worry! Here are some common issues and how to fix them.
Goo is too sticky:
Cause: Not enough activator (contact lens solution) was added.
Solution: Add another teaspoon of contact lens solution and knead thoroughly. Repeat if necessary, adding small amounts at a time. Be patient; it can take a few minutes of kneading to absorb the activator.
Goo is too stiff or breaks easily:
Cause: Too much activator was added, or the baking soda ratio was off.
Solution: Try adding a tiny bit more glue (just a few drops) and kneading it in. You can also try adding a little bit of lotion or baby oil to make it more pliable.
Goo is too watery or doesn’t form:
Cause: The contact lens solution might not contain the necessary ingredients (boric acid and sodium borate), or not enough was added.
Solution: Ensure your contact lens solution has boric acid and sodium borate. If it does, try adding a little more contact lens solution and continue stirring and kneading.
The Science Behind the Goo: Why it Works!
Understanding the science can make the fun even more engaging! The magic behind making goo from glue and contact lens solution lies in a chemical reaction.
PVA Glue: Polyvinyl acetate (PVA) is a polymer. Think of it as a long chain of molecules. In liquid glue, these polymer chains are separate and can slide past each other easily, which is why glue flows.
Borax (from Boric Acid and Sodium Borate): Contact lens solutions that contain boric acid and sodium borate act as a source of borate ions. When these borate ions are introduced to the PVA glue, they act as a cross-linking agent.
Cross-linking: The borate ions form bonds between the long PVA polymer chains, linking them together. This process is called cross-linking. These cross-links create a more solid, three-dimensional network. The goo is no longer a liquid but a viscoelastic substance – it can stretch like a liquid but also hold its shape like a solid.
Baking Soda’s Role: Baking soda (sodium bicarbonate) helps to adjust the pH of the mixture, which optimizes the cross-linking reaction for a better goo consistency. It also helps to firm up the goo.
For more information on polymers and cross-linking, you can explore resources from educational institutions like the American Chemical Society.
Goo Variations to Explore
Once you’ve mastered the basic recipe, why not experiment with some fun variations?
Fluffy Goo:
Add shaving cream to the glue mixture before adding the activator. Start with about 1/2 cup (120 ml) of foam shaving cream and mix it in well. This creates a lighter, fluffier texture that’s incredibly satisfying to squish.
Butter Goo:
After your goo is made and has a good consistency, knead in a tablespoon of softened butter or lotion. This makes the goo smoother, softer, and more spreadable, resembling butter.
Clear Goo:
Use clear PVA glue instead of white glue. You might need slightly more contact lens solution for clear glue. This is perfect for adding glitter or small objects inside for a mesmerizing effect.
Scented Goo:
Add a few drops of essential oils or extracts (like vanilla or peppermint) to the glue mixture for a delightful aroma.
Storing Your Goo
To keep your goo fresh and playable, proper storage is key.
Airtight Container: Always store your goo in an airtight container, such as a plastic food container with a lid or a resealable plastic bag. This prevents it from drying out.
Cool Place: Keep the container in a cool, dry place. Avoid direct sunlight or heat, as this can affect the goo’s consistency.
Longevity: With proper storage, homemade goo can last for several weeks. If it starts to feel dry or sticky, you can sometimes revive it by adding a little more contact lens solution or a touch of lotion.
Safety First!
While making goo is generally safe, a few precautions ensure a fun and worry-free experience.
Adult Supervision: Always supervise children during the goo-making process, especially when handling ingredients and during the mixing stages.
Do Not Eat: Emphasize that goo is not edible. Even though the ingredients are common, they are not meant for consumption.
Wash Hands: Encourage everyone to wash their hands thoroughly before and after playing with goo.
Surface Protection: Goo can be sticky. It’s a good idea to cover your work surface with newspaper or a plastic tablecloth to protect it.
Frequently Asked Questions About Making Goo
We’ve compiled some common questions to help you on your goo-making journey.
What is the best type of glue to use for making goo?
The best type of glue to use is PVA-based white school glue. Brands like Elmer’s are highly recommended because they reliably create the correct chemical reaction needed to form goo.
Why does my goo keep breaking instead of stretching?
If your goo is breaking easily, it likely means you’ve added too much activator (contact lens solution). Try adding a tiny bit more glue or a small amount of lotion to make it more pliable and stretchy.
Can I use saline solution instead of contact lens solution?
No, standard saline solution typically won’t work. Your contact lens solution must contain boric acid and sodium borate to act as the activator. Always check the ingredient list on the bottle.
How long does homemade goo last?
When stored properly in an airtight container in a cool place, homemade goo can last for several weeks. If it becomes too dry or sticky, you might be able to revive it with a little extra activator or lotion.
Is it safe for my kids to play with homemade goo?
Yes, as long as adult supervision is provided and children are reminded not to eat the goo. The ingredients are non-toxic, but they are not meant for consumption. Ensure hands are washed before and after play.
Can I make goo without food coloring?
Absolutely! If you prefer not to use food coloring, your goo will simply be white or translucent, depending on the glue you use. It will still be just as fun to play with.
What’s the difference between white glue goo and clear glue goo?
White glue goo tends to be more opaque and sometimes a bit softer. Clear glue goo is translucent, making it ideal for adding glitter or small decorative items that you want to see clearly within the goo. Clear glue might require slightly more activator to reach the perfect consistency.
Conclusion: Your Goo-Making Adventure Awaits!
You’ve now got the knowledge and the recipe to create some truly “shockingly best” goo right in your own kitchen! This simple, satisfying activity is perfect for a quiet afternoon, a fun family project, or even a creative science lesson. Remember the key ingredients – white glue, baking soda, and the right contact lens solution – and don’t be afraid to experiment with colors, glitter, and textures.
The Honey Pot Bakery is all about making your home life more enjoyable and functional, and that includes bringing fun, hands-on activities into the mix. So, gather your supplies, follow these easy steps, and get ready for hours of squishy, stretchy, gooey fun. Happy goo-making!