

Bolded Quick Summary:
Decorating kitchen counters is simple! Focus on a few key items that are both beautiful and functional. Think about a mix of everyday essentials, a touch of greenery, and a personal decorative piece. Keep it uncluttered for a clean, inviting look that enhances your kitchen’s style.
Is your kitchen counter a chaotic jumble of mail, appliances, and random odds and ends? You’re not alone! Many of us struggle to find that perfect balance between a workspace that’s ready for action and a surface that looks beautiful. A tidy, well-decorated counter can make your kitchen feel more welcoming and organized, turning a stressful space into a delightful one. Don’t worry, creating stunning kitchen counters is easier than you think! We’ll walk you through simple, step-by-step secrets to achieve that magazine-worthy look without sacrificing usability.
The Art of the Countertop: Why It Matters
Your kitchen counters are the unsung heroes of your culinary adventures. They’re where you chop, mix, bake, and often, where you gather with loved ones. Because they’re so central to your kitchen’s function and aesthetic, how you decorate them can dramatically impact the overall feel of the room. A cluttered counter can make a kitchen feel smaller and more chaotic, while a thoughtfully arranged one can add personality, charm, and a sense of calm.
Think of your kitchen counters as a blank canvas. What you place there should not only look good but also serve a purpose. We’re going to reveal how to achieve this balance, turning everyday essentials into decorative elements and adding those special touches that make your kitchen uniquely yours. Get ready to transform your countertops from a mere surface into a stylish statement!
Understanding Your Kitchen Counter Landscape
Before we dive into the fun part—decorating—it’s helpful to understand the basic layout and function of your kitchen counters. This helps in making practical and aesthetically pleasing choices.
Countertop Materials: A Quick Look
The material of your countertops can influence how you decorate them. Some materials are more delicate than others. For instance, while you might place a hot pot directly on a granite countertop, you’d want to use a trivet for a laminate or wood surface.
| Countertop Material | Pros | Cons | Decorating Considerations |
|---|---|---|---|
| Granite | Durable, heat-resistant, wide variety of colors | Can be porous if not sealed, requires occasional sealing | Can handle hot items directly; choose trivets to match decor if desired. |
| Quartz | Non-porous, highly durable, low maintenance | Can be sensitive to extreme heat, generally more expensive | Excellent for placing items directly; avoid direct prolonged heat. |
| Laminate | Affordable, wide range of styles and colors | Less heat and scratch resistant than stone | Always use trivets or hot pads; be mindful of sharp objects. |
| Butcher Block (Wood) | Warm aesthetic, can be repaired, good for chopping | Requires regular oiling/sealing, susceptible to stains and water damage | Use cutting boards and trivets to protect the surface; oiling can be a decorative ritual. |
| Marble | Luxurious, unique veining | Porous, prone to etching and staining, requires careful maintenance | Must use coasters, trivets, and cutting boards; embrace its natural patina. |
Standard Countertop Heights and Depths
Knowing typical dimensions helps you visualize how decorative items will fit and function. Standard kitchen countertops in the United States are typically:
- Height: 36 inches (91.4 cm) from the floor.
- Depth: 24 inches (61 cm) for base cabinets.
- Backsplash Height: Usually 4 inches (10 cm) or up to 18 inches (45.7 cm) or more depending on design.
These dimensions are important because they dictate the scale of items you can place without them looking too big or too small, or obstructing your work area. For instance, a very tall vase might look out of place on a standard 36-inch high counter.
The Foundation: Decluttering and Organizing
Before you even think about adding decorative elements, the most crucial step is to declutter and organize. A beautiful arrangement on a messy counter is like putting a bow on a tangled mess – it doesn’t truly solve the problem.
Step 1: The Great Countertop Purge
This is where we get real. Take everything off your counters. Yes, everything! Set it all on a table or the floor. Now, go through each item and ask yourself:
- Do I use this regularly?
- Does it belong in the kitchen?
- Is it broken or expired?
- Can it be stored elsewhere (in a drawer, cabinet, or pantry)?
Create piles: Keep, Relocate, Donate, Trash.
Step 2: Zone Your Kitchen
Think about how you use your kitchen. What do you need within easy reach? Creating zones makes your kitchen more efficient and helps you decide what lives on the counter and what doesn’t.
- Prep Zone: Near the sink and trash can. Knives, cutting boards, frequently used spices.
- Cooking Zone: Near the stove. Utensils, oils, salt and pepper.
- Baking Zone: If you bake often, perhaps a spot for your mixer or baking essentials.
- Coffee/Beverage Station: Coffee maker, mugs, sugar, tea.
This zoning helps determine what items are essential to keep on the counter.
Step 3: Smart Storage Solutions
For items that need to stay on the counter, invest in smart storage. This is where functionality meets beauty.
- Drawer organizers: For utensils, gadgets, and cutlery.
- Spice racks: Wall-mounted, drawer inserts, or tiered shelves keep spices tidy.
- Canisters and Jars: For flour, sugar, pasta, and coffee. They look great and keep items fresh.
- Utensil Crocks: Attractive crocks can hold your most-used cooking tools.
- Appliance Garages or Dedicated Spots: If your toaster or stand mixer isn’t used daily, consider storing it in a cabinet or pantry.
According to the USDA, proper food storage, including keeping dry goods in sealed containers, is vital for food safety and reducing waste.
The Secrets to Stunning Countertop Decor
Now for the exciting part! Once your counters are decluttered and organized, you can start adding those beautiful touches. The key is to curate a few impactful pieces rather than cluttering the space.
Secret #1: Embrace the “Less is More” Philosophy
This is perhaps the most important secret. Overcrowded counters look messy, no matter how pretty the items are. Aim for a few well-chosen pieces that have visual appeal and a purpose.
Secret #2: Think in Threes (The Rule of Three)
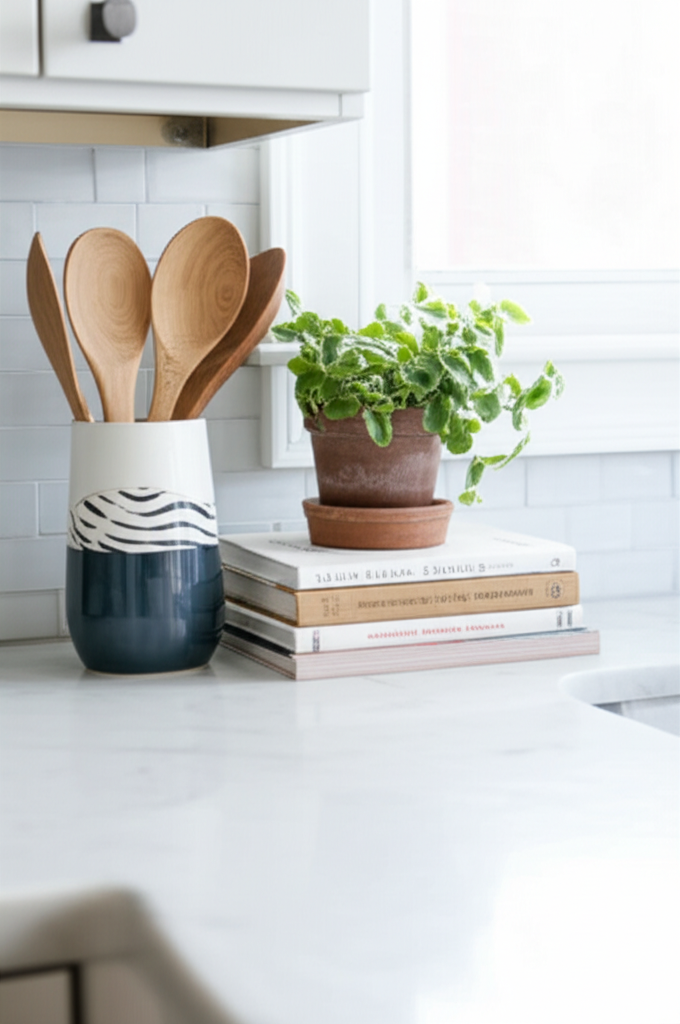
This is a classic design principle that works wonders for countertops. Grouping items in odd numbers, typically three, creates a pleasing visual balance. Think about varying heights, textures, and materials within your group.
- Example 1: A small potted herb, a beautiful soap dispenser, and a ceramic fruit bowl.
- Example 2: A decorative canister, a wooden cutting board propped up, and a small vase with fresh flowers.
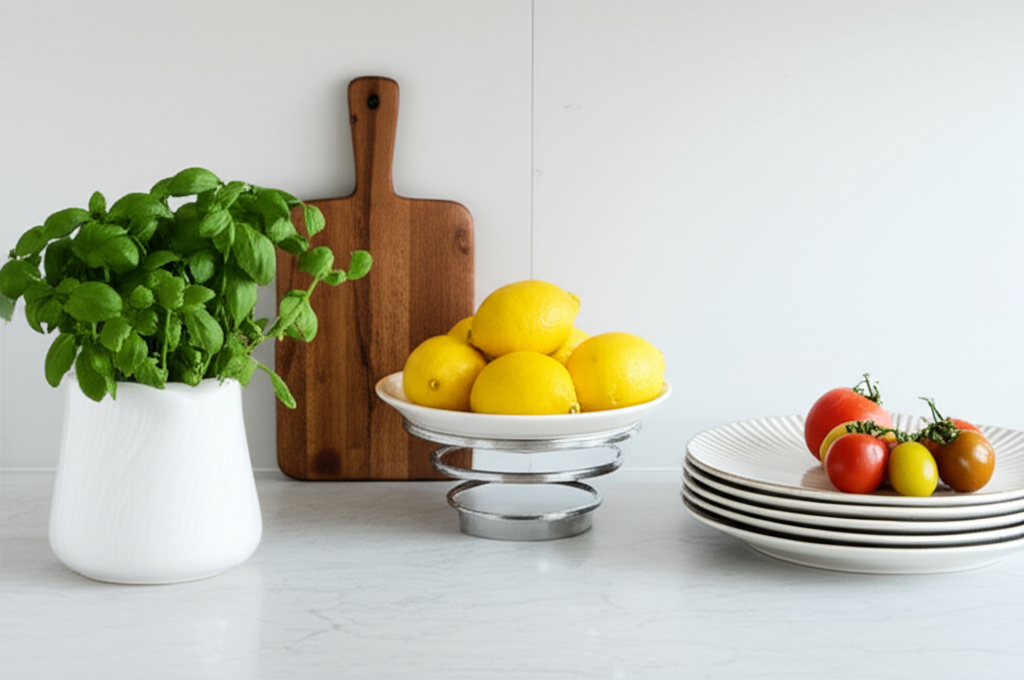
Secret #3: Incorporate Living Elements
Plants and flowers bring life, color, and a natural, refreshing feel to your kitchen. They instantly elevate the space and can even purify the air. Check out this guide on growing culinary herbs from the Royal Horticultural Society for easy kitchen-friendly options.
- Herbs: Basil, mint, rosemary, or chives in small pots are both decorative and functional for cooking.
- Small Flowering Plants: A tiny succulent, a small orchid, or a cheerful potted bloom.
- Cut Flowers: A small bouquet in a bud vase adds a touch of elegance.
Pro Tip: If you don’t have much natural light, opt for faux plants that look realistic.
Secret #4: Utility as Decor
Why hide beautiful, everyday items? Many kitchen essentials can double as decorative pieces.
- Stylish Utensil Holders: A ceramic crock, a sleek metal holder, or even a vintage-inspired jar can house your most-used spatulas and spoons.
- Attractive Canisters: Store flour, sugar, coffee, or tea in decorative canisters that match your kitchen’s style.
- Nice Soap Dispensers: Upgrade from plastic bottles to a ceramic or glass dispenser.
- Cutting Boards: A beautiful wooden cutting board can be propped against the backsplash as a design element when not in use.
- Kettles and Coffee Makers: If you have a stylish appliance, let it shine!
Secret #5: Add Texture and Warmth
Varying textures makes your countertop arrangement more visually interesting and inviting.
- Wood: Cutting boards, bowls, or wooden utensils.
- Ceramics/Pottery: Canisters, crocks, vases, or decorative bowls.
- Metal: A sleek utensil holder, a copper kettle, or stainless steel appliances.
- Glass: Bud vases, glass jars, or a decorative glass bowl.
- Natural Materials: A woven basket for fruit or produce.
Secret #6: The Power of a Statement Piece
Choose one or two items that are a bit more substantial or eye-catching to anchor your countertop design.
- A Beautiful Fruit Bowl: Filled with colorful fruits.
- A Decorative Tray: To corral smaller items like a soap dispenser, hand lotion, and a small plant.
- A Small Artwork: A framed print or a small sculpture can add personality.
- A Kitchen Scale: A vintage-style scale can be both functional and a charming decor item.
Secret #7: Consider Your Backsplash
Your backsplash is a key part of your counter’s visual backdrop. Ensure your countertop decor complements, rather than competes with, your backsplash design. If your backsplash is busy, opt for simpler countertop decor.
Creating Specific Countertop Zones: Practical Decor Ideas
Let’s put these secrets into practice by decorating specific areas of your counter.
The Beverage Station
Make your morning routine a little more pleasant:
- Coffee Maker: If it’s stylish, let it be the star.
- Mugs: Keep a few of your favorites on display in a cute mug tree or a small shelf.
- Storage: Use attractive canisters for coffee beans, tea bags, or sugar.
- Finishing Touch: A small tray to hold creamer, a spoon, and perhaps a tiny vase with a bloom.
The Prep Area
Keep essentials handy but tidy:
- Utensil Crock: Filled with your most-used cooking tools.
- Small Cutting Board: A beautiful wooden one propped up.
- Spice Rack or Caddy: Keep your go-to spices within reach.
- Olive Oil/Vinegar Dispensers: Store them in attractive glass bottles.
- Small Dish: For resting used utensils or collecting peels.
The “Landing Strip” (Near the Door or Entryway)
If your counter serves as a drop zone:
- Key Bowl: A decorative bowl or tray for keys.
- Mail Sorter: A stylish vertical file or basket for incoming mail.
- Small Plant: To soften the look.
- A Notepad and Pen: For quick notes, housed in a small holder.
The goal here is containment and organization to prevent mail and keys from spreading.
What to Avoid on Your Kitchen Counters
Just as important as knowing what to add is knowing what to keep off your counters.
- Excessive Small Appliances: Only keep out what you use daily.
- Clutter Magnets: Too many random knick-knacks, promotional items, or unused gadgets.
- Piles of Paperwork: Unless it’s a very organized mail sorter, keep paperwork out of sight.
- Dirty Dishes: These instantly kill the aesthetic.
- Anything That Obstructs Workspaces: Ensure you have ample clear space to prep food.
Styling Your Countertops: A Step-by-Step Visual Guide
Let’s walk through styling a typical kitchen counter section.
Scenario: A 3-foot section of counter between your sink and stove.
- Clear the Space: Remove everything.
- Assess the Zone: This is a prime prep area. What do you need here?
- Place Your Largest Item/Anchor: This might be a nice utensil crock filled with spatulas and spoons. Place it towards the back, slightly off-center.
- Add a Mid-Size Item: A beautiful canister for flour or sugar, or a small potted herb. Place this next to the utensil crock, perhaps a bit forward.
- Incorporate a Smaller, Decorative Item: A bud vase with a single flower, a small decorative object, or a nice hand soap dispenser. Place this in front of or beside the mid-size item.
- Consider Texture/Height: If your utensil crock is tall, and the canister is medium, the bud vase adds a lower touch. If your canister is tall, place the crock and vase in front.
- The “Rule of Three” in Action: You now have your crock, canister, and bud vase – a visually appealing grouping.
- Add a Functional Piece: Perhaps a small wooden cutting board can be leaned against the backsplash in a gap between your groupings, or a small tray to hold salt and pepper grinders.
- Final Check: Is there still ample clear space to chop vegetables? Does it feel balanced? Remove anything that feels out of place.
Remember to step back and assess from different angles. What looks good from one side might need a slight adjustment from another.
Frequently Asked Questions About Decorating Kitchen Counters
Q1: How many items should I put on my kitchen counters?
A1: Aim for a minimalist approach. Focus on a few key items that are both functional and beautiful. The “rule of three” is a great guideline for groupings, but overall, avoid overcrowding. Less is definitely more when it comes to creating a clean, appealing look.
Q2: What are the best things to keep on kitchen counters?
A2: Keep only items you use daily or that are decorative necessities. This includes things like a coffee maker, utensil crock, attractive canisters for staples, a nice soap dispenser, and perhaps a small plant or fruit bowl. Prioritize functionality and visual appeal.
Q3: How do I make my kitchen counters look less cluttered?
A3: Start by decluttering everything. Then, invest in smart storage solutions like drawer organizers, wall-mounted spice racks, and attractive canisters. Assign a home for everything, ideally within cabinets or drawers, and only keep essential, aesthetically pleasing items on display.
Q4: Should I put plants on my kitchen counters?
A4: Yes, plants are fantastic for countertops! They add life, color, and can improve air quality. Small herbs, succulents, or a simple bud vase with fresh flowers work wonderfully. Just ensure they get enough light or opt for realistic faux plants if light is an issue.
Q5: What if I have very limited counter space?
A5: For limited space, prioritize functionality above all else. Use vertical space with tiered organizers or wall-mounted solutions. Keep only absolute essentials on the counter, and ensure each item serves a clear purpose or is highly decorative. A small tray can help corral a few key items.
Q6: How often should I rearrange my countertop decor?
A6: This is entirely up to your preference! Some people like to change it seasonally, perhaps adding warmer tones in fall or brighter colors in spring. Others prefer a consistent look. The most important thing is to keep it tidy and dust-free, rather than frequently rearranging.
Q7: What kind of items should I use for countertop decor?
A7: Opt for items that combine beauty and utility. Think decorative canisters, stylish utensil holders, attractive fruit bowls, small plants, bud vases, nice soap dispensers, and decorative trays. Materials like wood, ceramic, metal, and glass add texture and visual interest.
Conclusion: Your Beautiful, Functional Kitchen Awaits
Decorating your kitchen counters is a journey, not a destination. By following these secrets—decluttering with intention, organizing smartly, and choosing decorative elements that bring joy and function—you can transform your countertops into a beautiful and inviting part of your home. Remember, the goal is to create a space that inspires you, whether you’re whipping up a gourmet meal or simply enjoying a cup of coffee. Start small, experiment with what you love, and don’t be afraid to let your personal style shine through. Your kitchen is the heart of your home, and its counters deserve to be as welcoming and stylish as the rest of it!