

Build beautiful kitchen cabinets yourself with free plans! Discover easy, step-by-step guidance to create custom storage that transforms your kitchen, proving that DIY can be surprisingly affordable and incredibly rewarding.
Tired of kitchen clutter? Dreaming of a beautiful, functional space but wincing at renovation costs? You’re not alone! Many of us imagine custom cabinets but feel overwhelmed by the price tag or the complexity of the process. But what if we told you that you can achieve that dream kitchen look and feel without breaking the bank? With the right free plans and a little bit of elbow grease, building your own kitchen cabinets is entirely achievable. Get ready to be amazed as we guide you through creating stunning, custom storage that will make your kitchen the heart of your home.
Your Kitchen Cabinet DIY Journey Starts Here!
Building kitchen cabinets might sound like a daunting task, reserved for seasoned woodworkers. However, the truth is, with a good set of free plans and a willingness to learn, even beginners can create professional-looking results. We’ll break down the process into simple, manageable steps, equipping you with the knowledge to select the right plans, gather your materials, and bring your vision to life. Imagine the satisfaction of opening your own custom-built cabinets, knowing you made them yourself!
Why Choose DIY Kitchen Cabinets with Free Plans?
The benefits of tackling this project yourself are numerous, especially when you leverage the power of free plans. It’s a fantastic way to:
Save Significant Money: Professional custom cabinetry can cost thousands of dollars. DIYing with free plans drastically cuts down on expenses, often leaving you with just the cost of materials.
Achieve Customization: Standard cabinets don’t always fit your unique kitchen layout or storage needs. DIY allows you to tailor dimensions, shelf placement, and even door styles precisely to your space.
Gain Valuable Skills: This project is a rewarding learning experience. You’ll pick up woodworking skills that can be applied to countless other home improvement projects.
Boost Your Home’s Value: Well-built, attractive cabinetry is a major selling point for any home. Your DIY project adds both beauty and financial value.
Enjoy the Satisfaction: There’s immense pride in creating something beautiful and functional with your own hands.
Finding the Perfect Free Kitchen Cabinet Plans
The first crucial step is finding plans that match your skill level and design aesthetic. Luckily, the internet is brimming with resources. Look for plans that are:
Clear and Detailed: The plans should include precise measurements, cutting lists, and assembly diagrams.
Beginner-Friendly: Good plans will explain techniques and offer tips for common challenges.
Adaptable: While the plans provide a blueprint, understand that you might need to make minor adjustments for your specific kitchen dimensions.
Some excellent sources for free kitchen cabinet plans include:
Woodworking Websites: Many popular woodworking blogs and forums offer free, downloadable plans. Websites like Ana White, Family Handyman, and Woodsmith Shop often have comprehensive projects.
DIY Project Hubs: Platforms dedicated to DIY projects frequently feature user-submitted cabinet plans.
Manufacturer Resources: Occasionally, cabinet hardware manufacturers or lumber suppliers will offer free basic plans as a customer resource.
When searching, use terms like “free kitchen cabinet plans,” “DIY base cabinet plans,” or “wall cabinet blueprints.”
Understanding Cabinet Basics: What You Need to Know
Before you dive into cutting wood, it’s helpful to understand some fundamental cabinet terminology and standard dimensions. This knowledge will make choosing and adapting plans much easier.
Standard Kitchen Cabinet Dimensions
While customization is key with DIY, understanding typical sizes helps in planning and ensures your new cabinets will function seamlessly with standard countertops and appliances.
| Cabinet Type | Standard Height | Standard Depth | Standard Width Range | Notes |
| :————— | :————– | :————- | :——————- | :———————————————– |
| Base Cabinets | 34.5 inches | 24 inches | 9 to 48 inches | Countertop height is typically 36 inches. |
| Wall Cabinets | 30 or 36 inches | 12 inches | 12 to 36 inches | Often hung 15-18 inches above the countertop. |
| Tall/Pantry | 84 to 96 inches | 24 inches | 18 to 36 inches | Usually extend from floor to ceiling or higher. |
Source: National Kitchen & Bath Association (NKBA) Guidelines
It’s important to measure your specific kitchen space carefully. Don’t be afraid to deviate slightly from these standards if your layout demands it, but keep them in mind for compatibility with appliances and countertops.
Cabinet Construction Types
Most DIY kitchen cabinets fall into one of two main construction types:
Face-Frame Cabinets: These have a solid wood frame attached to the front of the cabinet box. Doors and drawer fronts attach to this frame. They offer a traditional look and are generally easier for beginners to build and align doors on.
Frameless (European-Style) Cabinets: These cabinets have no face frame. Doors attach directly to the sides of the cabinet box. This style offers a more modern aesthetic and can provide slightly more interior storage space due to the absence of the frame. They require more precise construction for proper door alignment.
For your first DIY cabinet project, face-frame cabinets are often recommended due to their forgiving nature and ease of construction.
Step-by-Step Guide: Building Your Kitchen Cabinets
Let’s get down to business! This guide outlines the general steps involved in building kitchen cabinets using free plans. Remember to always refer to your specific chosen plans for detailed measurements and instructions.
Step 1: Plan and Design Your Layout
Measure Your Space: Accurately measure the width, height, and depth of each wall where you plan to install cabinets. Note the placement of windows, doors, plumbing, and electrical outlets.
Sketch Your Layout: Draw a simple floor plan of your kitchen. Mark where each base cabinet, wall cabinet, and any specialized units (like a corner cabinet or sink base) will go.
Choose Your Plans: Select free plans that fit your design and skill level. Consider the number of doors, drawers, and shelves you’ll need.
Create a Cutting List: Most free plans will provide a detailed cutting list. Double-check this against your measurements and adjust if necessary.
Step 2: Gather Your Materials and Tools
Having everything ready before you start cutting will save you time and frustration.
Essential Materials:
Plywood: For cabinet boxes (¾-inch birch plywood is a popular and durable choice).
Lumber: For face frames (e.g., 1×2 or 1×3 poplar or pine).
Hardwood Plywood or MDF: For drawer boxes and cabinet doors (½-inch for drawers, ¾-inch for doors).
Screws: Wood screws of various lengths (e.g., 1 ¼-inch and 2-inch).
Wood Glue: High-quality wood glue is essential for strong joints.
Drawer Slides: Choose a style that suits your needs (ball-bearing slides are smooth and durable).
Hinges: For cabinet doors (e.g., concealed European hinges for a clean look).
Sandpaper: Various grits (80, 120, 180, 220) for smoothing.
Finish: Paint, stain, or clear coat depending on your desired look.
Optional: Plywood edge banding, cabinet knobs/pulls.
Essential Tools:
Measuring Tape and Pencil: For accurate marking.
Safety Glasses and Hearing Protection: Always prioritize safety.
Circular Saw or Table Saw: For making straight cuts. A table saw offers more precision for cabinet-grade cuts.
Jigsaw: Useful for cutting curves or openings.
Drill/Driver: For drilling pilot holes and driving screws.
Sander: Orbital sander or sanding block for smoothing.
Clamps: Various sizes for holding pieces together while glue dries.
Level: For ensuring cabinets are installed straight.
Optional (but highly recommended): Pocket hole jig (like Kreg Jig), router for joinery and edge profiles, nail gun.
A helpful resource for understanding tools and techniques is the Woodworking Handbook, which provides in-depth guides on various woodworking processes.
Step 3: Cut Your Plywood and Lumber
Accuracy is Key: Using your cutting list and a reliable saw (a table saw is ideal for precise plywood cuts), carefully cut all the pieces for your cabinet boxes, face frames, doors, and drawer parts.
Label Everything: As you cut, label each piece with its intended purpose (e.g., “Base Cabinet 1 – Side Panel,” “Drawer 2 – Front”). This prevents confusion later.
Edge Banding (Optional): If you’re using plywood for visible edges, consider applying iron-on edge banding for a cleaner, more finished look.
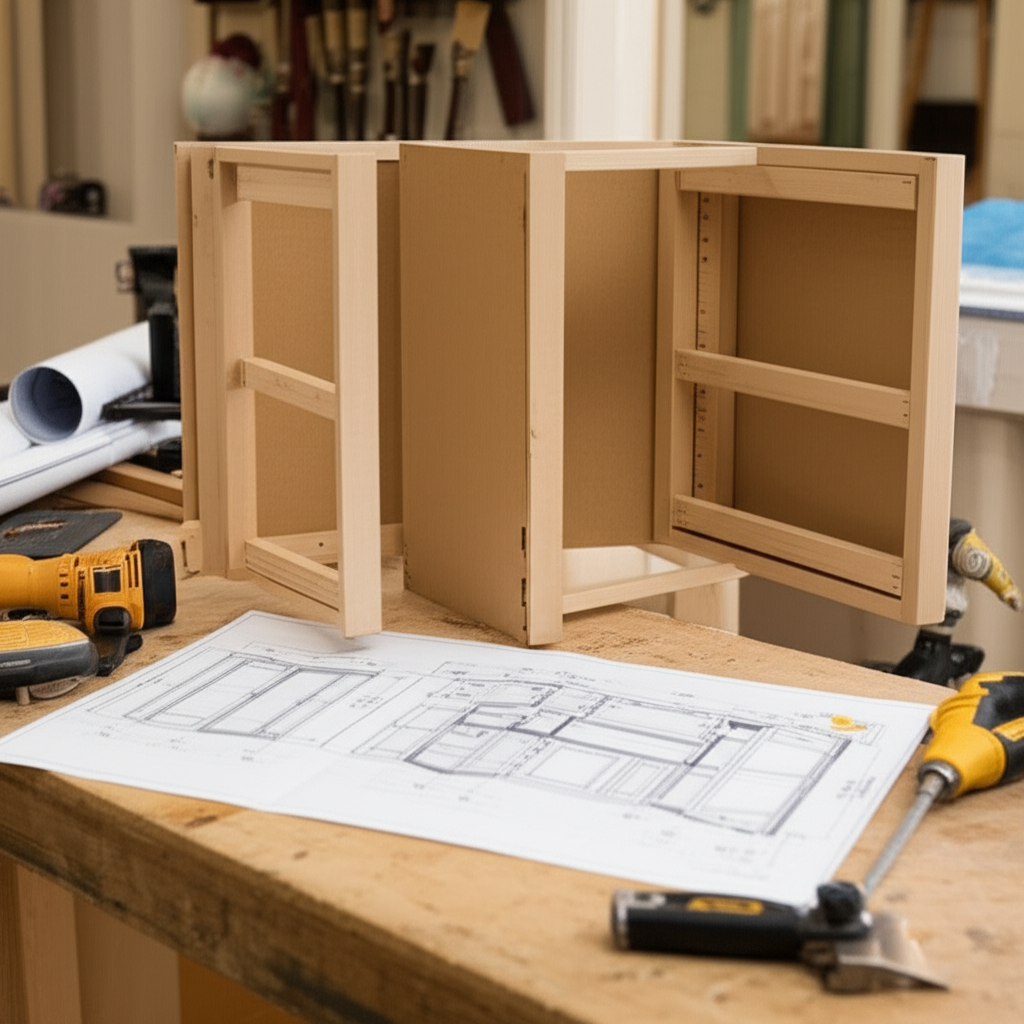
Step 4: Assemble the Cabinet Boxes
This is where your cabinets start to take shape!
Joinery Methods: Common methods for assembling cabinet boxes include:
Pocket Holes: Using a pocket hole jig to drill angled holes, allowing you to screw pieces together securely. This is a popular and strong method for DIYers.
Dadoes and Rabbets: These are grooves and notches cut into the wood that allow pieces to slot together. This requires more advanced joinery tools but creates very strong, clean joints.
Butt Joints with Glue and Screws: The simplest method, where pieces are butted against each other and secured with glue and screws. Ensure you pre-drill pilot holes to prevent splitting.
Assemble Sides, Top, and Bottom: Follow your plans to connect the side panels to the top and bottom panels. Use wood glue and your chosen joinery method.
Add Back Panel: Typically, a thin piece of plywood (¼-inch or ½-inch) is attached to the back of the cabinet box. This adds significant rigidity and squareness. Ensure the cabinet box is perfectly square before attaching the back. Use clamps to hold it in place while you screw or nail it.
Add Shelves: Install adjustable shelves or fixed shelves according to your plans.
Step 5: Build and Attach Face Frames (for Face-Frame Cabinets)
Cut Rails and Stiles: Cut your lumber into the stiles (vertical pieces) and rails (horizontal pieces) according to your plans.
Assemble the Frame: Lay out the pieces on a flat surface. Use pocket holes or dowels and glue to join the stiles and rails, forming a rectangle.
Attach to Cabinet Box: Apply glue to the front edges of the cabinet box. Position the face frame flush with the front of the box and secure it with clamps and screws or nails, driving them from the inside of the cabinet box into the face frame. Ensure the frame is perfectly square and aligned.
Step 6: Construct and Install Drawers
Drawer Box Assembly: Drawer boxes are typically made from ½-inch plywood or solid wood. Assemble them using glue and screws, or pocket holes. The drawer bottom often slides into grooves cut into the sides.
Attach Drawer Slides: Mount the corresponding parts of the drawer slides to the sides of the drawer boxes and to the inside of the cabinet openings. Follow the manufacturer’s instructions carefully for precise placement.
Install Drawer Fronts: Attach the drawer fronts to the assembled drawer boxes. You can use screws from the inside of the box, ensuring they don’t poke through.
Step 7: Build and Attach Cabinet Doors
Choose Your Style: Simple flat panel doors, shaker-style doors (with a raised or recessed center panel), or raised panel doors are common. Shaker-style is popular and relatively easy for DIYers.
Cut and Assemble: Cut the stiles and rails for the door frames and the center panel. Assemble the frame using glue and pocket holes or dowels. Fit the center panel into the frame.
Attach Hinges: Mount the hinges to the doors and then to the cabinet face frames or cabinet sides (for frameless). This requires careful measurement and alignment to ensure doors hang straight and close properly. Concealed European hinges are a popular choice for a clean, modern look.
Step 8: Sanding and Finishing
Sanding is Crucial: Thoroughly sand all surfaces, working through progressively finer grits of sandpaper. This is key to achieving a smooth, professional finish. Pay attention to edges and corners.
Clean Dust: Use a tack cloth or a damp microfiber cloth to remove all dust before applying any finish.
Apply Finish: Apply your chosen finish (paint, stain, polyurethane, etc.) according to the manufacturer’s instructions. Multiple thin coats are usually better than one thick coat. Allow adequate drying time between coats.
Step 9: Installation
Prepare Walls: Ensure your walls are sturdy and ready to support the weight of the cabinets. You may need to add blocking between studs if cabinet mounting points aren’t ideally located.
Install Base Cabinets: Place your base cabinets in their designated spots. Use shims to level them. Secure them to the wall studs with long wood screws, driving them through the back or face frame of the cabinet. Connect adjacent cabinets together with screws.
Install Wall Cabinets: This is often a two-person job. Use a level to mark a level line on the wall for the bottom of your wall cabinets. Lift the cabinets into place, ensure they are level and plumb, and secure them to wall studs with screws. Connect adjacent cabinets.
Install Countertops: Once cabinets are securely installed and leveled, you can install your countertops.
Add Hardware: Install drawer pulls and cabinet knobs.
Common Kitchen Cabinet DIY Challenges and Solutions
Even with the best plans, you might encounter a few hiccups. Here’s how to navigate them:
Out-of-Square Cabinets: If a cabinet box isn’t perfectly square, the back panel is often the culprit. When attaching the back, measure diagonally from corner to corner. If the measurements are equal, the box is square. If not, gently push on the longer diagonal to square it up before fully attaching the back.
Uneven Door Alignment: This is usually due to inconsistent hinge placement or slightly uneven cabinet boxes. Carefully adjust the screws on the hinges. Most concealed hinges have adjustment screws that allow you to move the door up, down, left, or right.
Warped Plywood: Plywood can sometimes warp, especially if not stored properly. Try to select flat sheets. If a piece is slightly warped, clamping it firmly during assembly can sometimes help straighten it. For critical pieces like doors, using higher-quality cabinet-grade plywood can minimize warping.
* Getting a Smooth Finish: Proper sanding is paramount. Ensure you remove all dust between coats. Using a good quality primer and paint, and applying thin, even coats, will yield the best results.
FAQ: Your Kitchen Cabinet DIY Questions Answered
Q1: How much does it typically cost to build DIY kitchen cabinets compared to buying them?
A1: The cost savings can be significant! While professional custom cabinets can range from $500 to $1,500+ per linear foot, DIY cabinets using free plans can often be built for 50-75% less, primarily covering the cost of materials like plywood, lumber, hardware, and finishes.
Q2: What is the best type of wood for DIY kitchen cabinets?
A2: For cabinet boxes, ¾-inch birch plywood is highly recommended for its durability, stability, and smooth surface. For face frames and doors, hardwoods like poplar, maple, or oak are excellent choices. Poplar is often favored for its affordability and ease of finishing.
Q3: Do I need a lot of fancy tools to build kitchen cabinets?
A3: While specialized tools like a table saw and a pocket hole jig can make the process easier and more precise, you can build basic cabinets with a good circular saw, a drill, a measuring tape, and clamps. However, investing in a pocket hole jig (like a Kreg Jig) is highly beneficial for strong, easy joinery.
Q4: How long does it usually take to build kitchen cabinets?
A4: The time commitment varies greatly depending on your skill level, the complexity of the design, and how much time you can dedicate. For a beginner, building a set of base and wall cabinets for a small to medium-sized kitchen might take anywhere from 40 to 80 hours of actual work, spread over several weekends.
Q5: What’s the difference between cabinet boxes and cabinet doors?
A5: The cabinet box is the main structure that houses shelves and drawers. Cabinet doors are the panels that cover the openings of the cabinet boxes. They are a major aesthetic component of your kitchen cabinetry.
Q6: Are free cabinet plans always good quality?
A6: Free plans can vary in quality. It’s essential to find plans from reputable woodworking sites or experienced DIYers. Look for detailed diagrams, clear instructions, and a complete cutting list. Reading reviews or comments on the plans can also give you an idea of their usability.
Q7: How do I ensure my DIY cabinets are strong and durable?
A7: Use high-quality materials like cabinet-grade plywood and solid wood. Employ strong joinery techniques such as pocket holes or dadoes. Use plenty of wood glue on all joints, and ensure the cabinet back is properly attached and that the cabinet box is square. Don’t skimp on screws and clamps during assembly.
Your Kitchen Cabinet Transformation Awaits!
Embarking on a DIY kitchen cabinet project with free plans is an incredibly rewarding endeavor. It’s a journey that transforms not just your kitchen’s appearance but also your confidence in your own abilities. From the initial excitement of finding the perfect plans to the final satisfaction of opening your beautifully crafted drawers and doors, every step is a building block towards a more functional and aesthetically pleasing home.
Remember, perfection isn’t the goal for your first project – progress and learning are. Embrace the process, celebrate each completed cabinet, and don’t be afraid to ask for help or consult resources like those provided by the Woodworking Handbook for techniques. You have the power to create a kitchen that reflects your style and meets your needs, all while enjoying the immense satisfaction of a job well done. So, gather your courage, your tools, and your chosen free plans, and get ready for an amazing reveal that will have you beaming with pride every time you step into your kitchen. Happy building!