

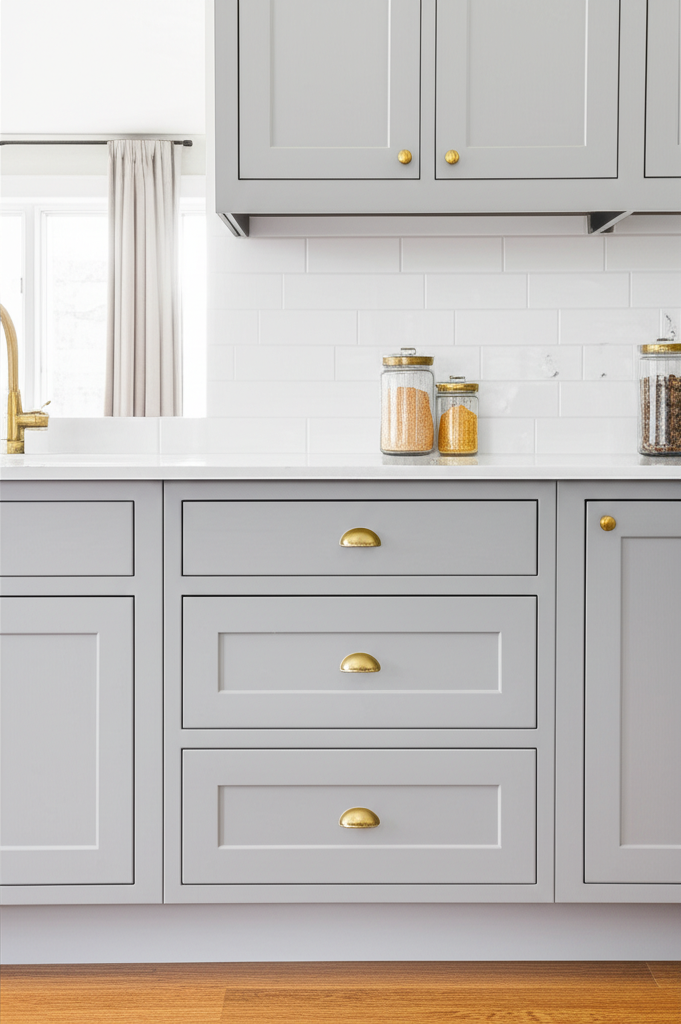
The ideal placement for kitchen cabinet knobs balances aesthetics and usability, typically centering them on cabinet doors and aligning them horizontally on drawers for a clean, functional look. We’ll reveal the “shocking” details to transform your kitchen with confidence!
Ever stared at your kitchen cabinets, wondering if those knobs are really in the best spot? It’s a common kitchen dilemma! Getting knob placement just right can make a surprisingly big difference in how your kitchen looks and feels. Too high, too low, or just a little bit off can be a constant, subtle annoyance. But don’t worry, we’re here to guide you through it, making sure your cabinets are as beautiful as they are functional. Let’s discover the perfect spots together, step by step!
The Golden Rules of Cabinet Knob Placement: Why It Matters
Placing knobs and pulls on your kitchen cabinets isn’t just about aesthetics; it’s deeply tied to how you use your kitchen every single day. The right placement makes opening cabinets effortless, prevents wear and tear on the cabinet finish, and contributes to a cohesive, polished look. Think about it: if a knob is too low on a tall pantry door, you might have to stoop uncomfortably. If it’s too close to an edge, your fingers might bump into the cabinet frame. These small details add up to a much more enjoyable kitchen experience. We’re aiming for that sweet spot where function meets beauty, making your kitchen a joy to be in.
Understanding Cabinet Hardware: Knobs vs. Pulls
Before we dive into placement, let’s quickly clarify the difference between knobs and pulls, as their placement can sometimes vary slightly.
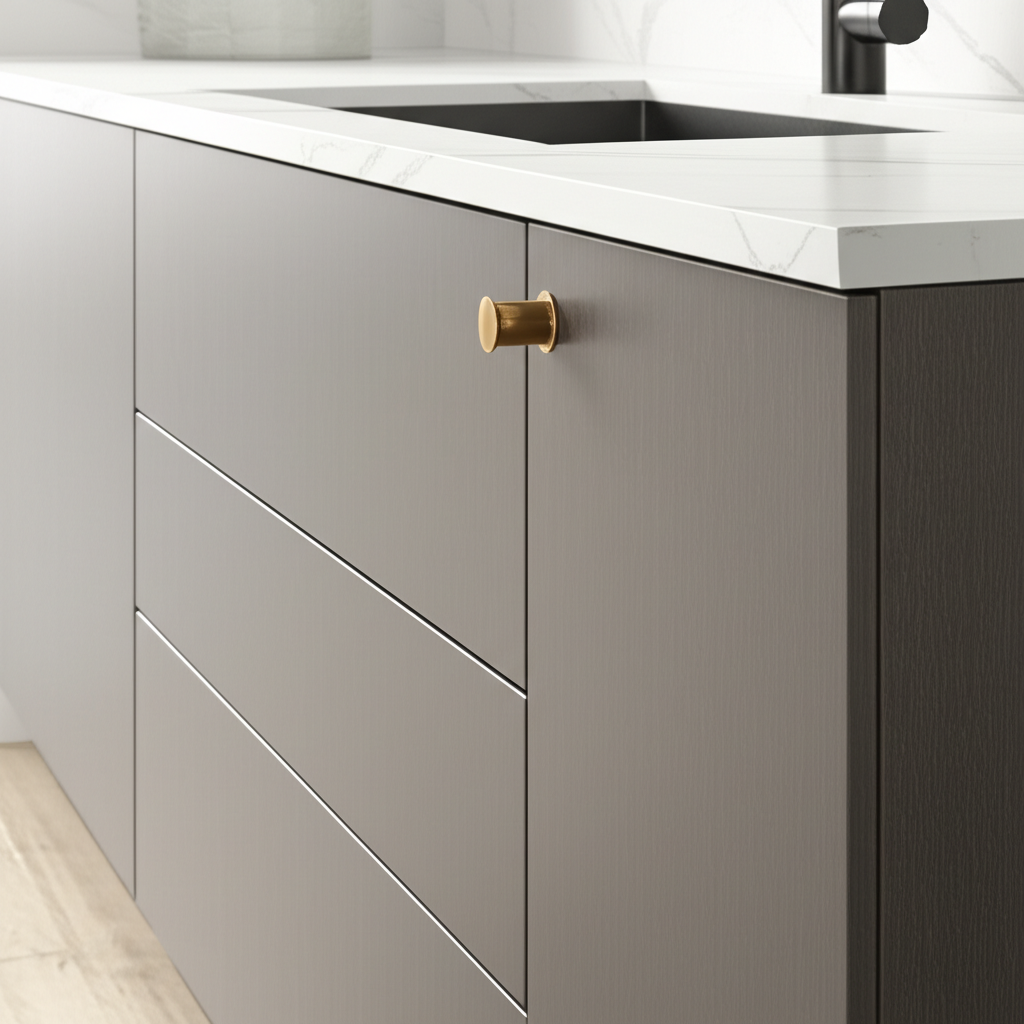
- Knobs: These are typically round or decorative pieces that attach with a single screw. They’re great for smaller cabinet doors and drawers where a full pull might feel overpowering.
- Pulls: These are longer, bar-shaped or decorative handles that attach with two screws. They offer a better grip, especially for heavier drawers or doors, and are often preferred for a more contemporary or sleek look.
While this guide focuses on knobs, many of the principles apply to pulls as well. The key is consistency and functionality for your specific cabinet style.
Step-by-Step Guide: Where to Put Knobs on Kitchen Cabinets
Let’s get down to the practicalities. Whether you’re adding hardware to brand-new cabinets or updating an existing look, these steps will help you achieve a professional and pleasing result.
Step 1: Gather Your Tools and Materials
Having the right tools makes all the difference. You’ll want to be prepared before you start drilling. Here’s what you’ll need:
- Your chosen cabinet knobs (and screws, usually included)
- A tape measure
- A pencil
- A drill with drill bits (appropriate size for your screws)
- Painter’s tape or masking tape
- A template (optional, but highly recommended for accuracy)
- A level (optional, but helpful for drawers)
Having a good set of drill bits is essential. For cabinet hardware, you’ll typically need a bit that matches the diameter of the screw thread. If you’re unsure, it’s always best to test on a scrap piece of wood or consult the hardware manufacturer’s recommendations.
Step 2: Measure and Mark for Cabinet Doors
This is where precision comes in! For standard cabinet doors, the most common and visually pleasing placement is dead center.
- Measure the Door Height: Measure the height of the cabinet door from top to bottom.
- Find the Center: Divide the total height by two. This is your vertical center point.
- Measure the Door Width: Measure the width of the cabinet door from side to side.
- Find the Center: Divide the total width by two. This is your horizontal center point.
- Mark the Spot: Where the vertical and horizontal center lines intersect is where your knob should go. Mark this spot lightly with your pencil.
Pro Tip: For doors with a distinct top or bottom rail, you might want to place the knob slightly higher than the absolute center to avoid hitting the rail when opening. A common recommendation is to go about 2-3 inches down from the top edge of the door panel itself (not the entire door, including the frame), ensuring it’s still centered horizontally. This avoids the “too low” look and feels more natural to use.
Step 3: Drill the Pilot Hole for Doors
Once you’ve marked your spot, it’s time to drill.
- Apply Painter’s Tape: Place a small piece of painter’s tape over your pencil mark. This helps prevent the drill bit from slipping and reduces the risk of splintering the wood.
- Drill the Hole: Using your drill and the appropriate drill bit, carefully drill straight through the door at your marked spot. Drill from the outside of the door inwards. You only need to drill deep enough for the screw to pass through.
- Clear Debris: Gently remove the tape and clear away any sawdust.
Important Note: If your cabinets are older or made of a delicate material, consider drilling from the inside out first with a smaller bit to create a guide, then drill from the outside to prevent chipping. Alternatively, you can drill from the inside with a slightly larger bit than your screw, then use a small bit from the outside to meet it. This creates a cleaner finish on the visible side.
Step 4: Attach the Knob to Doors
Now for the satisfying part!
- Align the Knob: Position the knob over the drilled hole on the outside of the cabinet door.
- Insert and Tighten the Screw: From the inside of the cabinet, insert the screw through the hole and into the back of the knob. Tighten the screw until the knob is snug but don’t overtighten, as this can damage the cabinet or the hardware.
Step 5: Measure and Mark for Drawers
Drawers are a bit different. For standard drawer widths, centering the knob horizontally is key. For longer drawers, you might consider two knobs or a pull.
- Measure Drawer Width: Measure the width of the drawer face from side to side.
- Find the Center: Divide the width by two. This is your horizontal center point.
- Measure Drawer Height: Measure the height of the drawer face from top to bottom.
- Determine Vertical Placement: For most drawers, the knob should be placed higher than the absolute center to avoid interference with the drawer’s operation and to create a pleasing visual line. A common placement is about 2-3 inches down from the top edge of the drawer face.
- Mark the Spot: Where your horizontal center line and your chosen vertical placement intersect is your mark.
For Wide Drawers (over 24 inches): Consider using two knobs or a longer pull. If using two knobs, measure the drawer width, find the center, and then place each knob equidistant from that center point. For example, on a 30-inch wide drawer, the center is at 15 inches. You might place knobs at 10 inches and 20 inches from one side.
Step 6: Drill the Pilot Hole for Drawers
Similar to doors, but with an extra consideration for drawers:
- Apply Painter’s Tape: Place tape over your marked spot on the drawer face.
- Drill the Hole: Drill straight through the drawer face at your mark. Ensure you’re drilling through the drawer face only, not into the drawer box itself.
- Clear Debris: Remove the tape and clean the area.
Tip for Drawers: To ensure your knobs are perfectly aligned horizontally, especially if you’re adding hardware to multiple drawers, use a level and a jig or template. This is particularly helpful for drawers that sit side-by-side.
Step 7: Attach the Knob to Drawers
Follow the same procedure as with doors:
- Align the Knob: Position the knob on the outside of the drawer face.
- Insert and Tighten: Insert the screw from the inside of the drawer and tighten the knob.
Strategic Placement: Beyond the Center
While centering is the most common and often the best approach, there are times when a different placement might be more suitable or even “shockingly” better for your kitchen’s unique design.
The “Shocking” Placement: When to Deviate from the Center
Sometimes, the standard rules need a little creative interpretation. Here are a few scenarios:
- Decorative Cabinet Doors: If your cabinet doors have a raised panel or intricate design, placing the knob precisely in the middle might look awkward or clash with the design. In such cases, moving the knob slightly higher (2-3 inches from the top edge of the panel) often looks more balanced and provides a more ergonomic grip.
- Tall Pantry Doors: For very tall doors, a knob placed too low can be inconvenient. Shifting it up by a few inches from the absolute center can make it easier to reach and operate.
- Cabinets with Distinct Framing: If your cabinets have a prominent top or bottom frame, you might want to place the knob within the central stile (the vertical frame piece) or panel, ensuring it doesn’t interfere with the frame when opening.
- Appliance Garages and Specialty Cabinets: These often have unique shapes or functionalities. Measure and mark carefully based on how you’ll naturally access them. Sometimes, a pull might be more functional here than a knob.
The Power of Consistency: Aligning Hardware
One of the most critical aspects of cabinet hardware placement is consistency. Once you establish a placement rule for one cabinet or drawer, stick to it throughout your kitchen for a cohesive and professional look.
- Horizontal Alignment: For drawers and doors that are side-by-side, ensure the knobs are at the exact same height. Use a level and painter’s tape to mark all your spots before drilling.
- Vertical Alignment: For cabinets stacked vertically (e.g., a base cabinet and a wall cabinet above it), ensure the knobs align on a consistent horizontal line. This creates a clean visual flow.
A great resource for understanding cabinet styles and hardware trends can be found on the National Kitchen & Bath Association (NKBA) website, which often features articles on design best practices and current trends.
Cabinet Hardware Placement Chart: A Visual Guide
To help visualize the common placements, here’s a simple chart:
| Cabinet Type | Standard Placement | Notes |
|---|---|---|
| Standard Cabinet Door | Centered vertically and horizontally on the door panel. | Aim for 2-3 inches from the top edge of the panel for better ergonomics. |
| Tall Pantry Door | Centered horizontally, slightly higher than absolute vertical center. | Makes it easier to reach and operate. |
| Standard Drawer (up to 24″) | Centered horizontally, 2-3 inches from the top edge of the drawer face. | Ensures ease of use and visual balance. |
| Wide Drawer (over 24″) | Two knobs, equidistant from the center, or one long pull. | Provides better leverage and a balanced look. |
| Cabinets with Raised Panels | Centered horizontally on the panel, often slightly higher than dead center. | Avoids awkward placement on decorative elements. |
Considerations for Different Cabinet Styles
The style of your cabinets can influence the best placement.
- Shaker Style Cabinets: These have a distinct frame. For doors, place the knob centered horizontally on the vertical stile, usually about 2-3 inches down from the top of the stile. For drawers, center it horizontally and place it a few inches down from the top of the drawer front.
- Flat-Panel (Slab) Cabinets: These offer the most flexibility. The standard centering rules apply beautifully here. For a minimalist look, consider edge pulls or integrated finger pulls if your cabinets are designed for them.
- Inset Cabinets: These cabinets sit flush within the frame. Placement is crucial to avoid hitting the frame. Measure carefully, often placing the knob about 2-3 inches from the edge of the door itself, centered horizontally.
FAQ: Your Cabinet Knob Questions Answered
Q1: What’s the easiest way to ensure all my knobs are aligned?
A: Use painter’s tape! Mark your first spot, drill, and install the knob. Then, use that first knob as a reference point. Place a strip of painter’s tape along the edge of that cabinet/drawer, mark the knob’s position on the tape, remove the tape, and transfer it to the next cabinet/drawer to mark your drilling spot. For drawers, a spirit level is your best friend.
Q2: Should I use knobs or pulls?
A: It’s a matter of preference and function! Knobs are great for smaller doors and drawers, offering a classic look. Pulls provide a better grip, especially for larger or heavier drawers, and can offer a more modern or sleek aesthetic. Many kitchens use a combination of both.
Q3: Do I drill from the inside or outside?
A: Generally, you drill from the outside inwards. However, to prevent chipping on delicate finishes, you can drill from the inside out with a smaller bit first to create a guide, then drill from the outside. Some prefer to drill from the inside with a slightly larger bit, then use a small bit from the outside to meet it, creating a cleaner outer finish.
Q4: How far apart should two knobs be on a wide drawer?
A: There’s no strict rule, but a common guideline is to find the center of the drawer, then place each knob about 3-5 inches away from that center point, depending on the drawer width and knob size. The goal is to have them evenly spaced and aesthetically pleasing.
Q5: What if I make a mistake and drill in the wrong spot?
A: Don’t panic! For small errors, you can often fill the hole with wood filler, sand it smooth, and repaint or refinish the area. If the mistake is significant, you might need to replace the door or drawer front. This is why using a template and painter’s tape is so important!
Q6: Should knobs match the cabinet finish?
A: Not necessarily! While matching can create a seamless look, contrasting hardware can add a beautiful pop of personality. Brushed nickel, matte black, or brass knobs can all look stunning on white, wood-tone, or dark cabinets. Consider your overall kitchen design when choosing.
Conclusion: Your Kitchen, Perfected
We’ve uncovered the secrets to placing cabinet knobs like a pro! Remember, the key is a blend of following tried-and-true guidelines for symmetry and usability, while also considering the unique features of your cabinets and your personal style. By measuring carefully, marking precisely, and drilling with confidence, you can elevate the look and feel of your entire kitchen. Don’t be afraid to experiment with placement on a spare piece of wood first if you’re feeling uncertain. With these steps, you’re well on your way to a beautifully functional kitchen that you’ll love for years to come. Happy hardware hanging!