

When it comes to baking, nothing beats the comforting aroma of a freshly baked loaf wafting through your kitchen. Whether it’s a soft banana bread or a savory meatloaf, mastering the right loaf pan size can elevate your dish from good to fantastic. You’ll find yourself wanting seconds!
Get ready to discover a comprehensive loaf pan size conversion chart! This guide will help you adjust recipes effortlessly, ensuring perfect results every time. Expect clear measurements, baking times, and tips to troubleshoot any hiccups along the way.
History of Loaf Pans
The history of loaf pans is rich and varied, reflecting the evolution of baking practices over centuries. Understanding this history is crucial for home cooks who wish to adapt their recipes to different loaf pan sizes effectively.
- Early Designs: The earliest loaf pans date back to the 19th century, crafted from materials like cast iron and ceramic. These pans were designed to create a uniform shape for bread, which was essential for even baking and easy slicing.
- Introduction of Metal Pans: By the early 20th century, metal loaf pans became popular, especially those made from aluminum and steel. These materials allowed for better heat conduction, resulting in a more consistent bake and a rise that was easier to achieve.
- Modern Adaptations: Today, loaf pans come in various sizes and materials, including non-stick coatings and silicone. These innovations not only improve the baking process but also offer versatility for different recipes, such as quick breads, pound cakes, and even meatloaf.
- Importance of Size: The size of a loaf pan can significantly affect baking time and texture. Knowing how to convert between different sizes ensures that your baked goods turn out perfectly, regardless of the pan used.
Common Loaf Pan Sizes
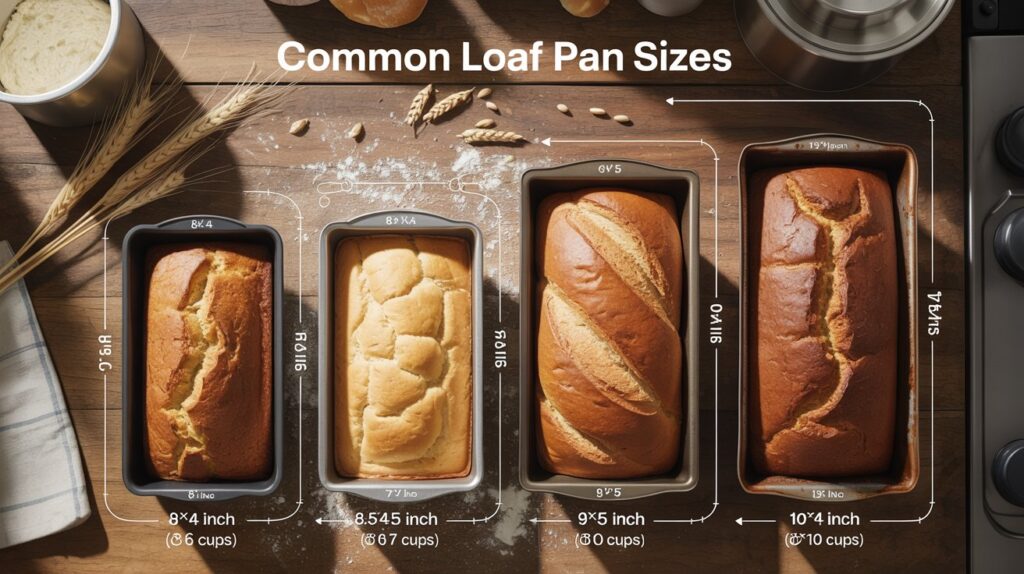
Understanding common loaf pan sizes is essential for any home baker looking to adapt their recipes effectively. Each size can influence baking time and texture, so knowing the dimensions will help you achieve the best results, regardless of the pan you have on hand.
Standard Loaf Pan Sizes
- 9 x 5 inches (23 x 13 cm) – This is the most common size for quick breads and pound cakes, with a volume of approximately 1.5 quarts (1.4 liters).
- 8 x 4 inches (20 x 10 cm) – Slightly smaller, this pan is great for smaller recipes, yielding about 1.25 quarts (1.2 liters) of batter.
- Pullman Loaf Pan (also known as a Pullman tin) – Typically 13 x 4 x 4 inches (33 x 10 x 10 cm), this pan has straight sides and a lid, ideal for making uniform, square loaves. The volume is around 1.5 quarts (1.4 liters).
Chef’s tip: Always grease or line your loaf pan to prevent sticking, especially with denser batters.
Quick Reference Table
| Pan Size | Volume | Best Use |
|---|---|---|
| 8 × 4 in | ~6 cups | banana bread, quick bread |
| 8.5 × 4.5 in | ~7 cups | pound cake |
| 9 × 5 in | ~8 cups | sandwich bread |
| 10 × 5 in | ~10 cups | large loaves |
✔ 9×5 inch pans are the most common recipe standard.
Keep these dimensions in mind when planning your baking projects, and you’ll ensure that your breads and loaves come out perfectly every time!
Volume Conversion Chart
This section provides a comprehensive chart detailing various loaf pan sizes alongside their volume conversions. Understanding these conversions is crucial for adjusting recipes effectively, ensuring your baked goods turn out just right, no matter the pan you’re using.
| Pan Size | Cups | Milliliters |
|---|---|---|
| 8 × 4 | 6 cups | 1,420 ml |
| 8.5 × 4.5 | 7 cups | 1,650 ml |
| 9 × 5 | 8 cups | 1,900 ml |
| 10 × 5 | 10 cups | 2,370 ml |
Use this chart when scaling recipes.
Tip: Always measure your batter to ensure it fits the pan size you’re using. Overfilling can lead to spills and uneven baking.
Refer to this chart whenever you’re switching between different loaf pan sizes to maintain the integrity of your recipes. Adjustments in baking time may also be necessary due to size differences, so keep an eye on your creations while they bake!
Using the Conversion Chart
Understanding how to adjust your recipes based on different loaf pan sizes is crucial for achieving the perfect bake. Whether you’re using a standard 9×5-inch pan or a smaller 8×4-inch version, knowing how to modify your ingredient amounts and baking times ensures your bread or cake comes out just right.
- Adjusting Ingredient Amounts: Start by checking the volume of your original loaf pan and the one you’re switching to. For example, a standard 9×5-inch loaf pan holds approximately 8 cups (1.9 liters), while an 8×4-inch pan holds about 6 cups (1.4 liters). If your recipe is for the larger pan, reduce the ingredient amounts by about 25% when using the smaller one to prevent overflow and ensure proper baking.
- Calculating Baking Times: Baking times can vary depending on the pan size. Generally, smaller pans require less time. If you’re using a smaller loaf pan, start checking for doneness about 10-15 minutes earlier than the original recipe suggests. A toothpick inserted into the center should come out clean or with a few moist crumbs, indicating that it’s ready.
- Common Adjustments: If you’re increasing the size of your pan, be prepared to add additional baking time. A larger loaf may need an extra 10-20 minutes. Always monitor the internal temperature with a thermometer; for bread, aim for 190°F (88°C) when fully baked. If the top is browning too quickly, cover it with aluminum foil to prevent burning.
Baking Times and Temperatures
This section provides essential guidance on adjusting baking times and temperatures when using different loaf pan sizes. Understanding how these factors change can ensure your baked goods come out perfectly every time, regardless of the pan you choose.
| Pan Size | Baking Time |
|---|---|
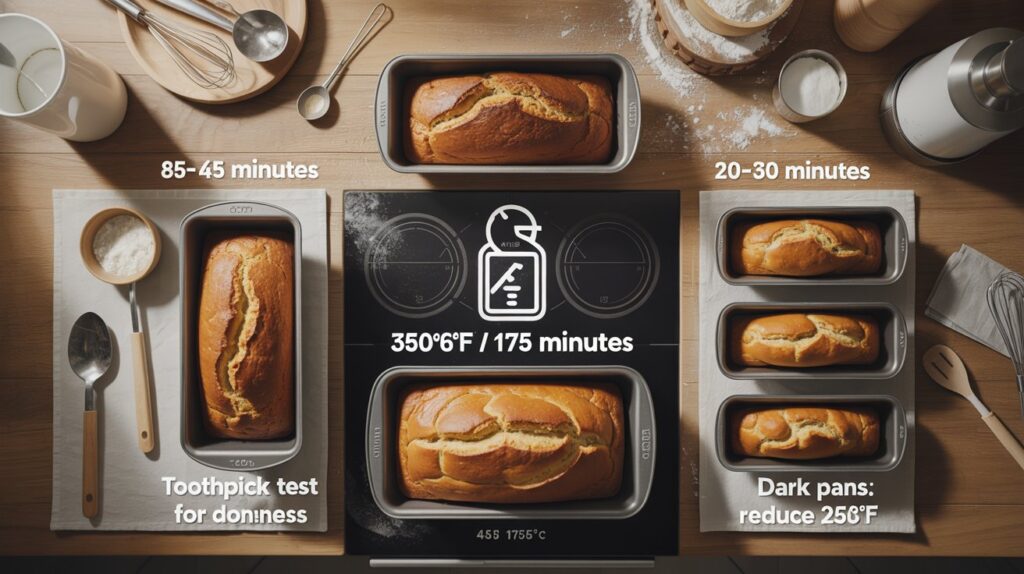
| 8 × 4 | 55–65 minutes |
| 9 × 5 | 45–60 minutes |
| mini loaf pans | 20–30 minutes |
Always test doneness with a toothpick.
General Baking Time Adjustments
When you switch to a different loaf pan size, the baking time can vary significantly. Here’s a general rule of thumb:
- For smaller pans (like a 8×4-inch), expect to bake for 10-15 minutes less than the recipe states.
- For larger pans (like a 9×5-inch), add about 10-15 minutes to your baking time.
- For mini loaf pans (3.5×5-inch), start checking for doneness at around 20-25 minutes.
Always test for doneness by inserting a toothpick into the center; it should come out clean or with a few moist crumbs, but no wet batter.
Temperature Considerations
Most recipes are designed for a specific temperature, typically around 350°F (175°C). However, when changing pan sizes, you might want to adjust the temperature slightly:
- If using a darker pan, reduce the temperature by 25°F (about 15°C) to prevent over-browning.
- For glass pans, keep the temperature the same but check for doneness earlier, as glass conducts heat differently.
Chef’s tip: Always preheat your oven before placing your loaf inside. This helps in achieving an even bake.
Remember, every oven is different, so keep a close eye on your loaf as it bakes!
Common Loaf Pan Questions
Choosing the right loaf pan and understanding material differences can significantly affect your baking results. This section addresses common inquiries about loaf pans, ensuring you have the right tools for perfect bakes every time.
Choosing the Right Pan
When selecting a loaf pan, consider both size and material, as these factors influence cooking times and the final texture of your baked goods.
- Standard Size: A typical loaf pan measures 9 x 5 inches (23 x 13 cm) and holds about 8 cups (1.9 liters) of batter.
- Mini Loaf Pans: These are usually 5.75 x 3 inches (14.5 x 7.5 cm) and hold approximately 2 cups (0.5 liters) of batter.
- Adjusting Recipes: If using a different size, refer to the conversion chart below to adjust your recipe accordingly.
Material Differences
The material of your loaf pan can alter how heat travels through the batter, affecting baking times and the crust’s texture. Here are common materials:
- Metal Pans: Conduct heat well, leading to a golden brown crust. Keep an eye on baking time as it may be shorter.
- Glass Pans: Provide even baking but may require an extra 10-15 minutes due to slower heat conduction.
- Silicone Pans: Easy to remove baked goods but may need a longer cooking time; check for doneness with a toothpick.
Chef’s tip: Always grease your pan, regardless of material, to ensure easy release and prevent sticking.
| Pan Size | Volume (cups) | Baking Time Adjustment |
|---|---|---|
| 9 x 5 inches | 8 | Standard |
| 8.5 x 4.5 inches | 6 | Reduce time by 5-10 mins |
| 5.75 x 3 inches (mini) | 2 | Reduce time by 15-20 mins |
Pro Tips for Successful Baking
Understanding how to effectively use your loaf pans can make a significant difference in your baking results. Here are some expert tips to ensure your loaves come out perfectly every time, focusing on greasing pans and preventing messy overflows.
- Grease your pans properly: Use a combination of butter and flour for a non-stick surface. Coat the inside of the pan with 1 tablespoon of softened butter, then sprinkle with 1 tablespoon of flour, shaking off any excess. This will help your loaf release easily without sticking.
- Check for overflow: To prevent your batter from overflowing, fill your loaf pan only up to ⅔ full. If you’re unsure, use a measuring cup to pour your batter in gradually, keeping an eye on the volume. This avoids a messy oven and ensures even baking.
- Use parchment paper: For extra security against sticking and easy removal, line the bottom and sides of your loaf pan with parchment paper. Cut a piece that fits the bottom and extends up the sides, allowing for easy lifting once baked.
- Adjust baking times for different sizes: If you’re using a different size loaf pan than the recipe calls for, remember that smaller pans may require less baking time while larger pans may need more. Start checking for doneness 5-10 minutes earlier or later than the recipe suggests.
Quick Summary
| Prep Time | Cook Time | Total Time | Servings |
|---|---|---|---|
| 10 minutes | 30-60 minutes | 40-70 minutes | 8 servings |
- Understand sizes: Common loaf pan sizes include 8×4 inches and 9×5 inches.
- Adjust baking time: Smaller pans require less time; check for doneness at 5-minute intervals.
- Conversion ratio: Use a 1.5x ratio for volume when switching pan sizes.
- Use parchment paper: Line your pans for easy removal and cleanup.
- Check for doneness: Insert a toothpick; it should come out clean.
- Tip 1: Always preheat your oven to ensure even baking.
- Tip 2: Allow the loaf to cool in the pan for 10 minutes before transferring to a wire rack.
Frequently Asked Questions
Can I make this ahead of time? How to store and reheat?
Yes, you can prepare your loaf in advance and store it in the refrigerator for up to 3 days. To reheat, cover it with foil and warm in a 350°F (175°C) oven for about 15-20 minutes.
What can I substitute for a standard loaf pan?
If you don’t have a standard loaf pan, you can use an 8-inch square baking dish or a muffin tin for smaller portions. Just remember to adjust the baking time, as smaller sizes may require 10-15 minutes less cooking time.
How do I know when my loaf is done?
Your loaf is done when a toothpick inserted in the center comes out clean or with just a few moist crumbs. Additionally, the internal temperature should reach 190°F (88°C).
Can I freeze this? How long does it last?
Yes, you can freeze your loaf for up to 3 months. Wrap it tightly in plastic wrap and then in aluminum foil to prevent freezer burn.
Why did my loaf turn out dense or gummy?
A dense or gummy loaf often results from overmixing the batter or using too much liquid. Make sure to measure your ingredients accurately and mix just until combined for a lighter texture.