

To make delicious sour pickles at home, you need a simple brine of water, salt, and optional spices, fermented with cucumbers. This easy recipe requires no special equipment and delivers a wonderfully tangy, crisp pickle.
Ever opened a jar of pickles and felt that burst of tangy, sour goodness? It’s a taste that brings a smile to many faces! But what if we told you that achieving that perfect sour pickle flavor at home is surprisingly simple? Many people think making pickles is complicated, involving fancy canning equipment or hard-to-find ingredients. The truth is, with just a few basic items and a little patience, you can create your own amazing sour pickles right in your kitchen. We’ll guide you through every step, making it easy and fun to unlock that fantastic sour pickle taste.
Unlock the Secret to Truly Sour Pickles: Your Kitchen Awaits!
Making sour pickles is a rewarding kitchen adventure that transforms humble cucumbers into a tangy delight. Forget those store-bought options that sometimes miss the mark on that perfect sour punch. This guide is designed for anyone, from absolute beginners to seasoned home cooks, who wants to master the art of naturally fermented sour pickles. We’ll reveal the simple secrets that make these pickles so uniquely delicious and surprisingly easy to achieve. Get ready to impress yourself and your family with your own homemade sour pickles!
The Magic of Fermentation: What Makes Sour Pickles Sour?
The “sour” in sour pickles comes from a natural process called fermentation. It’s an ancient method of preserving food that relies on beneficial bacteria, specifically lactic acid bacteria (LAB). These friendly microbes are naturally present on the surface of cucumbers and other vegetables. When you submerge cucumbers in a salt brine, you create an environment where LAB thrive. They consume the natural sugars in the cucumbers and, in turn, produce lactic acid. This lactic acid is what gives pickles their characteristic sour, tangy flavor and also acts as a preservative, preventing spoilage. It’s a completely natural process, and the resulting flavor is far more complex and satisfying than anything you can achieve with vinegar alone. Learning more about the science behind food preservation can be fascinating, and resources from institutions like the USDA National Agricultural Library offer great insights into food safety and preservation techniques.
Gather Your Tools: Essential Equipment for Pickle Perfection
You don’t need a professional kitchen to make fantastic sour pickles. Most of the items you’ll need are likely already in your home. Having the right tools makes the process smoother and more enjoyable, ensuring your pickling success. Here’s what you’ll need:
- Glass Jars: Wide-mouth mason jars (quart or half-gallon size) are ideal. Ensure they are thoroughly cleaned and sterilized.
- Lids and Rings: For sealing your jars.
- Large Bowl or Bucket: For brining and washing cucumbers.
- Measuring Cups and Spoons: For accurate brine measurements.
- Weight: To keep cucumbers submerged in the brine. This could be a smaller jar filled with water, a clean canning jar lid, a fermentation weight, or even a clean rock.
- Optional: Fermentation Bubbler/Airlock: While not strictly necessary for simple sour pickles, these can help release gases produced during fermentation without letting air in, reducing the risk of mold.
- Knife and Cutting Board: For preparing your cucumbers.
- Clean Towels or Paper Towels: For drying and cleaning.
The Perfect Ingredients: What You’ll Need for Amazing Sour Pickles
The beauty of sour pickles lies in their simplicity. High-quality ingredients yield the best results. Here’s a breakdown of what you’ll need:
| Ingredient | Quantity | Notes |
|---|---|---|
| Cucumbers | 2-3 lbs | Pickling varieties like Kirby or Persian cucumbers work best. Choose firm, fresh, and unwaxed cucumbers. |
| Water | 6 cups | Non-chlorinated water is preferred. If you have chlorinated tap water, let it sit out overnight or use filtered water. Chlorine can interfere with fermentation. |
| Salt | 3-4 tablespoons | Pickling salt or non-iodized sea salt is best. Iodized salt can cloud the brine and affect flavor. |
| Garlic | 4-6 cloves | Peeled and lightly smashed. |
| Dill | 2-3 sprigs fresh dill or 1 tsp dill seeds | Fresh dill adds a wonderful aroma and flavor. |
| Black Peppercorns | 1 teaspoon | Whole peppercorns add a subtle spice. |
| Mustard Seeds | 1 teaspoon (optional) | Adds a bit of zesty flavor. |
| Red Pepper Flakes | ½ teaspoon (optional) | For a touch of heat. |
Step-by-Step Guide: How to Make Sour Pickles
Follow these easy steps to create your own batch of delicious sour pickles. Remember, cleanliness is key to successful fermentation!
Step 1: Prepare Your Cucumbers
Wash your cucumbers thoroughly under cool running water. If you’re using cucumbers that might have been waxed (even if labeled unwaxed, it’s a good practice), you can gently scrub them with a soft brush or even dip them briefly in a diluted vinegar solution (1 part vinegar to 3 parts water) and rinse well. Trim off about 1/8 inch from the blossom end of each cucumber. This end can contain enzymes that may make your pickles soft, so it’s best to remove it.
Step 2: Prepare Your Jars and Spices
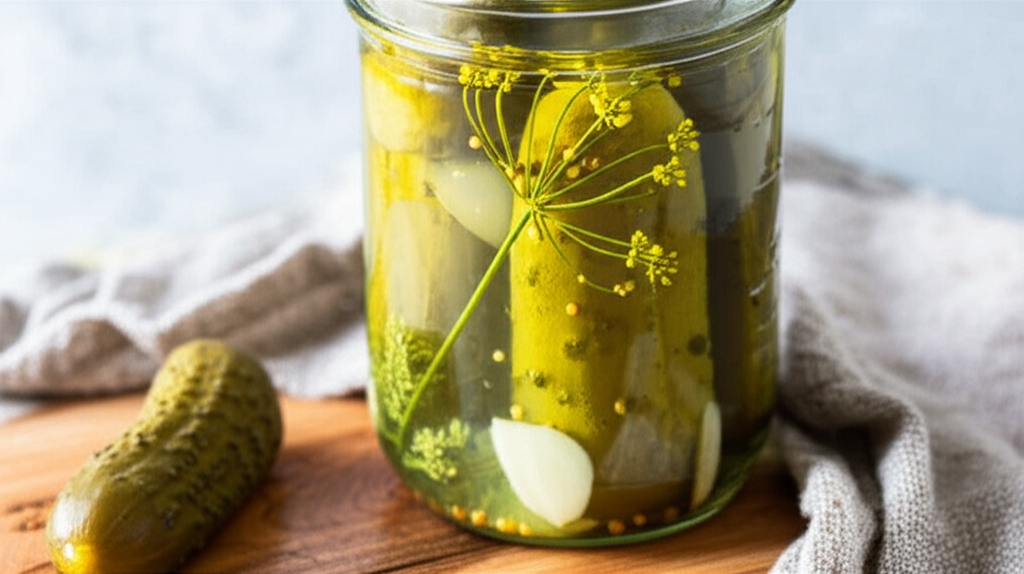
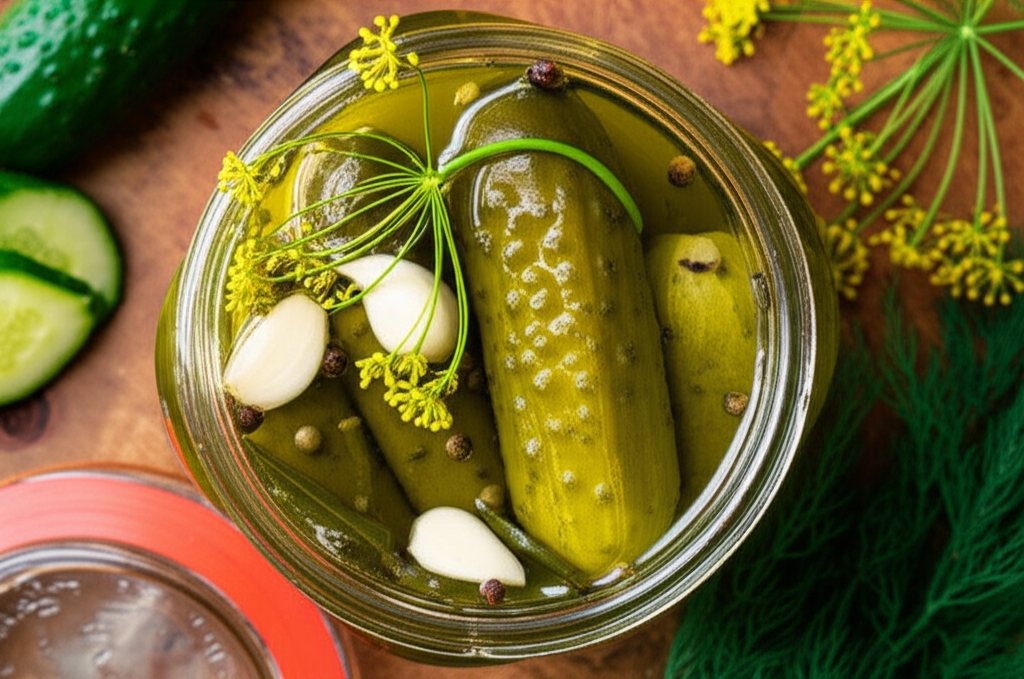
Wash your glass jars, lids, and rings in hot, soapy water. Rinse them thoroughly. To sterilize them, you can place them in a boiling water bath for 10 minutes or run them through a hot cycle in your dishwasher. In each sterilized jar, add your flavorings: smashed garlic cloves, fresh dill sprigs (or dill seeds), peppercorns, mustard seeds, and red pepper flakes (if using). Divide them evenly among the jars.
Step 3: Pack the Cucumbers
Stand the cucumbers upright in the jars, packing them in as snugly as possible without forcing them. You can cut larger cucumbers into spears or halves to fit your jars better. Leave about an inch of headspace at the top of each jar.
Step 4: Make the Brine
In a separate pot, combine the water and salt. Heat the mixture gently, stirring until the salt is completely dissolved. You don’t need to boil it, just warm it enough for the salt to dissolve. Let the brine cool slightly so it’s not piping hot when you pour it into the jars. The ideal brine concentration for successful fermentation is around 5% salt by weight, which translates to roughly 3-4 tablespoons of salt per 6 cups of water. For more precise measurements, you can use a kitchen scale; for example, 6 cups of water is about 1417 grams, so you’d aim for about 71 grams of salt for a 5% brine. Using a hydrometer can also help you achieve the correct salinity, which is crucial for both flavor and safety.
Step 5: Pour the Brine and Submerge
Carefully pour the brine over the cucumbers in the jars, ensuring they are completely submerged. Leave about ½ inch of headspace. If your cucumbers are floating too high, use your chosen weight to keep them below the brine level. This is crucial to prevent mold growth. If you’re using a fermentation bubbler, follow the manufacturer’s instructions for filling and attaching it.
Step 6: Cover and Ferment
Place the lids on the jars, but don’t tighten them fully. You want to allow gases to escape. If you’re not using an airlock, you can loosen the lid slightly each day to release pressure, or use a clean cloth secured with a rubber band for the first few days. Place the jars on a plate or in a tray to catch any potential overflow from the bubbling. Store the jars at room temperature, away from direct sunlight, in a place where you can easily monitor them. A kitchen counter is often a good spot.
Step 7: Monitor and Taste
The fermentation process typically starts within 24-48 hours, and you’ll see bubbles forming in the brine. You might also notice the brine becoming cloudy – this is normal and a sign of active fermentation! Taste your pickles every few days. After about 5-7 days, they should start developing a pleasant sourness. The longer they ferment, the more sour they will become. When they reach a flavor you enjoy, tighten the lids and move the jars to the refrigerator. Refrigeration significantly slows down the fermentation process.
Troubleshooting Common Pickle Problems
Even with the best intentions, sometimes pickles don’t turn out quite right. Don’t get discouraged! Here are some common issues and how to fix them:
- Soft Pickles: This is often caused by using older cucumbers, not trimming the blossom end, using non-pickling cucumber varieties, or not using enough salt. Ensure your cucumbers are fresh and firm, and always trim the blossom end.
- Mold Growth: Mold usually appears as fuzzy, colored patches on the surface. This is typically due to insufficient salt, cucumbers not being fully submerged, or allowing too much air exposure. If you see mold, it’s best to discard the batch for safety reasons.
- Cloudy Brine: This is usually normal! It’s a sign of active fermentation and is caused by the breakdown of plant material and the presence of bacteria. However, if the brine is slimy or has an off-putting smell, it might indicate spoilage.
- No Bubbling/Fermentation: This could be due to using chlorinated water, too much sugar, or an incorrect salt concentration. Ensure you’re using non-chlorinated water and the correct salt-to-water ratio.
FAQ: Your Sour Pickle Questions Answered
- Q1: How long do sour pickles take to ferment?
- The fermentation time varies depending on temperature and your desired sourness. Typically, they are ready to taste after 5-7 days at room temperature, but can ferment for several weeks for a very sour pickle.
- Q2: Can I use vinegar in my sour pickle recipe?
- For traditional sour pickles made through fermentation, you do not use vinegar. The sourness comes from the lactic acid produced by bacteria. Vinegar is used in quick-pickling recipes.
- Q3: What’s the difference between sour pickles and dill pickles?
- While often used interchangeably, “sour pickles” generally refer to naturally fermented pickles where the tanginess comes from lactic acid. “Dill pickles” usually refer to pickles flavored with dill, which can be either naturally fermented or quick-pickled with vinegar.
- Q4: How do I store my homemade sour pickles?
- Once they reach your desired sourness, tighten the lids and store them in the refrigerator. They can last for several months in the fridge.
- Q5: Why is my brine turning cloudy? Is it safe?
- Cloudy brine is usually a good sign! It indicates that the beneficial bacteria are actively fermenting. As long as there is no mold or off-smell, it’s perfectly safe and delicious.
- Q6: What kind of salt should I use?
- It’s best to use non-iodized salt such as pickling salt or sea salt. Iodized salt can sometimes make the brine cloudy and affect the flavor and color of your pickles.
- Q7: Can I add other vegetables to my pickle jar?
- Yes, you can! Carrots, garlic, and chili peppers are common additions. Ensure any added vegetables are also fresh and clean.
Tips for Maximizing Flavor and Crispness
Achieving that perfect crunch and tangy flavor involves a few extra considerations. These small details can make a big difference in your pickle-making journey.
- Cucumber Freshness: The fresher your cucumbers, the crisper your pickles will be. If you can’t pickle them the same day you buy them, store them in the refrigerator.
- Salt Concentration: The salt concentration is vital. Too little salt can lead to spoilage and soft pickles, while too much can inhibit fermentation. Aim for the 5% brine mentioned earlier.
- Temperature Control: Fermenting at a consistent room temperature (around 65-75°F or 18-24°C) is ideal for the beneficial bacteria to do their work efficiently.
- Keeping Them Submerged: This is probably the most critical factor for preventing spoilage. If any part of a cucumber is exposed to air, it’s an invitation for mold. Use a weight!
- Patience is a Virtue: Don’t rush the process. The magic of fermentation takes time. Tasting regularly will help you find your perfect flavor point.
Beyond the Basic: Customizing Your Sour Pickles
Once you’ve mastered the basic sour pickle recipe, don’t be afraid to experiment! Your kitchen is your laboratory, and the possibilities are endless. Here are some ideas to get you started:
- Spices Galore: Beyond dill, peppercorns, and mustard seeds, consider adding coriander seeds, caraway seeds, bay leaves, or even a slice of fresh ginger for a unique twist.
- Heat It Up: For spicy sour pickles, increase the red pepper flakes, add a whole dried chili pepper, or include a few slices of fresh jalapeño.
- Aromatic Additions: A few slices of onion, a sprig of fresh rosemary, or even some fresh turmeric root can add interesting aromatic notes to your brine.
- Sweetness (in moderation): While these are sour pickles, a tiny pinch of sugar or a small piece of a sweet bell pepper can sometimes round out the flavors without making them sweet pickles. Use sparingly if you want to maintain the sour profile.
- Vinegar “Boost”: If you’re in a hurry or want an extra tang, you can add a tablespoon or two of white vinegar or apple cider vinegar to the brine once it has cooled. This is not traditional for purely fermented sour pickles, but it can speed up the souring process and add a different dimension of acidity.
Conclusion: Your Homemade Pickle Journey Begins!
Congratulations! You’ve now unlocked the secrets to making your own delicious, tangy sour pickles right in your kitchen. This simple, natural fermentation process is not only rewarding but also incredibly satisfying. From the crisp crunch to the perfectly sour bite, these homemade pickles are sure to become a favorite. Remember the key principles: clean ingredients, the right salt concentration, and keeping those cucumbers submerged. So grab your jars, gather your cucumbers, and embark on this delightful culinary adventure. Your taste buds will thank you for it!