Learn how to make a basic moonshine mash recipe with simple ingredients and clear steps. Discover the secrets to a successful fermentation for homemade spirits.
Making your own moonshine mash might sound like a complex, almost mysterious process, but it’s actually quite manageable with the right guidance. Many home cooks and DIY enthusiasts find themselves curious about the traditional art of creating spirits. It can feel a bit daunting at first, especially when you’re unsure where to begin. But don’t worry! We’re here to break down the essentials, offering a reassuring, step-by-step approach to crafting a solid moonshine mash recipe. Get ready to uncover the simple secrets that lead to delicious results.
Unlocking the Secrets to a Perfect Moonshine Mash
The heart of any good spirit lies in its mash. Think of it as the foundation of your creation, much like a perfect pie crust is to a delicious dessert. Getting this right means understanding a few key principles. We’ll cover everything from the ingredients you’ll need to the precise steps for a successful fermentation.
What Exactly is Moonshine Mash?
At its core, moonshine mash is a mixture of fermentable sugars, water, and yeast. The sugars come from grains, fruits, or other starches, which the yeast then converts into alcohol and carbon dioxide through fermentation. This alcoholic liquid is what will eventually be distilled to produce the final spirit. It’s a surprisingly straightforward concept, rooted in the natural process of fermentation that’s been used for centuries.
Essential Ingredients for Your First Mash
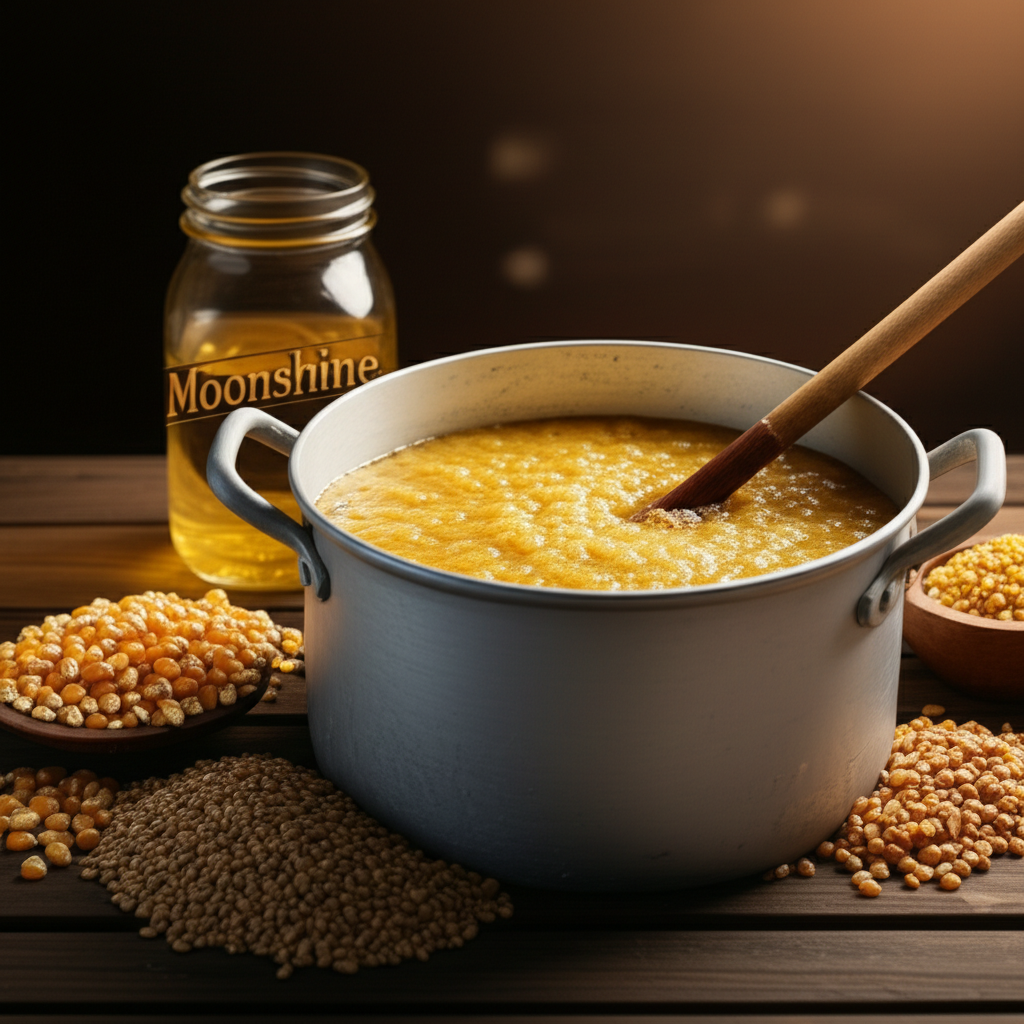
Gathering the right ingredients is your first crucial step. For a beginner-friendly, classic corn-based mash, you’ll want to focus on quality and accessibility.
Cornmeal (or Cracked Corn): This is the backbone of many traditional moonshine recipes. It provides the necessary starches that will be converted into sugars. Look for un-degerminated cornmeal for the best flavor and starch content.
Water: Clean, non-chlorinated water is essential. Chlorine can inhibit yeast activity. If your tap water is chlorinated, let it sit out for 24 hours to allow the chlorine to dissipate, or use filtered water.
Maltose (or Malted Barley): This is where the magic happens for converting starches to sugars. Maltose contains enzymes that break down the complex starches in corn into simpler sugars that yeast can consume. You can often find malted barley at homebrew supply stores.
Yeast: Specific distiller’s yeast is recommended for optimal alcohol production. Baker’s yeast can work in a pinch, but it’s less efficient and can impart off-flavors.
Tools You’ll Need for the Journey
Just like in any well-equipped kitchen, having the right tools makes the process smoother and more successful.
Large Cooking Pot (10-20 gallons): For cooking the grain.
Fermentation Vessel (5-10 gallons): A food-grade bucket or carboy with an airlock.
Thermometer: To monitor mash temperature during cooking and cooling.
Hydrometer: To measure the sugar content (gravity) of your mash, which helps estimate potential alcohol content.
Stirring Paddle: A long, sturdy paddle for mixing.
Sanitizer: Crucial for preventing unwanted bacterial growth.
Airlock and Stopper: To allow CO2 to escape while preventing contaminants from entering.
The Step-by-Step Guide: Crafting Your Moonshine Mash
Now, let’s get down to the nitty-gritty. Follow these steps carefully, and you’ll be well on your way to a successful mash.
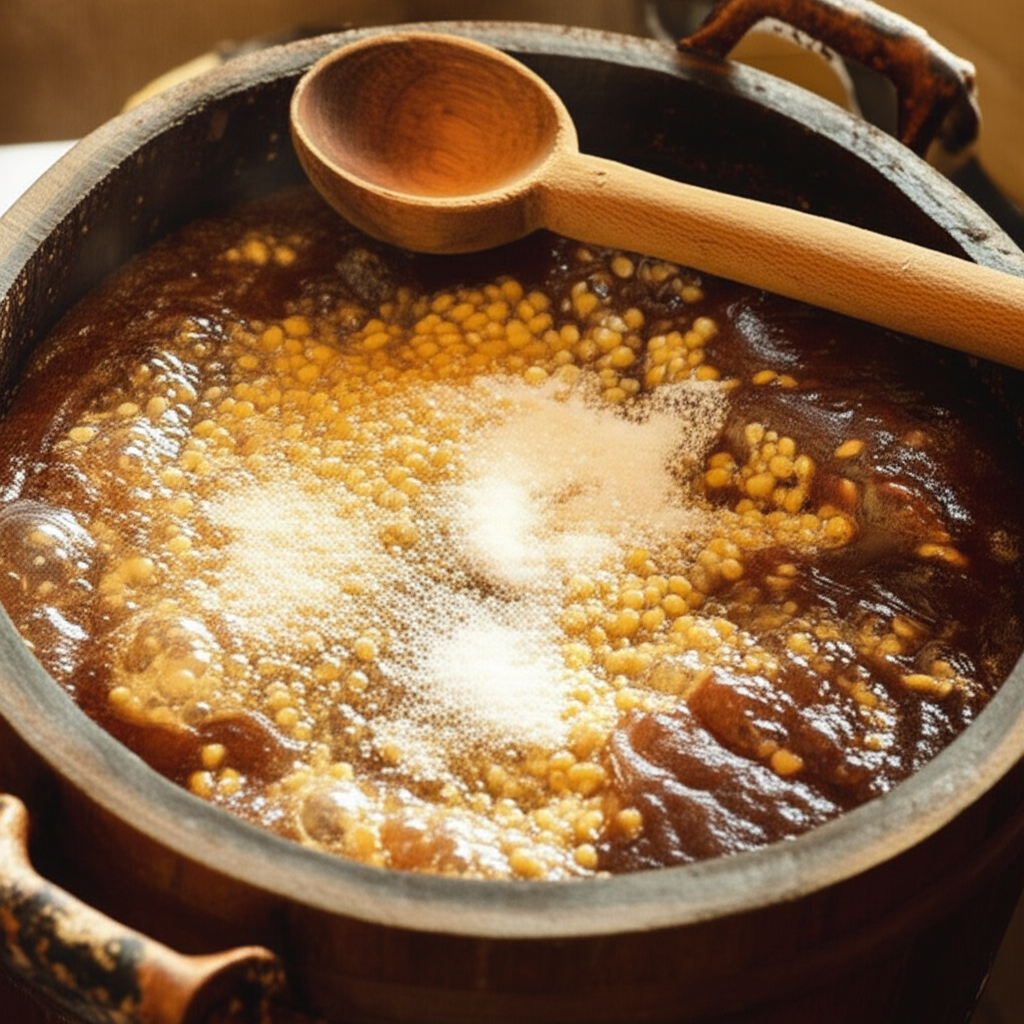
Step 1: Cooking the Corn (The Gelatinization Process)
This is where you make the starches in the corn accessible to the enzymes.
1. Heat Water: Pour about 5 gallons of water into your large cooking pot. Heat it to around 150-160°F (65-71°C).
2. Add Cornmeal: Slowly stir in 5 pounds of cornmeal, ensuring it doesn’t clump. Stir continuously to prevent sticking and scorching.
3. Cook: Bring the mixture to a simmer (not a rolling boil) and cook for about 60-90 minutes, stirring frequently. The goal is to gelatinize the starches, turning the mixture into a thick, porridge-like consistency.
4. Cool: Remove the pot from heat and let it cool to around 150-155°F (65-68°C). This temperature is ideal for adding your malt.
Step 2: Mashing and Saccharification
This is where the malted barley works its magic, converting starches into fermentable sugars.
1. Add Malted Barley: Slowly stir in 1 pound of malted barley.
2. Maintain Temperature: Keep the mash at 148-152°F (64-67°C) for 60-90 minutes. This is the optimal temperature range for the enzymes in the malt to convert starches into sugars. Stir occasionally. You should notice the mash thinning out as sugars are released.
3. Test for Conversion: You can test if the starches have converted by taking a small sample of the mash liquid and adding a drop of iodine. If it turns blue-black, starches are still present. If it remains brown or yellowish, the conversion is complete.
4. Cool to Fermentation Temperature: Once saccharification is complete, cool the mash down to around 70-80°F (21-27°C) before pitching the yeast. Rapid cooling is best to prevent bacterial contamination. You can do this by placing the pot in an ice bath or using a wort chiller.
Step 3: Fermentation
This is the stage where yeast transforms sugars into alcohol.
1. Transfer to Fermenter: Carefully transfer the cooled mash into your sanitized fermentation vessel. Leave any solid grain husks behind if possible.
2. Add Water (if needed): You may need to add more water to reach your desired volume, typically around 6-7 gallons total liquid.
3. Pitch the Yeast: Sprinkle your distiller’s yeast over the surface of the mash. Do not stir it in vigorously; a gentle stir is sufficient.
4. Airlock: Seal the fermentation vessel with a stopper and airlock. Fill the airlock with water or sanitizer.
5. Ferment: Place the fermenter in a dark place with a stable temperature (ideally 70-75°F or 21-24°C). Fermentation typically begins within 12-24 hours, indicated by bubbling in the airlock.
6. Duration: Fermentation can last anywhere from 5 to 14 days, depending on the yeast, temperature, and sugar content. It’s complete when the bubbling slows significantly or stops altogether, and the hydrometer reading has stabilized (usually below 1.000).
Understanding Mash Ratios and Variations
The ratio of ingredients can significantly impact the final mash. A common starting point for a “backyard” or simple corn mash is often referred to as a “5-gallon batch” or a specific ratio of grain to water.
Here’s a look at a common grain-to-water ratio for a 5-gallon fermentation:
| Ingredient | Amount | Notes |
| :————- | :———– | :—————————————- |
| Cornmeal | 5 lbs | Un-degerminated preferred |
| Malted Barley | 1 lb | For enzyme conversion |
| Water | 6-7 gallons | Non-chlorinated, adjust for consistency |
| Distiller’s Yeast | 1 packet | Or as recommended by manufacturer |
Variations to Consider:
All-Grain vs. Cornmeal: Some recipes use whole cracked grains instead of cornmeal. This requires a longer cooking time and often a more robust mashing process.
Sugar Washes: For a quicker and simpler ferment, some opt for a “sugar wash” where sugar is the primary fermentable, often supplemented with a small amount of grain for flavor. However, these lack the complexity of a grain-based mash.
Fruit Mashes: Many spirits utilize fruits like apples, grapes, or berries, where the natural sugars in the fruit are fermented.
Troubleshooting Common Mash Issues
Even with careful preparation, you might encounter a few hiccups. Here are some common problems and how to fix them.
Mash Too Thick: If your mash becomes too thick to stir or if the enzymes aren’t working effectively, you can add more hot water (around 160°F/71°C) to reach a more manageable consistency.
No Fermentation: This is usually due to:
Incorrect Temperature: Yeast is sensitive to temperature. Too hot kills it; too cold makes it sluggish. Ensure your mash is in the 70-80°F (21-27°C) range before adding yeast.
Chlorinated Water: Chlorine kills yeast. Always use non-chlorinated water.
Old or Dead Yeast: Ensure your yeast is fresh and stored properly.
Sanitation Issues: Contaminating bacteria can outcompete the yeast.
Off-Smells: Unusual or unpleasant smells during fermentation can indicate bacterial contamination. If the smell is strongly putrid or rotten, it’s best to discard the batch and start over, ensuring thorough sanitation.
The Importance of Sanitation
We cannot stress this enough: sanitation is paramount. Wild yeasts and bacteria are everywhere. If they get a foothold in your mash, they can spoil the batch, produce off-flavors, or even create harmful byproducts.
Clean Everything: Wash all equipment thoroughly with a good detergent.
Sanitize: Use a no-rinse sanitizer specifically designed for brewing or distilling. Follow the manufacturer’s instructions for dilution and contact time. Sanitize your fermenter, airlock, stopper, hydrometer, and anything else that touches the mash after it has been cooked and cooled.
Avoid Cross-Contamination: Be mindful of what your mash and equipment come into contact with.
When is the Mash Ready for Distillation?
Your mash is ready for distillation when fermentation is complete. This is typically indicated by:
No More Bubbling: The airlock has stopped producing bubbles.
Hydrometer Reading: The specific gravity reading on your hydrometer is stable and typically below 1.000. A reading between 0.990 and 0.998 usually signifies that all fermentable sugars have been consumed.
* Smell and Taste: The mash will have a dry, slightly sour smell and taste, with little to no sweetness.
At this point, the liquid (often called “wash” or “beer”) contains the alcohol produced by the yeast and is ready for the next step: distillation.
Frequently Asked Questions About Moonshine Mash
Q1: Can I use regular baker’s yeast for my moonshine mash?
A1: While baker’s yeast can ferment sugars, distiller’s yeast is specifically bred for higher alcohol tolerance and cleaner fermentation profiles, which is ideal for spirits. Baker’s yeast may work, but it’s less efficient and can introduce undesirable flavors.
Q2: How do I know if my mash has converted starches to sugar?
A2: The iodine test is a simple way to check. Take a small sample of the mash liquid and add a drop of iodine. If it turns blue-black, starches are still present. If it remains brown or yellowish, the conversion is complete. You can also use a hydrometer to track the change in sugar content.
Q3: What is the ideal temperature for fermenting moonshine mash?
A3: Most distiller’s yeasts perform best in a temperature range of 70-80°F (21-27°C). Maintaining a stable temperature is crucial for optimal yeast activity and preventing the growth of unwanted microorganisms.
Q4: My mash smells like rotten eggs. Is it still good?
A4: A slight sulfur smell can sometimes occur, especially with certain yeast strains. However, a strong rotten egg smell or a putrid odor usually indicates bacterial contamination. In such cases, it’s safer to discard the batch and start over, focusing on strict sanitation.
Q5: How long does it take for moonshine mash to ferment?
A5: Fermentation time can vary, typically lasting between 5 to 14 days. Factors like yeast strain, temperature, and sugar content influence how long it takes for the yeast to consume all the sugars.
Q6: Can I use rye or wheat instead of corn?
A6: Absolutely! While corn is traditional, rye and wheat can also be used. They will require similar gelatinization and enzymatic conversion steps, but will impart different flavor profiles to your final spirit. You can also create blends of grains.
Conclusion: Your Mash-Making Journey Begins
You’ve now learned the foundational secrets to creating a basic moonshine mash recipe. From understanding the role of each ingredient to meticulously following the steps for cooking, mashing, and fermenting, you’re equipped to embark on this rewarding home craft. Remember, patience and cleanliness are your greatest allies. Each batch is a learning experience, and with practice, you’ll refine your technique and discover your own preferred variations. Enjoy the process, and savor the knowledge that you’ve successfully transformed simple ingredients into the base for a traditional spirit. Happy mashing!