

Learn how to make perfect, clear hard candy at home with this simple recipe and easy-to-follow guide. Discover the secrets to avoiding crystallization and achieving a smooth, delicious finish for your homemade sweets.
Making beautiful, clear hard candy at home can feel like a bit of magic, but it’s actually quite achievable with the right approach! Many home cooks worry about the sugar scorching, the candy becoming cloudy, or it sticking to everything. But don’t you worry! We’re here to share a straightforward recipe and a few key secrets that will help you create stunning hard candies every single time. Get ready to impress yourself and your loved ones with this fun and rewarding kitchen project.
The Sweet Science Behind Perfect Hard Candy
Before we dive into the recipe, let’s understand what makes hard candy, well, hard. It’s all about reaching a specific temperature where the sugar and liquid mixture becomes a dense, glassy solid when cooled. This temperature is known as the “hard crack stage.” Reaching this stage correctly is the core of making delicious hard candy.
Why Your Hard Candy Might Be Going Wrong (And How to Fix It!)
Have you ever tried making hard candy only to end up with a sticky mess or cloudy, grainy results? It’s a common frustration, but usually, it comes down to a few key factors:
Crystallization: This is the most common culprit behind grainy or opaque candy. It happens when sugar crystals form prematurely. We’ll show you how to prevent this!
Incorrect Temperature: Not reaching the hard crack stage means your candy won’t harden properly. Going too far can lead to burning. A reliable candy thermometer is your best friend here.
Humidity: Believe it or not, a humid day can make your hard candy sticky and difficult to set. Try to make candy on a dry day if possible.
Your Easy Hard Candy Recipe: The Honey Pot Bakery Method
This recipe is designed for simplicity and success, even for absolute beginners. We’re focusing on achieving that beautiful, clear, and crunchy texture.
What You’ll Need: Ingredients
Gathering your ingredients is the first step to a smooth cooking process.
2 cups granulated sugar
2/3 cup light corn syrup
3/4 cup water
1 teaspoon flavoring extract (like peppermint, lemon, or cherry – choose clear or light-colored ones to maintain clarity)
Food coloring (optional, a few drops of gel coloring work best for vibrancy)
Essential Tools for Hard Candy Success
Having the right tools makes all the difference.
Heavy-bottomed saucepan (4-quart size is ideal to prevent scorching)
Candy thermometer (clip-on style is easiest)
Measuring cups and spoons
Baking sheets
Parchment paper or silicone baking mats (Silpats are excellent for candy making)
Heat-resistant spatula or wooden spoon
Small brush and water (for washing down sides of the pan)
Step-by-Step: Crafting Your Clear Hard Candy
Follow these steps carefully, and you’ll be on your way to candy-making bliss!
-
Prepare Your Station: Line two baking sheets with parchment paper or silicone mats. Have your flavoring and food coloring (if using) measured and ready to go. It’s important to have everything within reach because the process moves quickly once the sugar reaches temperature.
-
Combine Ingredients: In your heavy-bottomed saucepan, combine the granulated sugar, light corn syrup, and water. Stir gently until the sugar is mostly dissolved. It’s important not to over-stir once the mixture heats up, as this can encourage crystallization.
-
Attach Thermometer: Clip your candy thermometer to the side of the saucepan, ensuring the bulb is submerged in the syrup but not touching the bottom of the pan. This is crucial for accurate temperature readings.
-
Heat the Mixture: Place the saucepan over medium-high heat. Bring the mixture to a boil. As it begins to boil, resist the urge to stir. If sugar crystals form on the sides of the pan above the syrup line, use a pastry brush dipped in water to gently wash them down into the boiling syrup. This is one of our key secrets to preventing cloudiness!
-
Reach the Hard Crack Stage: Continue boiling the syrup without stirring until it reaches 300-310°F (149-154°C) on your candy thermometer. This is the “hard crack” stage. The syrup will become very thick and will turn a light amber color if you let it go a little further, but for clear candy, aim to remove it just as it hits the target temperature.
-
Add Flavor and Color: Immediately remove the saucepan from the heat. Carefully stir in your chosen flavoring extract and food coloring (if using). Be cautious, as the mixture will bubble up vigorously when the extract is added.
-
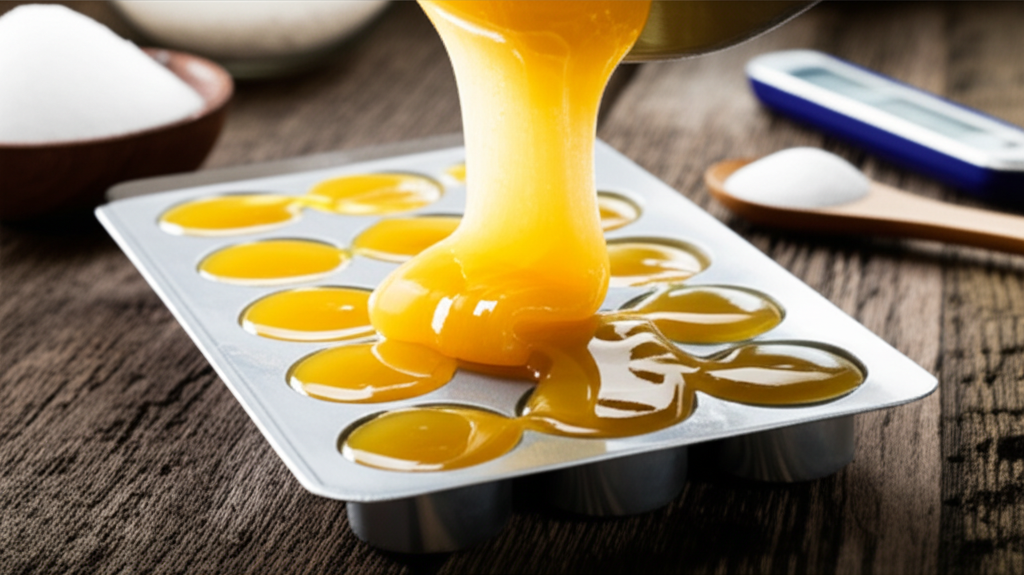
Pour the Candy: Working quickly but carefully, pour the hot syrup onto the prepared baking sheets. You can pour it into thin streams to create lollipops or shards, or pour larger puddles. If you’re making lollipops, insert lollipop sticks into the hot candy just before it begins to set.
-
Cool and Harden: Let the candy cool completely on the baking sheets until it is hard and brittle. This usually takes about 15-30 minutes, depending on the thickness.
-
Break and Store: Once fully hardened, break the candy into pieces. Store your hard candy in an airtight container at room temperature. Avoid storing it in the refrigerator, as moisture can make it sticky.
The “Secret” Revealed: Achieving Crystal-Clear Hard Candy
The single most important “secret” to achieving perfectly clear hard candy lies in preventing sugar crystallization. Here’s how we ensure that beautiful transparency:
The Water Wash: As mentioned in step 4, using a wet pastry brush to wash down the sides of the saucepan is crucial. Any sugar crystals clinging to the sides can fall into the syrup and trigger a chain reaction of crystallization throughout the entire batch.
Corn Syrup’s Role: Light corn syrup is not just for sweetness; it’s an “interfering agent.” It helps prevent the sugar molecules from lining up neatly into crystals, promoting a smoother, more glassy texture.
Resist Stirring: Once the sugar is dissolved and the mixture is boiling, avoid stirring. Stirring introduces air and can encourage crystal formation.
Clean Equipment: Ensure all your pots, spoons, and thermometers are spotlessly clean. Even a tiny bit of residue can act as a seed for crystals.
Understanding Sugar Stages for Candy Making
Knowing the different stages of sugar syrup helps you master candy making. Here’s a quick reference:
| Stage Name | Temperature (°F) | Temperature (°C) | Description |
|---|---|---|---|
| Thread Stage | 230-235°F | 110-113°C | Syrup forms thin threads when dropped from a spoon. Used for jellies and fondants. |
| Soft Ball Stage | 235-245°F | 113-118°C | Syrup forms a soft ball when dropped into cold water. Used for caramels and fudge. |
| Firm Ball Stage | 245-250°F | 118-121°C | Syrup forms a firm ball in cold water. Used for nougat and taffy. |
| Hard Ball Stage | 250-265°F | 121-130°C | Syrup forms a hard ball in cold water. Used for marshmallows and gum drops. |
| Soft Crack Stage | 270-290°F | 132-143°C | Syrup separates into hard but still pliable threads in cold water. Used for butterscotch and toffee. |
| Hard Crack Stage | 300-310°F | 149-154°C | Syrup forms hard, brittle threads that break cleanly in cold water. This is for hard candy, lollipops, and candy apples. |
| Caramel Stage | 320-350°F | 160-177°C | Syrup turns deep amber and caramelizes. Used for caramel sauces and caramel candies. |
Tips for Flavoring and Coloring Your Hard Candy
Customizing your hard candy is where the real fun begins!
Choosing Flavors
Extracts: Use high-quality, concentrated extracts for the best flavor. Oil-based flavorings tend to hold up better to heat than water-based ones.
Citrus: For citrus flavors like lemon or orange, consider using citrus oils for a more authentic taste.
Minty Fresh: Peppermint and spearmint are classic choices that are always a hit.
Achieving Vibrant Colors
Gel Food Coloring: Gel colors are concentrated and provide vibrant hues without adding too much extra liquid, which could affect the candy’s texture. A little goes a long way!
Natural Colors: For a more natural approach, you can experiment with fruit juices (though they can add moisture and affect clarity) or natural coloring powders. Be aware that natural colors may be less vibrant.
Troubleshooting Common Hard Candy Problems
Even with the best intentions, you might encounter a hiccup. Here’s how to fix them:
Candy is Sticky/Not Hard: You likely didn’t reach a high enough temperature. Next time, aim for the full 300-310°F range. Ensure your thermometer is accurate by testing it in boiling water (which should register 212°F/100°C at sea level).
Candy is Cloudy or Grainy: This is almost always due to premature crystallization. Double-check that you washed down the sides of the pan with water and avoided stirring after the mixture boiled.
Candy is Burnt: You overheated the syrup. Watch your thermometer closely and remove the pot from the heat as soon as you reach the desired temperature. Sugar burns very quickly!
Candy Tastes Burnt: If the syrup started to caramelize too much, it can impart a burnt flavor. Again, precise temperature control is key.
Beyond the Basics: Creative Ways to Use Your Hard Candy
Once you’ve mastered the basic recipe, get creative!
Lollipops: Pour into lollipop molds or freeform circles on parchment paper. Add sticks when the candy is partially set.
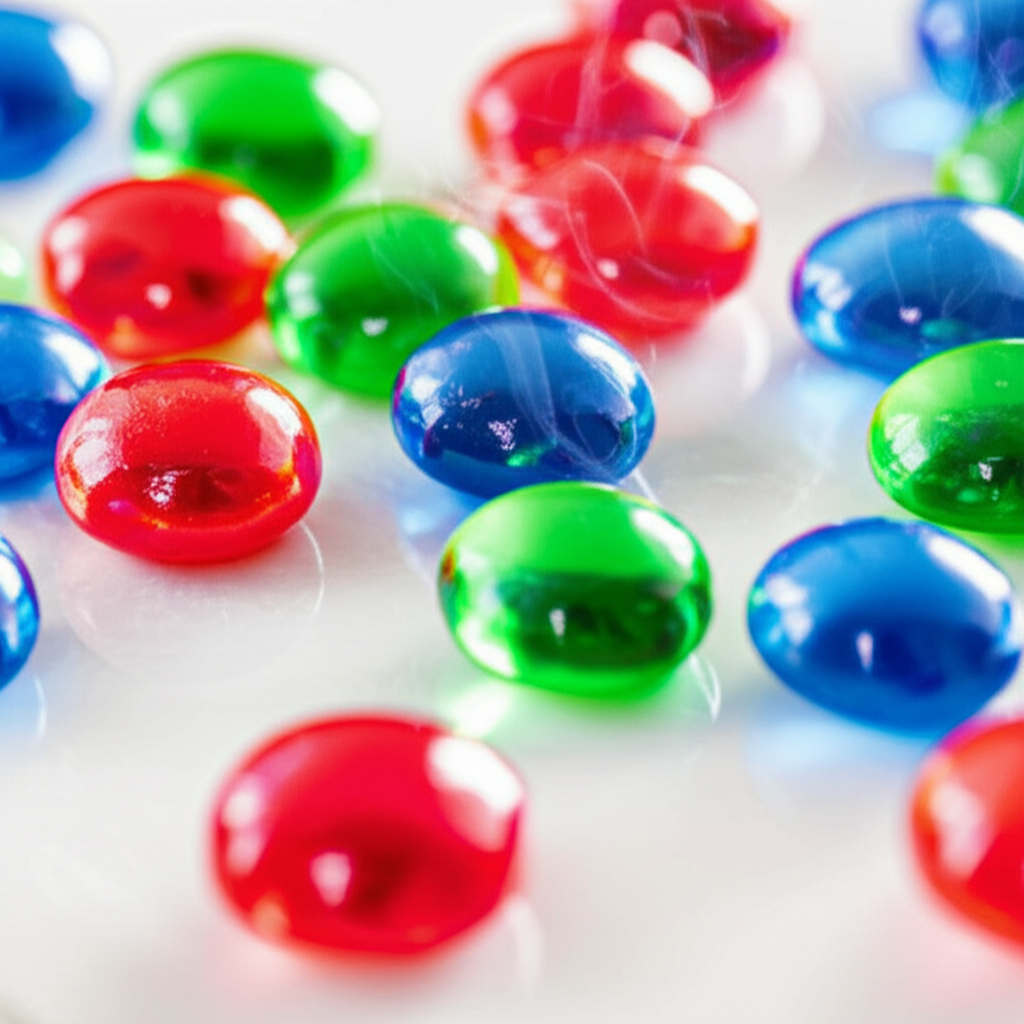
Candy Melts: Pour thin layers onto parchment paper and break into shards for a beautiful decorative element on cakes and cookies.
Crushed Topping: Crush cooled hard candy in a bag with a rolling pin and sprinkle over ice cream, cupcakes, or even homemade popcorn for a sweet crunch.
Edible Decorations: Create intricate shapes or embed small, edible decorations (like edible glitter) into the candy as it cools.
Frequently Asked Questions About Making Hard Candy
Q1: What is the most important temperature for making hard candy?
A1: The most important temperature is the “hard crack stage,” which is between 300-310°F (149-154°C). This ensures the candy will harden properly and become brittle.
Q2: How do I prevent my hard candy from becoming sticky?
A2: The key is to store it in an airtight container at room temperature. Humidity from the air can cause it to become sticky. Avoid storing it in the refrigerator.
Q3: Can I use a different type of syrup instead of corn syrup?
A3: While you can substitute other liquid sweeteners like golden syrup or honey, they can affect the final color and flavor. Corn syrup is preferred for its neutral taste and ability to prevent crystallization, leading to clearer candy.
Q4: My hard candy turned cloudy. What did I do wrong?
A4: Cloudiness is usually a sign of sugar crystallization. Make sure to wash down the sides of your saucepan with a wet pastry brush to remove any sugar crystals and avoid stirring the syrup once it starts boiling.
Q5: How long does it take for hard candy to cool and harden?
A5: It typically takes about 15-30 minutes for the candy to cool and harden completely on the baking sheets, depending on how thickly it was poured.
Q6: Can I make hard candy without a candy thermometer?
A6: While it’s very difficult and less reliable, you can use the “cold water test” to estimate stages. For hard crack, drop a bit of syrup into ice water; it should form brittle, thread-like pieces that break easily. However, a thermometer is highly recommended for accuracy.
The Joy of Homemade Sweets
Making hard candy at home is a wonderfully satisfying process. It’s a chance to tap into a bit of kitchen chemistry, create something beautiful, and enjoy a delicious, nostalgic treat. With the right technique, especially focusing on preventing crystallization, you can consistently produce clear, crisp, and flavorful hard candies. Whether you’re making them for holidays, special occasions, or just for a bit of everyday sweetness, this recipe and these tips will set you up for success. So, gather your ingredients, embrace the process, and get ready to experience the sweet reward of your own homemade hard candy! Enjoy crafting these delightful confections!