

Yes, you can easily make delicious and healthy cherry juice at home with just a few simple steps! Our guide reveals the surprisingly simple “secret” to unlocking the vibrant flavor and incredible benefits of fresh cherries, perfect for beginners.
Ever stared at a bowl of beautiful cherries and wondered if you could transform them into that gorgeous, vibrant juice you love? You’re not alone! Many people think making fresh juice at home is complicated or requires fancy equipment. But what if we told you it’s easier than you think, and the “secret” is simply using the right method and a little bit of patience? At The Honey Pot Bakery, we believe in the power of natural goodness, and turning fresh cherries into pure, revitalizing juice is one of our favorite kitchen adventures. Get ready to discover how simple it is to create this delightful drink right in your own home, unlocking a world of flavor and wellness.
The Amazing Secret to Delicious Homemade Cherry Juice Revealed!
You’ve seen it in stores, perhaps enjoyed it at a cafe, but have you ever considered making your own cherry juice? The “secret” isn’t a secret ingredient or a complex technique. It’s about understanding how to gently extract the maximum flavor and goodness from fresh cherries, ensuring a pure, unadulterated taste that store-bought versions often can’t match. Forget artificial flavors and added sugars; we’re talking about the pure essence of cherry, packed with antioxidants and a delightfully sweet-tart profile. Ready to unlock this simple magic?
Why Make Your Own Cherry Juice?
There are so many wonderful reasons to dive into homemade cherry juice! It’s not just about saving money; it’s about control, quality, and the sheer satisfaction of creating something so pure and beneficial. Let’s explore why this is a fantastic idea for anyone looking to embrace a healthier, more natural lifestyle.
- Unbeatable Freshness: Taste the difference that freshly picked, juiced cherries make. It’s a burst of pure flavor!
- No Added Sugars or Preservatives: You control exactly what goes into your juice. Say goodbye to unwanted additives!
- Rich in Antioxidants: Cherries, especially tart varieties, are brimming with anthocyanins and other powerful antioxidants that can support overall health and reduce inflammation. According to the USDA FoodData Central, cherries are a good source of vitamins and minerals.
- Hydration Boost: It’s a delicious and nutritious way to stay hydrated throughout the day.
- Versatile Ingredient: Use your homemade juice in smoothies, cocktails, mocktails, or even as a base for sauces and dressings.
- Cost-Effective: When cherries are in season, juicing them yourself can be significantly more economical than buying pre-made juice.
What You’ll Need: Your Cherry Juicing Toolkit
Don’t worry if you don’t have a professional juicer! There are several accessible ways to make cherry juice. The best method for you will depend on the equipment you have available. Here’s a breakdown of what you might need:
Method 1: The Juicer Method (Easiest & Most Efficient)
If you have a juicer, this is by far the most straightforward and efficient way to get pure cherry juice.
- Centrifugal Juicer: Great for quick juicing, but can be less efficient with softer fruits and may heat the juice slightly.
- Masticating (Slow) Juicer: Excellent for soft fruits like cherries, it extracts more juice and preserves nutrients better by using a slower, grinding process.
- Twin-Gear Juicer: Considered the best for maximizing yield and nutrient preservation, especially with a variety of produce.
Method 2: The Blender & Strainer Method (Accessible for Everyone)
No juicer? No problem! Your blender and a fine-mesh sieve or cheesecloth will do the trick.
- Blender: Any standard blender will work.
- Fine-Mesh Sieve or Nut Milk Bag/Cheesecloth: Essential for straining out the pulp.
- Large Bowl: To catch the juice.
Method 3: The Stovetop & Masher Method (For a Slightly Different Texture)
This method involves a bit of cooking and can yield a juice concentrate or a slightly softer juice.
- Saucepan: A medium-sized pot.
- Potato Masher or Spoon: For mashing the cherries.
- Fine-Mesh Sieve or Cheesecloth: For straining.
Choosing Your Cherries: Sweet vs. Tart
The type of cherry you choose will significantly impact the flavor of your juice. Both sweet and tart cherries offer unique benefits and tastes.
| Cherry Type | Flavor Profile | Best For | Key Benefits |
|---|---|---|---|
| Sweet Cherries (e.g., Bing, Rainier) | Mildly sweet, delicate flavor. | Enjoying as is, lighter juice, adding to cocktails. | Good source of Vitamin C and potassium. |
| Tart Cherries (e.g., Montmorency, Morello) | Tangy, robust, slightly sour. | Concentrated juice, tart cherry juice blends, health-focused drinks. | High in anthocyanins, known for anti-inflammatory properties and sleep support. Studies suggest tart cherry concentrate may aid in muscle recovery. Research highlights these benefits. |
For a truly vibrant, health-boosting juice, tart cherries are often preferred. However, sweet cherries make a wonderfully refreshing drink, especially if you prefer a milder sweetness.
How To Make Cherry Juice: Step-by-Step Guide
Let’s get to the good part! Follow these simple steps to create your own delicious cherry juice.
Step 1: Prepare Your Cherries
This is a crucial step for clean, flavorful juice.
- Wash Thoroughly: Rinse your cherries under cool running water. Gently rub them to remove any dirt or residue.
- Remove Stems: While optional for some juicers, it’s best practice to remove the stems to prevent them from adding a bitter taste to your juice.
- Pit the Cherries (Highly Recommended): Cherry pits contain small amounts of cyanide compounds and can also add a bitter, almond-like flavor. It’s safest and tastiest to remove them. You can use a cherry pitter, a straw, or even a chopstick to push the pit out. For the blender method, pitting is essential. For some juicers, check your manual; some can handle unpitted cherries, but pitting generally yields cleaner juice.
Step 2: Juice Your Cherries (Method Dependent)
Now for the magic!
Method 1: Using a Juicer
- Assemble Your Juicer: Follow the manufacturer’s instructions for your specific juicer.
- Feed Cherries: Place your pitted cherries into the juicer chute.
- Collect Juice: Your juicer will separate the juice from the pulp. Collect the juice in a clean glass or pitcher.
- Process Pulp (Optional): Some juicers allow you to re-process the pulp for extra juice, though the yield will be less.
Method 2: Using a Blender
- Add Cherries to Blender: Place your pitted cherries into the blender jar. You can add a splash of water (about 1/4 cup per pound of cherries) to help the blender get started, especially if your cherries are very soft.
- Blend Until Smooth: Pulse and blend until the cherries are completely pureed.
- Strain the Mixture: Place a fine-mesh sieve over a large bowl. For an even clearer juice, line the sieve with cheesecloth or a nut milk bag.
- Pour and Strain: Pour the cherry puree into the lined sieve.
- Extract the Juice: If using a sieve, use a spoon or spatula to press the pulp against the mesh, forcing the juice through. If using cheesecloth or a nut milk bag, gather the edges and gently squeeze the juice into the bowl.
- Repeat if Necessary: You can add a little more water to the leftover pulp and strain again for a second, lighter juice.
Method 3: Using the Stovetop Method
- Combine Cherries and Water: Place pitted cherries in a saucepan. Add about 1/2 cup of water for every pound of cherries.
- Simmer Gently: Bring to a simmer over medium heat, then reduce heat to low. Cover and let simmer for about 10-15 minutes, or until the cherries have softened and released their juices.
- Mash the Cherries: Use a potato masher or the back of a spoon to gently mash the softened cherries in the pot.
- Strain the Juice: Pour the cooked cherry mixture through a fine-mesh sieve or cheesecloth-lined colander set over a bowl. Press gently to extract the juice.
- Cool and Serve: Allow the juice to cool before serving. This method often produces a slightly more concentrated juice.
Step 3: Taste and Adjust (Optional)
Take a sip of your freshly made cherry juice! If you used tart cherries and find it too sour, you can:
- Add a touch of natural sweetener: A drizzle of honey, maple syrup, or a date can sweeten it without refined sugars.
- Mix with other juices: Combine with a sweeter juice like apple or pear juice for a balanced flavor.
- Add a squeeze of lemon or lime: This can brighten the flavor.
Step 4: Chill and Serve
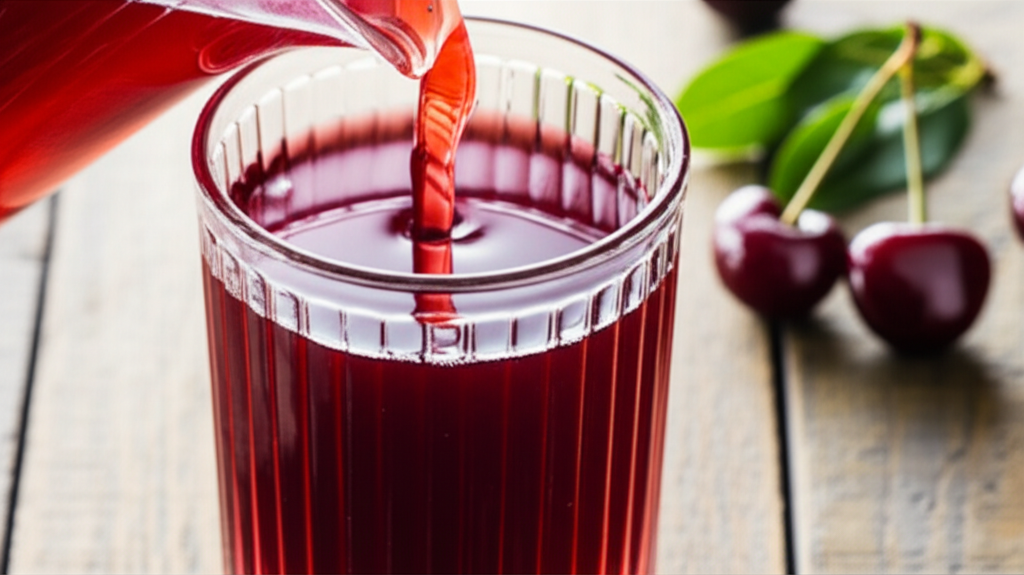
Pour your beautiful cherry juice into a pitcher or glasses. For the best flavor and to preserve nutrients, chill it in the refrigerator for at least 30 minutes before serving. Enjoy it plain, over ice, or as part of your favorite beverage!
Tips for the Best Homemade Cherry Juice Experience
Want to elevate your cherry juicing game? Here are a few insider tips from The Honey Pot Bakery:
- Use Ripe Cherries: Ripe cherries yield the most juice and the best flavor.
- Consider Organic: If possible, opt for organic cherries to minimize pesticide exposure.
- Don’t Waste the Pulp: The leftover cherry pulp is still nutritious! You can add it to muffins, pancakes, smoothies, or even compost it.
- Start with Cold Cherries: This helps ensure your juice stays cool and fresh during the juicing process.
- Clean Your Equipment Immediately: Juicers and blenders are much easier to clean right after use before the pulp dries on.
Storing Your Homemade Cherry Juice
Proper storage is key to enjoying your fresh juice for as long as possible.
- Airtight Container: Pour your freshly made cherry juice into clean, airtight glass bottles or jars.
- Refrigerate Promptly: Store the juice immediately in the refrigerator.
- Shelf Life: Homemade cherry juice is best consumed within 2-3 days. Because it contains no preservatives, it will start to degrade in quality and safety after this period.
- Freezing for Longer Storage: If you’ve made a larger batch, you can freeze the juice in ice cube trays or freezer-safe containers. Frozen cherry juice can last for several months. Thaw in the refrigerator before drinking.
Beyond the Basics: Enhancing Your Cherry Juice
Once you’ve mastered the basic recipe, why not experiment? Cherry juice is a fantastic base for a variety of delicious and healthy concoctions.
Cherry Juice Smoothies
Combine your homemade cherry juice with:
- A handful of spinach or kale for extra greens.
- Half a banana or avocado for creaminess.
- A tablespoon of chia seeds or flax seeds for omega-3s.
- A scoop of protein powder for a post-workout boost.
Cherry Juice Spritzers
For a refreshing mocktail:
- Fill a glass with ice.
- Pour in your homemade cherry juice.
- Top with sparkling water or club soda.
- Garnish with a fresh cherry or a slice of lime.
Cherry Juice for Specific Needs
The natural goodness of cherry juice can be particularly beneficial for certain situations:
- Wisdom Teeth Recovery: The anti-inflammatory properties of tart cherry juice may help soothe discomfort.
- Hydration and Electrolytes: It’s a tasty way to rehydrate, especially after exercise.
- Digestive Support: Some find that the natural compounds in cherries can aid digestion.
- Sleep Aid: Tart cherry juice is naturally rich in melatonin, a hormone that helps regulate sleep-wake cycles. Consuming it regularly might improve sleep quality for some individuals.
Always consult with a healthcare professional for specific health concerns or dietary advice.
Frequently Asked Questions About Making Cherry Juice
We’ve gathered some common questions to help you feel confident on your cherry juicing journey!
Q1: Do I have to pit cherries before juicing?
A: Yes, it is highly recommended to pit cherries before juicing. Cherry pits contain small amounts of cyanide and can impart a bitter flavor to your juice. Removing them ensures a safer and more pleasant taste.
Q2: Can I use frozen cherries to make juice?
A: Absolutely! Frozen cherries work wonderfully for making juice, especially with the blender or stovetop method. They are often already pitted and can be more convenient. Thaw them slightly before blending or add a little water if using them frozen in a blender.
Q3: My juice is too thick. What can I do?
A: If your juice is too thick, especially when using the blender method, you can add a small amount of water or another light juice (like apple or white grape juice) to thin it out. For juicer methods, the consistency should naturally be thinner.
Q4: How long does homemade cherry juice last?
A: Freshly made cherry juice should be stored in an airtight container in the refrigerator and consumed within 2 to 3 days for optimal freshness and safety. Freezing is a good option for longer storage.
Q5: What’s the difference between sweet and tart cherry juice?
A: Sweet cherry juice, made from cherries like Bing or Rainier, has a milder, sweeter taste. Tart cherry juice, made from varieties like Montmorency, is tangier and more robust. Tart cherries are particularly noted for their high antioxidant content and potential health benefits, such as reducing inflammation and improving sleep.
Q6: Can I juice cherries with the skin on?
A: Yes, you can juice cherries with the skin on. The skin contains valuable nutrients and antioxidants. However, ensure they are thoroughly washed beforehand. Pitting is still recommended.
Conclusion: Your Homemade Cherry Juice Journey Begins!
See? Making your own cherry juice is a delightfully simple and rewarding process. From the vibrant color to the pure, refreshing taste, you’re not just making a drink; you’re creating a little bottle of natural goodness. Whether you’re using a juicer, a blender, or even a stovetop method, you have the power to unlock the amazing benefits and delicious flavor of fresh cherries right in your own kitchen. So go ahead, embrace the ease, savor the freshness, and enjoy the wholesome pleasure of homemade cherry juice. Your body and taste buds will thank you!