

Clean painted kitchen cabinets easily and effectively with simple solutions for a sparkling kitchen you’ll love. Get surprising results without harsh chemicals!
Is your kitchen looking a little less than its best? Those beautiful painted cabinets, once the shining stars of your kitchen, might be showing signs of wear and tear. Greasy fingerprints, food splatters, and everyday grime can make even the prettiest cabinets look dull and dingy. But don’t worry! Giving your painted kitchen cabinets a thorough cleaning is easier than you think, and the results can be truly shocking – in the best way possible! You’ll be amazed at how a little effort can bring back their original beauty.
Why Your Painted Kitchen Cabinets Need a Gentle Touch
Painted kitchen cabinets are a popular choice for their versatility and ability to transform a kitchen’s look. However, paint, especially certain types, can be more sensitive to cleaning than other cabinet finishes like laminate or solid wood. Using the wrong cleaning agents or scrubbing too hard can lead to faded colors, dull finishes, or even damage to the paint itself. The goal is to remove dirt and grease effectively while preserving the integrity and beauty of your painted surfaces. This guide will walk you through safe and effective methods that yield surprisingly brilliant results.
The Ultimate Guide to Cleaning Painted Kitchen Cabinets: Step-by-Step
Getting your painted kitchen cabinets looking like new is a straightforward process. We’ll break it down into simple steps, so you can tackle this kitchen refresh with confidence.
Step 1: Gather Your Cleaning Arsenal
Before you begin, it’s essential to have the right tools and supplies. This ensures you’re prepared and can clean efficiently.
- Mild Dish Soap: Your go-to for cutting through grease and grime.
- Warm Water: The perfect base for your cleaning solution.
- Soft Cloths or Microfiber Towels: Crucial for gentle cleaning and buffing without scratching. Have plenty on hand!
- Bucket(s): Two buckets are ideal – one for your cleaning solution and one for rinsing.
- Sponge (Non-abrasive): For tackling tougher spots, but always test in an inconspicuous area first.
- Optional: All-Purpose Cleaner (pH-neutral): For stubborn spots, but always check if it’s safe for painted surfaces.
- Optional: White Vinegar: A natural disinfectant and degreaser, diluted with water.
- Optional: Baking Soda Paste: For very tough, baked-on grime, but use with extreme caution on painted surfaces.
- Drop Cloth or Old Towels: To protect your countertops and flooring.
Step 2: Prepare Your Cleaning Solution
The key to cleaning painted cabinets safely is using a mild solution. Harsh chemicals can strip paint or leave a dull residue.
In one of your buckets, mix a few drops of mild dish soap with warm water. You don’t need a lot of soap; just enough to create a slightly sudsy mixture. If you’re opting for vinegar, a common recommendation is a 1:1 ratio of white vinegar to warm water. However, always test this in a hidden spot first, as vinegar’s acidity can sometimes affect certain paint finishes. For general cleaning, the dish soap and water mixture is usually sufficient and the safest bet.
Step 3: Test in an Inconspicuous Area
This is a critical step, especially if you’re unsure about your cabinet’s paint finish or if you’re trying a new cleaning method.
Find a small, hidden area of your cabinet – perhaps the inside of a door or a corner that’s not easily visible. Apply a small amount of your cleaning solution with a soft cloth and gently wipe. Let it sit for a minute, then rinse with a damp cloth and dry. Check for any signs of discoloration, paint lifting, or dulling. If the test area looks good, you’re ready to proceed with the rest of your cabinets!
Step 4: Wipe Down the Cabinets
Now comes the actual cleaning. Work in manageable sections to avoid letting the solution dry on the cabinets.
- Dip a soft cloth into your cleaning solution and wring it out well. You want the cloth to be damp, not soaking wet. Excess water can seep into cabinet seams and cause damage.
- Gently wipe down the cabinet doors and drawer fronts. Start from the top and work your way down.
- Pay attention to areas prone to grease buildup, like around handles and stovetop areas.
- For tougher spots, you can let the damp cloth sit on the area for a minute to help loosen the grime before gently wiping. Avoid scrubbing vigorously.
Step 5: Rinse Thoroughly
Removing all soap residue is vital to prevent a sticky or dull film from forming on your cabinets.
- Empty your cleaning solution bucket and rinse it out.
- Fill the second bucket with clean, warm water.
- Dip a clean soft cloth into the rinse water and wring it out thoroughly.
- Wipe down each cabinet section you just cleaned to remove any soap residue.
- Rinse your cloth frequently in the clean water to ensure you’re not just spreading soap around.
Step 6: Dry and Buff
Proper drying is the final step to a streak-free shine and to protect the paint.
- Immediately after rinsing, use a clean, dry microfiber cloth to dry each cabinet surface thoroughly.
- Buff the cabinets gently in a circular motion to remove any remaining moisture and enhance the shine. This step makes a huge difference in the final appearance!
Tackling Stubborn Stains and Greasy Buildup
Sometimes, everyday cleaning isn’t enough for those particularly stubborn messes. Here’s how to handle them safely.
Grease on Painted Cabinets
The kitchen is notorious for grease, especially near the stove.
For moderate grease, the dish soap and warm water solution is usually effective. If you’re dealing with heavy grease, a slightly stronger solution might be needed. Try mixing 1 part white vinegar with 2 parts warm water. Apply with a damp cloth, let it sit for a few minutes, and then wipe clean. For very tough, dried-on grease, you can create a paste of baking soda and water. Apply it gently to the greasy area, let it sit for a short while, and then carefully wipe away with a damp cloth. Always rinse thoroughly afterward and dry. Remember, baking soda is mildly abrasive, so use it sparingly and with a very soft touch.
Food Stains and Splatters
Accidents happen, especially when cooking or with little ones around.
For most food stains, a damp cloth with your mild dish soap solution should do the trick. For tougher stains like tomato sauce or coffee, you can try a gentle all-purpose cleaner that is specifically labeled as safe for painted surfaces. Alternatively, a slightly more concentrated vinegar and water solution can also help lift these stains. Blot the stain rather than rubbing vigorously to avoid spreading it or damaging the paint. Always rinse the area afterward to remove any cleaner residue.
Fingerprints and Smudges
These are the most common culprits for dull-looking cabinets.
Regular wiping with a slightly damp microfiber cloth is the best way to keep fingerprints at bay. If smudges are more noticeable, a gentle solution of dish soap and water, followed by thorough drying and buffing, will make them disappear. For a quick touch-up between deep cleans, a glass cleaner (used sparingly on a cloth, not sprayed directly) can sometimes work on glossy finishes, but always test first and avoid ammonia-based cleaners, which can damage paint.
Choosing the Right Cleaning Products for Your Painted Cabinets
The type of paint on your cabinets can influence the best cleaning products to use.
Latex or Acrylic Paint: These are common for cabinets. They are generally durable and can withstand mild soap and water or a diluted vinegar solution. Avoid abrasive cleaners and scrubbing tools, as they can easily scratch or dull the finish. A pH-neutral cleaner is also a safe bet.
Oil-Based Paint: While less common for DIY cabinet painting nowadays, oil-based paints can be very durable. However, they might be more susceptible to damage from certain solvents. Stick to the mildest cleaning methods – dish soap and water is your safest bet. Avoid strong degreasers unless specified as safe for painted surfaces.
Lacquer or High-Gloss Finishes: These finishes can be very sensitive. A soft, damp cloth is often all that’s needed. For tougher spots, use a highly diluted mild soap solution and dry immediately to prevent water spots. Never use ammonia-based cleaners or abrasive materials.
Important Note: Always refer to the paint manufacturer’s recommendations if you know what type of paint was used on your cabinets. If you’re unsure, err on the side of caution and use the gentlest methods.
What NOT to Use on Painted Kitchen Cabinets
Using the wrong products can cause irreversible damage. Be mindful of these common cleaning mistakes:
- Abrasive Cleaners: Steel wool, scouring pads, abrasive powders (like Comet) will scratch and dull painted surfaces.
- Harsh Chemicals: Bleach, ammonia, oven cleaner, and strong solvents can strip paint, cause discoloration, or leave a sticky residue.
- Excessive Water: Soaking cabinets can damage the wood underneath and cause the paint to peel or bubble. Always use a well-wrung-out cloth.
- Scrub Brushes: Unless specifically designed for delicate surfaces, avoid stiff brushes that can scratch.
- Paper Towels: While convenient, some paper towels can be surprisingly abrasive and can leave lint behind, especially on glossy finishes. Microfiber cloths are superior.
Table: Cleaning Product Comparison for Painted Cabinets
Here’s a quick look at common cleaning agents and their suitability for painted kitchen cabinets:
| Cleaning Agent | Pros | Cons | Best For |
|---|---|---|---|
| Mild Dish Soap & Warm Water | Effective degreaser, readily available, gentle | May require multiple passes for heavy grease | General cleaning, fingerprints, light grime |
| Diluted White Vinegar & Water (1:1 or 1:2) | Natural disinfectant, good degreaser, readily available | Can be too acidic for some finishes, strong smell | Stubborn grease, light stains (test first!) |
| pH-Neutral All-Purpose Cleaner | Designed for multiple surfaces, often gentle | Must verify it’s safe for painted surfaces | General cleaning, various light stains |
| Baking Soda Paste (Baking Soda + Water) | Mildly abrasive, good for stuck-on grime | Can scratch if not used gently or on delicate paint, requires thorough rinsing | Very tough, baked-on food stains (use with caution) |
| Glass Cleaner (Ammonia-Free) | Can provide a streak-free shine on glossy finishes | Test first, can damage some paints if used excessively or if it contains ammonia | Quick touch-ups on glossy finishes |
Tips for Maintaining Your Clean Painted Cabinets
Keeping your cabinets looking great between deep cleans is all about preventative measures and quick clean-ups.
- Wipe Spills Immediately: Don’t let food or liquid spills sit on the cabinets. A quick wipe with a damp cloth can prevent stains from setting.
- Regular Dusting: Dust can accumulate and mix with oils in the air, creating a film. Dust your cabinets regularly with a dry microfiber cloth.
- Clean Handles and Knobs: These are high-touch areas. Wipe them down with a damp cloth and dry them to prevent buildup and transfer of oils to the cabinet surface.
- Use Backsplashes and Range Hoods: These kitchen features help contain grease and food splatters, protecting your cabinets from the worst of it.
- Consider a Protective Sealant (for new paint): If you’ve recently painted your cabinets, ask your paint professional about a clear, protective topcoat. This can add an extra layer of durability and make cleaning easier. For existing finishes, ensure any sealant is compatible with your paint type.
Frequently Asked Questions About Cleaning Painted Kitchen Cabinets
Q1: How often should I clean my painted kitchen cabinets?
A: For general maintenance, a quick wipe-down of high-touch areas like handles and around the stove should be done weekly. A more thorough cleaning of all cabinet surfaces is recommended every 1-3 months, depending on your kitchen’s usage.
Q2: Can I use a magic eraser on painted cabinets?
A: Magic Erasers are very abrasive and can easily remove paint, especially on matte or satin finishes. It’s best to avoid them altogether on painted cabinets to prevent damage. Stick to soft cloths and mild cleaners.
Q3: What if my cabinets have a matte finish? Are they more delicate?
A: Yes, matte finishes can be more delicate. They are more prone to showing scuffs and can be more easily dulled or damaged by abrasive cleaners or excessive rubbing. Always use the gentlest methods and softest cloths on matte painted cabinets.
Q4: My painted cabinets feel a bit sticky. How can I fix this?
A: A sticky feeling usually indicates a residue buildup, often from grease or certain cleaning products. Try cleaning them with a solution of equal parts white vinegar and water, then rinse with a clean damp cloth and dry thoroughly. This should help break down and remove the sticky film.
Q5: Can I use a steam cleaner on painted kitchen cabinets?
A: It’s generally not recommended to use a steam cleaner on painted cabinets. The high heat and moisture can potentially damage the paint, cause bubbling, or seep into the wood, leading to more significant issues. Stick to damp cloths.
Q6: What’s the best way to clean the inside of my painted cabinets?
A: The inside of cabinets can usually be cleaned with the same mild dish soap and water solution. For shelves where you store food, ensure you rinse thoroughly and dry completely to avoid any chemical transfer.
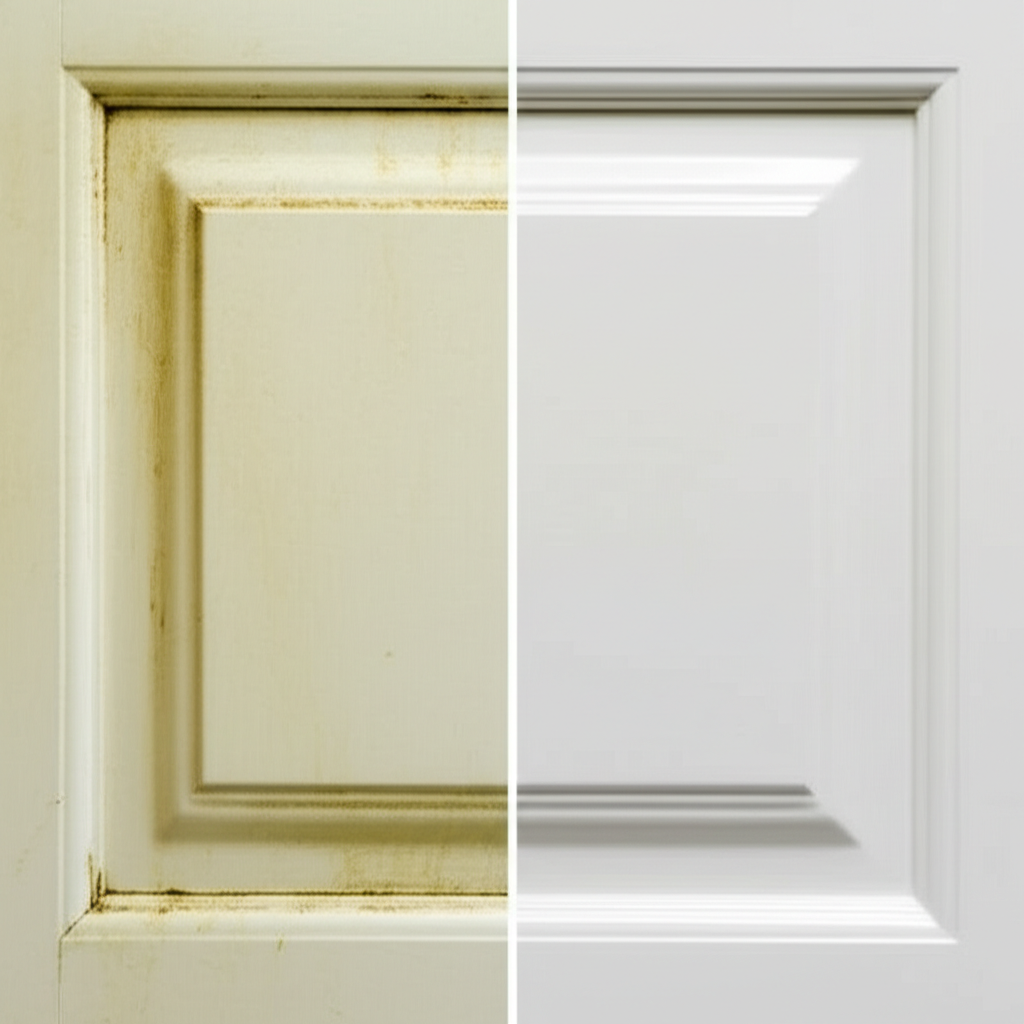
The “Shocking” Transformation: Before and After
Imagine stepping into your kitchen and seeing those cabinets gleam. The difference a good cleaning can make is often quite dramatic. You’ll likely be surprised by how much brighter and cleaner your entire kitchen feels when the cabinets are sparkling. This isn’t just about aesthetics; it’s about refreshing the heart of your home and feeling proud of your space. The satisfaction of seeing years of grime disappear to reveal the beautiful paint underneath is incredibly rewarding. It’s a simple DIY project that delivers big visual impact.
Conclusion
Cleaning painted kitchen cabinets doesn’t have to be a chore or a source of worry. By using gentle, effective methods and the right tools, you can achieve truly surprising results, bringing back the beauty and shine to your kitchen. Remember to always test your cleaning solution in an inconspicuous area, work with damp, not wet, cloths, and dry thoroughly. With a little care and attention, your painted cabinets will look fantastic, making your kitchen an even more inviting place to cook, gather, and enjoy. So, grab your supplies and get ready to be amazed by the transformation!