

If you’re a chocolate lover, you’re in for a treat! Understanding chocolate bar sizes is not just about measurements; it’s key for whipping up your favorite desserts, from gooey brownies to rich chocolate cakes. Having the right size bar can make all the difference in getting that perfect melt and texture. Trust me, your taste buds will thank you!
Here, you’ll find a detailed size chart for various chocolate bars, along with 3-5 delicious recipes that match those sizes. Get ready for prep times ranging from 15 to 30 minutes, with total cook times up to an hour. Perfect for satisfying your sweet tooth!
History of Chocolate Bars
The history of chocolate bars is rich and fascinating, reflecting cultural significance and evolving culinary practices. Understanding this history not only adds depth to our appreciation of chocolate but also highlights the variations in sizes and shapes that have become popular over the years.
- Origin of Chocolate Bars: Chocolate has been enjoyed for thousands of years, dating back to the ancient Mesoamerican cultures that consumed it as a bitter beverage. The first chocolate bar as we know it was created in the 19th century when Joseph Fry mixed cocoa powder with sugar and cocoa butter. This innovation marked the beginning of chocolate’s transformation into a solid form.
- What Makes Them Special: Chocolate bars are not just sweet treats; they are crafted with care, often featuring various ingredients such as nuts, fruits, or spices. This versatility allows for a range of flavors and textures, making each chocolate bar a unique experience. The size of the bar can also influence how it is enjoyed — larger bars are often shared, while smaller ones make for quick, individual indulgences.
- When to Serve Chocolate Bars: Chocolate bars can be savored anytime, whether as a midday snack, after dinner dessert, or a festive treat during holidays. Their sizes can also dictate when to serve them; for instance, fun-sized bars are perfect for Halloween, while larger gourmet bars can be a centerpiece at celebrations.
Chocolate Bar Size Chart

This section provides a comprehensive size chart for various chocolate bar types, detailing their dimensions and weights. Knowing these specifics is essential for accurate ingredient measurements and ensuring your chocolate recipes turn out perfectly every time.
Standard Sizes
- Standard Chocolate Bar: 1.55 oz (43g), 6.5 inches x 2 inches x 0.5 inches
- Fun Size Bar: 0.5 oz (14g), 3 inches x 1 inch x 0.5 inches
- Mini Bar: 0.3 oz (8.5g), 2.5 inches x 0.75 inches x 0.25 inches
Weight Measurements
| Bar Type | Weight | Typical Size | Best Use |
|---|---|---|---|
| Mini Bar | 0.3 oz (8–10 g) | ~2–2.5 in | snacking, candy bowls |
| Fun Size | 0.5 oz (14 g) | ~3 in | Halloween treats |
| Standard Bar | 1.5–1.6 oz (40–45 g) | ~6–7 in | desserts, baking |
| Snack Size | 0.7–0.8 oz (20–25 g) | ~3–4 in | small portions |
| Family / XL Bar | 3 oz (85 g) or more | 7–8 in | sharing or recipes |
Popular Brands and Their Sizes
- Hershey’s Milk Chocolate Bar: 1.55 oz (43g)
- Snickers Bar: 1.86 oz (53g)
- Twix Bar: 1.79 oz (51g)
- Milky Way: 1.84 oz (52g)
Chef’s tip: Always check the packaging for exact sizes, as they may vary slightly by region or retailer.
Essential Ingredients for Chocolate Bars
Creating delicious chocolate bars requires specific ingredients that contribute to their rich flavor and texture. This section outlines the essential components needed to craft your chocolate bars, ensuring you have the right amounts for various sizes and recipes.
| Cocoa Solids | 1 cup (100g) cocoa powder | Use Dutch-processed for a smoother taste |
| Sweeteners | ¾ cup (150g) granulated sugar | Can substitute with coconut sugar or honey for different flavors |
| Add-ins (Nuts) | ½ cup (80g) chopped nuts (e.g., almonds, walnuts) | Toast nuts for enhanced flavor |
| Add-ins (Fruits) | ½ cup (75g) dried fruits (e.g., cranberries, raisins) | Chop larger pieces for even distribution |
- For a dairy-free option, consider using coconut oil instead of butter.
- Ensure all ingredients are at room temperature for better mixing.
- Don’t rush the melting process; use a double boiler to avoid burning the chocolate.
- For lower sugar content, adjust sweeteners to taste, keeping in mind that some sweeteners can alter the texture.
Equipment and Preparation Steps
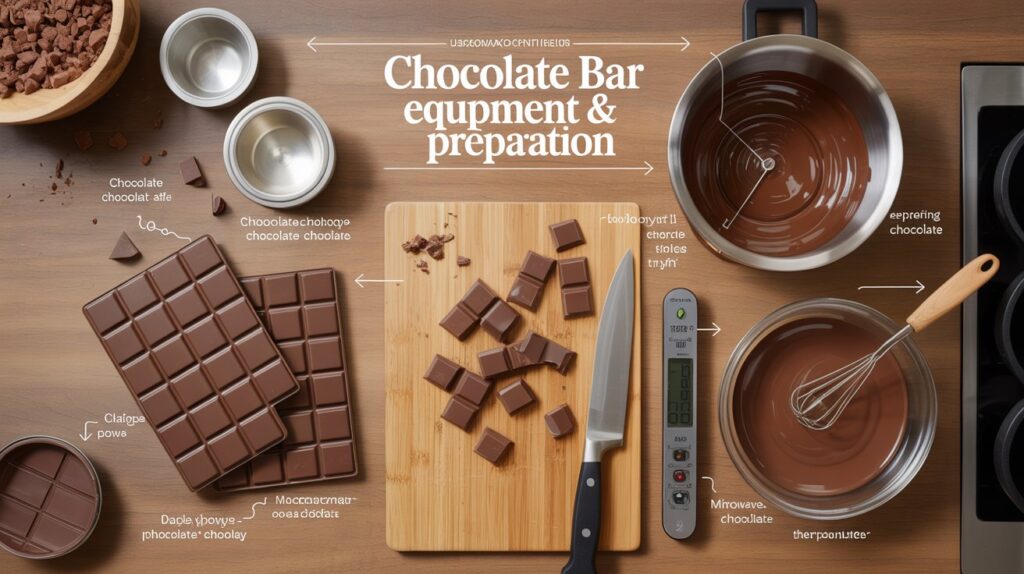
This section outlines the essential kitchen equipment and preparation steps required for making chocolate bars, ensuring you have everything you need to create delicious treats. Having the right tools and knowing how to properly prepare your ingredients is key to achieving the perfect chocolate bar every time.
- Molds: Choose silicone molds or polycarbonate molds designed specifically for chocolate bars. Silicone molds are flexible and make it easy to pop out the bars once set, while polycarbonate molds give a professional finish. Depending on the size you want, common bar molds measure approximately 7 inches by 4 inches (18 cm by 10 cm) and can hold around 6 ounces (170g) of chocolate.
- Chopping Tools: Use a sharp chef’s knife and a cutting board to chop your chocolate into small, uniform pieces. Aim for pieces that are about ½ inch (1.27 cm) to ensure even melting. If you prefer, you can also use a food processor for a quicker option—just pulse the chocolate until finely chopped.
- Melting Equipment: For melting chocolate, you can use a double boiler or a microwave-safe bowl. If using a double boiler, fill the bottom pot with water and bring it to a simmer. Place your chopped chocolate in the top pot, stirring frequently until smooth and glossy, which should take about 5-7 minutes. If using a microwave, heat the chocolate in 30-second intervals at 50% power, stirring in between, until completely melted, which usually takes about 1-2 minutes.
- Thermometer: A chocolate thermometer is essential if you want to temper chocolate. The ideal melting temperature for dark chocolate is around 120°F (49°C), while milk and white chocolates should be melted at around 110°F (43°C). This helps prevent the chocolate from becoming grainy or dull.
Chef’s tip: Always use dry utensils when working with chocolate, as even a small amount of moisture can cause it to seize.
Step-by-Step Chocolate Bar Recipe
This section provides a detailed guide on melting chocolate and pouring it into molds, crucial steps for creating perfectly sized chocolate bars. Understanding these processes will ensure that your chocolate bars set correctly and have a smooth finish.
- Melting Chocolate: Start by chopping 12 ounces (340g) of your favorite chocolate (dark, milk, or white) into small, uniform pieces. This helps it melt evenly. Place the chocolate in a heatproof bowl over a pot of simmering water (double boiler method), making sure the bowl doesn’t touch the water. Stir the chocolate gently as it melts, which should take about 5-7 minutes until it’s completely smooth and glossy. If using a microwave, heat in 30-second intervals at 50% power, stirring in between, until fully melted.
- Pouring into Molds: Prepare your molds by lightly greasing them with a non-stick spray or lining with parchment paper for easy removal. After the chocolate is melted, let it cool for a minute, then carefully pour it into the molds. Fill them to your desired thickness, typically around ¼ inch (0.6 cm) for standard bars. Tap the molds gently on the counter to remove any air bubbles. This step will take about 1-2 minutes.
- Setting Time: Allow the chocolate to set at room temperature for about 30 minutes, or until firm to the touch. For quicker results, you can place the molds in the refrigerator for about 10-15 minutes. The chocolate should feel hard and have a shiny surface. If it appears dull or has a white film, it may have bloomed due to improper melting or storage.
Chef’s tip: Ensure your chocolate is completely melted before pouring to avoid graininess in the final product.
Common Mistakes and Pro Tips
This section highlights common pitfalls when making chocolate bars and offers practical tips to enhance their quality. By avoiding these mistakes, you can achieve a smoother texture and a more visually appealing finish.
- Avoiding Blooming: Chocolate can develop a whitish coating called bloom due to temperature fluctuations. To prevent this, ensure you temper your chocolate correctly and store it in a cool, dry place away from direct sunlight. This keeps your bars looking glossy and prevents texture issues.
- Temperature Control: Maintaining the right temperature is crucial for melting chocolate. Use a double boiler or microwave in 30-second intervals, stirring in between, until the chocolate reaches 88°F to 90°F (31°C to 32°C) for dark chocolate, and slightly lower for milk or white chocolate. This ensures a smooth melt and optimal consistency.
- Perfecting Texture: If your chocolate bars feel grainy, it may be due to not melting the chocolate completely or impurities in your ingredients. Always sift dry ingredients like cocoa powder and sugar before mixing. Additionally, allow your bars to cool slowly at room temperature to maintain a firm and enjoyable texture.
Chef’s tip: Always test a small amount of melted chocolate on your wrist to gauge its temperature before pouring into molds. It should feel warm but not hot.
Variations and Dietary Options
This section highlights various adaptations and substitutions for chocolate bars, ensuring that everyone can enjoy a sweet treat, regardless of dietary restrictions. From gluten-free options to vegan adaptations and exciting flavor variations, there’s something for every chocolate lover.
Gluten-Free Options
For those who need to avoid gluten, you can easily make gluten-free chocolate bars by choosing the right ingredients. Look for gluten-free chocolate brands or make your own using gluten-free flour alternatives. Here are a few suggestions:
- Use 1 cup almond flour instead of all-purpose flour for a nutty flavor.
- Try 1 cup coconut flour for a slightly sweet, tropical twist.
- Ensure that any add-ins, like nuts or dried fruit, are certified gluten-free.
Vegan Chocolate Bars
Creating delicious vegan chocolate bars is simple and satisfying. Replace dairy ingredients with plant-based alternatives:
- Use 1 cup coconut oil instead of butter for richness.
- Choose dairy-free chocolate chips; many brands offer options that are both vegan and delicious.
- Use maple syrup or agave nectar for sweetness instead of honey.
Flavor Variations
Don’t be afraid to get creative! Here are some flavor variations to consider:
| Mint Chocolate | Add 1 teaspoon peppermint extract to the mixture. |
| Spicy Chocolate | Add ½ teaspoon cayenne pepper for a kick. |
| Nutty Chocolate | Incorporate ½ cup chopped nuts or seeds into the mix. |
Chef’s tip: Experiment with different extracts and spices to create personalized chocolate bars that reflect your taste preferences!
Serving and Enjoying Chocolate Bars
When it comes to enjoying chocolate bars, presentation and pairing can elevate the experience. Understanding how to serve these treats, what to pair them with, and how to gift them can enhance your chocolate indulgence, making it more memorable for yourself or for someone special.
Plating Tips
- For a simple yet elegant presentation, place chocolate bars on a wooden board or a decorative plate.
- Garnish with fresh fruits like strawberries or raspberries, which complement the richness of chocolate.
- Use small bowls for sauces such as caramel or melted chocolate for dipping.
Pairing with Beverages
Choosing the right beverage can significantly enhance your chocolate experience. Here are some excellent pairings:
- Red Wine: A rich Cabernet Sauvignon pairs beautifully with dark chocolate.
- Hot Chocolate: For a double chocolate experience, serve your chocolate bars with a steaming cup of hot chocolate.
- Tea: Herbal teas like peppermint or chai can provide a refreshing contrast to sweet chocolate.
Gifting Ideas
Chef’s tip: Create a chocolate gift box by combining different chocolate bar sizes and types for a delightful present.
When gifting chocolate bars, consider the following:
- Assemble a selection of various sizes—mini bars, standard bars, and large gourmet options.
- Wrap them in decorative paper or place them in a beautiful box to enhance the presentation.
- Include a personalized note or a recipe card for added thoughtfulness.
| Mini Bar | 1.5 | Single-origin coffee |
| Standard Bar | 3.5 | Red wine |
| Large Bar | 7.0 | Craft beer |
Quick Summary
| Prep Time | Cook Time | Total Time | Servings |
|---|---|---|---|
| 10 minutes | 0 minutes | 10 minutes | Varies |
- Understand dimensions: Familiarize yourself with common chocolate bar sizes (e.g., 1.55 oz, 3.5 oz).
- Measure accurately: Use a kitchen scale for precise weights when cutting bars.
- Use a ruler: Ensure uniformity in size by measuring each piece.
- Consider thickness: Keep thickness consistent for even melting and dipping.
- Label sizes: Keep a chart handy to reference sizes while baking or cooking.
- Tip: Chocolate bars can vary in size by brand; always check the package.
- Tip: Use a sharp knife for clean cuts to maintain the shape.
Frequently Asked Questions
Can I make chocolate bars ahead of time? How do I store them?
You can definitely make chocolate bars ahead of time! Just store them in an airtight container at room temperature for up to two weeks.
What can I substitute for cocoa powder?
If you’re out of cocoa powder, you can use carob powder as a substitute in equal amounts, though it will slightly alter the flavor.
How do I know when my chocolate bars are done setting?
Your chocolate bars are done when they feel firm to the touch and have a glossy finish, typically after about 1-2 hours in the refrigerator.
Can I freeze chocolate bars? How long do they last?
You can freeze chocolate bars for up to three months, but make sure to wrap them tightly to prevent freezer.
What if I don’t have a candy thermometer?
If you don’t have a candy thermometer, you can test if the chocolate is tempered by dropping a small amount on parchment paper; it should set within 5-10 minutes and have a shiny finish.