

Picture this: a table filled with an array of colorful candies, each piece perfectly sized for sharing or savoring. With the right candy size chart, you’ll create delightful treats that impress at any gathering or simply satisfy a sweet craving at home. It’s the kind of fun that turns an ordinary day into something special!
Total Time: 30 minutes | Difficulty Level: Easy | Servings: 12
Candy Size Overview
Understanding candy sizes is crucial for achieving the perfect texture and presentation in your recipes. Different candies can drastically change a dish’s flavor and appearance depending on their size, so knowing the appropriate measurements helps ensure your sweet creations turn out just right.
- Importance of Candy Sizes: The size of candies affects not only cooking times but also how they melt and integrate with other ingredients. For instance, larger candies take longer to melt, while smaller pieces can dissolve quickly into mixtures, impacting the overall outcome of your dessert.
- Common Candy Types: Familiarizing yourself with various candy types can aid in making informed choices for your recipes. Common types include chocolate chips, gummies, hard candies, and toffees, each with distinct sizes and melting properties that should be considered when selecting ingredients.
Candy Size Chart
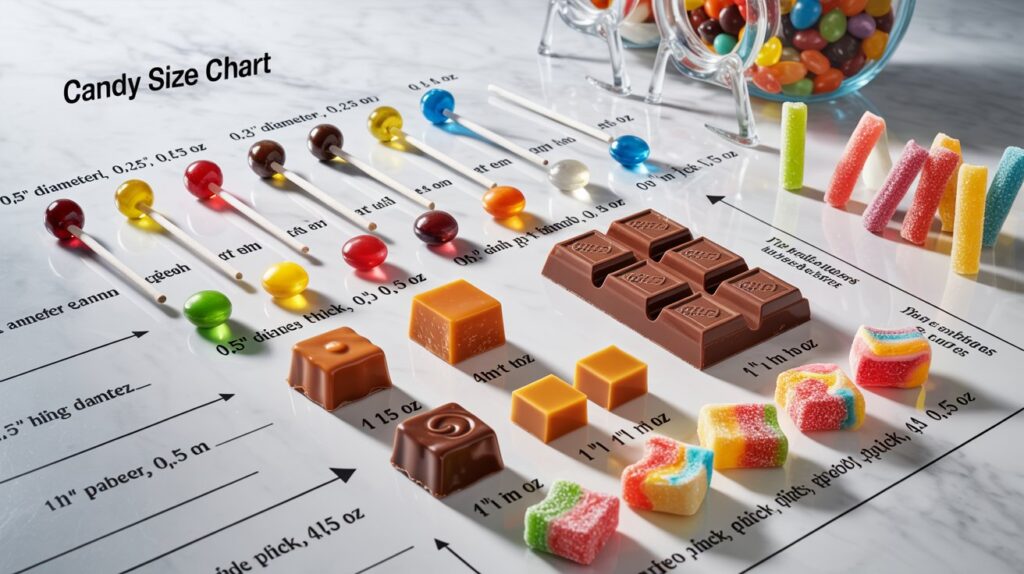
Understanding the sizes of different candies is essential for achieving the perfect portioning and presentation in your recipes. This chart provides specific measurements for hard candies, soft candies, chocolate, and gummies, helping you create delightful treats without any guesswork.
Hard Candies
- Diameter: 0.5 inches (12.7 mm) – typical for standard lollipops
- Weight: 0.5 ounces (14 g) – average for a single hard candy piece
- Thickness: 0.25 inches (6.35 mm) – common for flat hard candies like peppermints
Soft Candies
- Size: 1 inch x 1 inch (25 mm x 25 mm) – typical for soft caramels
- Weight: 0.4 ounces (11 g) – average soft candy piece
Chocolate
Chocolate bars typically come in various sizes, but a standard square is about 1 inch (25 mm) on each side.
- Thickness: 0.25 inches (6.35 mm) – for standard chocolate bars
- Weight: 1.5 ounces (42 g) – average for a single chocolate bar
Gummies
| Gummy Bears | 1 inch (25 mm) tall | 0.2 ounces (5.7 g) |
| Gummy Worms | 4 inches (100 mm) long | 0.5 ounces (14 g) |
Visual References
This section provides an image gallery and size comparison for various types of candies, which is essential for accurate portioning and presentation in your recipes. Knowing the sizes of candies helps ensure that your sweet treats turn out beautifully and consistently every time.
? Common Candy Size Chart
| Candy Type | Typical Size | Weight | Common Uses |
|---|---|---|---|
| Chocolate chips | 0.3–0.5 in (8–12 mm) | ~0.02 oz | cookies, brownies |
| Hard candy | 0.5–1 in (12–25 mm) | ~0.5 oz | lollipops, decorations |
| Caramel squares | 1 × 1 in | ~0.4 oz | candy bars, desserts |
| Gummy bears | ~1 in tall | ~0.2 oz | candy mixes, toppings |
| Gummy worms | ~4 in long | ~0.5 oz | candy jars, party treats |
✔ Smaller candies melt faster and mix evenly in recipes.
Size Comparison
| Chocolate Bar | 3 x 1 | 7.6 x 2.5 |
| Jelly Beans | 0.75 | 1.9 |
| Tootsie Roll | 1 x 3 | 2.5 x 7.6 |
Chef’s tip: Keep a ruler handy when working with candies to ensure accurate measurements!
Impact of Size on Recipes
The size of candy significantly influences both cooking times and the overall outcome of your recipes. Understanding how different sizes affect melting, cooling, and portioning can make a substantial difference in achieving the perfect treat.
Cooking Times
- When melting chocolate, the size of your chocolate pieces matters. For instance, if you chop your chocolate into 1-inch chunks, it may take about 5-7 minutes to melt over low heat. In contrast, finely chopped chocolate can melt in just 2-3 minutes, so keep a close eye to prevent burning.
- If you are making caramel candies, the size of the sugar granules impacts how quickly they dissolve. Granulated sugar takes approximately 8-10 minutes to reach the desired amber color in a saucepan over medium heat. However, using powdered sugar can reduce this time by a couple of minutes, so be vigilant.
- When baking candies, such as fudge or brownies, the size of the pieces you cut will determine the cooking time as well. Smaller pieces (about 1-inch squares) will cool faster and are ready to serve within 15-20 minutes, while larger squares can take up to 30 minutes to set.
| Candy Type | Melt Time | Best Method |
|---|---|---|
| chocolate chips | 2–3 min | microwave or double boiler |
| chopped chocolate | 3–5 min | double boiler |
| caramel | 5–7 min | saucepan low heat |
| hard candy | 8–10 min | stovetop melt |
Portioning Tips
- For uniformity, use a candy scoop to portion out truffles or fudge. A 1-ounce scoop is ideal for consistent sizing, allowing each piece to cook evenly and present nicely.
- When working with gummies, cut them into even squares or shapes. If you prefer ½-inch pieces, use a sharp knife and a ruler for guidance. This ensures that each piece has the same chewiness and flavor distribution.
- To avoid sticky situations when portioning caramel, lightly spray your knife with cooking spray before slicing. This will help prevent the caramel from sticking and ensure clean cuts.
Adjusting Recipes
When working with a candy size chart, it’s crucial to know how to adjust your recipes based on the size of the candies you’re using. Whether you’re scaling up for a larger batch or scaling down for a smaller treat, these guidelines will help ensure your candies turn out perfect every time.
- Scaling Up: If you want to make a larger batch of candy, start by multiplying the ingredient amounts based on the size difference. For instance, if you need to double your recipe but the candy size is larger, adjust the cooking time by increasing it by about 10-15%. Monitor the texture closely, as larger sizes may require more time to set properly. Make sure to allow enough space on your baking sheet to prevent sticking.
- Scaling Down: When reducing a recipe, the same principle applies. If you’re using smaller candies, decrease the ingredient amounts proportionally. For example, if you’re cutting a recipe in half, use 1 cup of sugar instead of 2 cups. Keep an eye on cooking times as well; smaller sizes may cook faster, so start checking for doneness 5 minutes earlier than usual.
- Testing for Doneness: Regardless of whether you’re scaling up or down, always rely on visual and tactile cues. The candy should be glossy and firm to the touch when it’s ready to come off the heat. If using a thermometer, ensure you reach the appropriate temperature for your candy type, like 300°F (149°C) for hard candy.
- Common Adjustments: Be prepared to tweak flavors and textures as well. Larger candies may require a stronger flavor to balance the size, while smaller candies might need less. Taste your mixture before pouring into molds to ensure the flavor is to your liking.
Common Candy Mistakes
Making candy can be a delightful experience, but common mistakes can lead to disappointing results. Understanding how overcooking and incorrect measurements impact your candy-making process is crucial to achieving that perfect texture and flavor. Here are some key areas to watch out for:
- Overcooking: Candy reaches its desired stage when it reaches specific temperatures. For instance, soft ball stage is around 238°F (114°C), while hard crack stage is about 300°F (149°C). Use a reliable candy thermometer to avoid burning your candy. If you notice a bitter smell, it’s likely overcooked; remove it from heat immediately to prevent further cooking.
- Incorrect Measurements: Precision is key in candy making. Use a kitchen scale for accuracy, especially for ingredients like sugar and corn syrup. For example, use 2 cups (400g) granulated sugar for many recipes. If you accidentally add too much liquid or not enough sugar, it will affect the candy’s texture and sweetness. Always double-check your measurements before starting.
By avoiding these common pitfalls, you can ensure your candy turns out beautifully every time. Remember, practice makes perfect, so don’t be discouraged if it takes a few tries to get it just right!
Serving and Presentation Tips
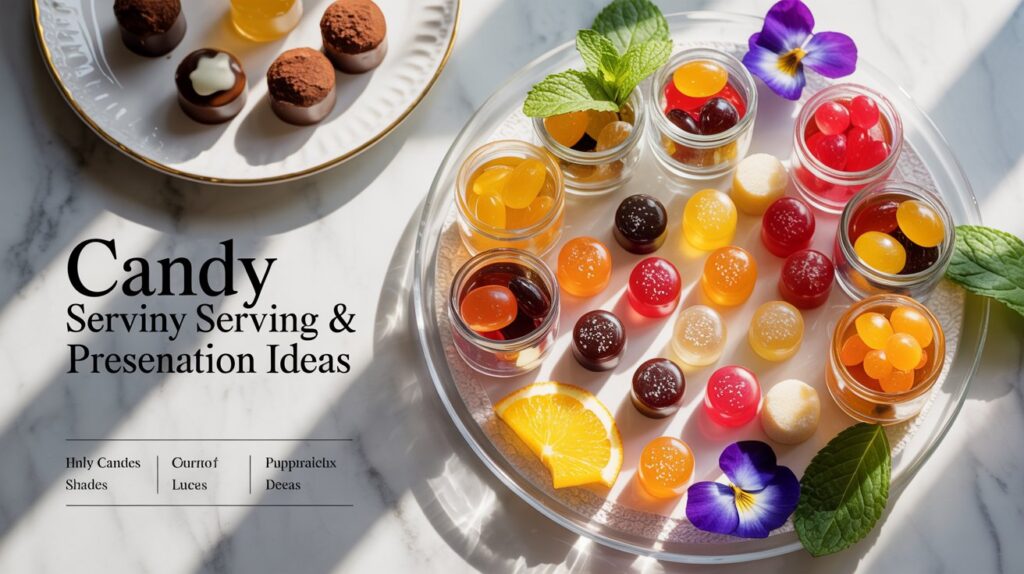
Presenting your homemade candies beautifully can enhance the overall experience for you and your guests. Here are some practical plating ideas and pairing suggestions to make your candies stand out and delight the senses.
- Choose the Right Plate: Use a clean, white or neutral-colored plate to allow the vibrant colors of your candies to pop. A simple glass platter can also add an elegant touch. Arrange the candies in groups based on color or type, creating a visually appealing display.
- Garnish Thoughtfully: Consider garnishing your presentation with fresh mint leaves, edible flowers, or citrus zest. This not only adds a pop of color but also introduces additional scents and flavors that complement the candies. For example, a sprinkle of sea salt or a dusting of powdered sugar can elevate the visual appeal.
- Use Clear Containers: For a more modern look, place smaller candies in clear glass jars or bowls. This technique works well for bite-sized treats like truffles or bonbons. Layering different types of candies in one container can create a beautiful gradient effect.
- Pair with Complementary Flavors: Consider pairing your candies with items that enhance their flavors. For instance, serve dark chocolate candies with a side of fresh berries or a small dish of warm caramel for dipping. This adds an interactive element to your presentation.
- Mind the Lighting: Good lighting can dramatically impact how your candies are perceived. Natural light is best, so aim to present them near a window or in a well-lit room. Avoid harsh overhead lights which can wash out the colors.
Quick Summary
| Prep Time | Cook Time | Total Time | Servings |
|---|---|---|---|
| 10 mins | 0 mins | 10 mins | Varies |
- Know your sizes: Use the chart for accurate candy measurements.
- Plan your portions: Determine serving sizes based on candy type.
- Measure precisely: Use a kitchen scale for best results.
- Consider melt points: Adjust sizes for different chocolate types.
- Store properly: Use airtight containers to maintain freshness.
- Tip: Keep candies uniform in size for even cooking.
- Tip: Use a thermometer for chocolate to avoid overheating.
Frequently Asked Questions
Can I make candy ahead of time? How to store and reheat?
You can definitely make candy ahead of time! Store it in an airtight container at room temperature for up to two weeks, and avoid refrigerating as it can cause the candy to become sticky.
What can I substitute for corn syrup?
You can substitute corn syrup with honey or agave syrup in equal amounts, but be aware that this may slightly alter the flavor and texture of your candy.
How do I know when my candy is done?
, such as 300°F for hard candy or 240°F for soft candy. Pay attention to the color and consistency as well!
Can I freeze candy? How long does it last?
You can freeze candy, but it’s best to wrap it tightly in plastic wrap and store it in an airtight container to avoid freezer burn; it can last up to three months in the freezer.
What if I don’t have a candy thermometer?
If you don’t have a candy thermometer, you can test the candy by dropping a small amount into cold water; if it forms a soft ball, it’s ready for soft candy, while a hard ball indicates hard candy.